Posted on

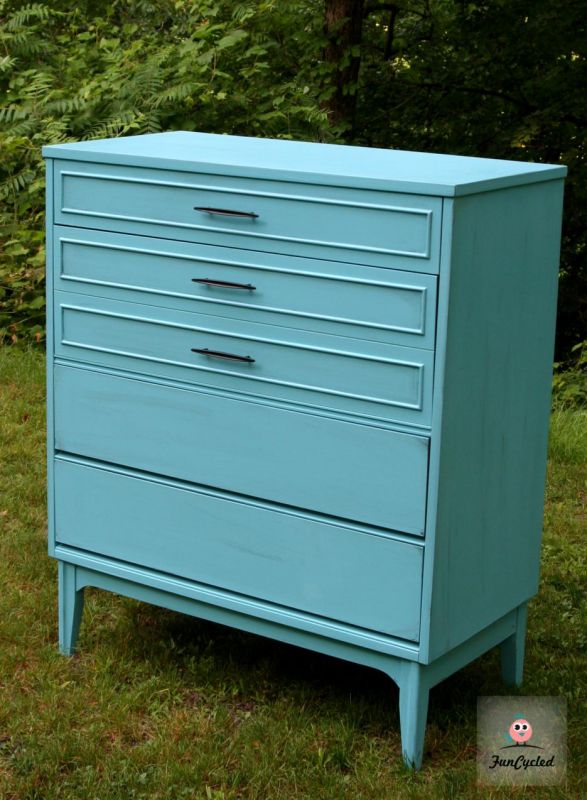
French Provincial Vanity Makeover

Hi Friends~

I’m having a fun time over here making some really beautiful new pieces. Since it’s keeping me busy, I haven’t had to post all of the ones I love. So I’m sharing a quick before and after with you this Thursday without all of the bells and whistles. A picture’s worth 1,000 words anyway, right??

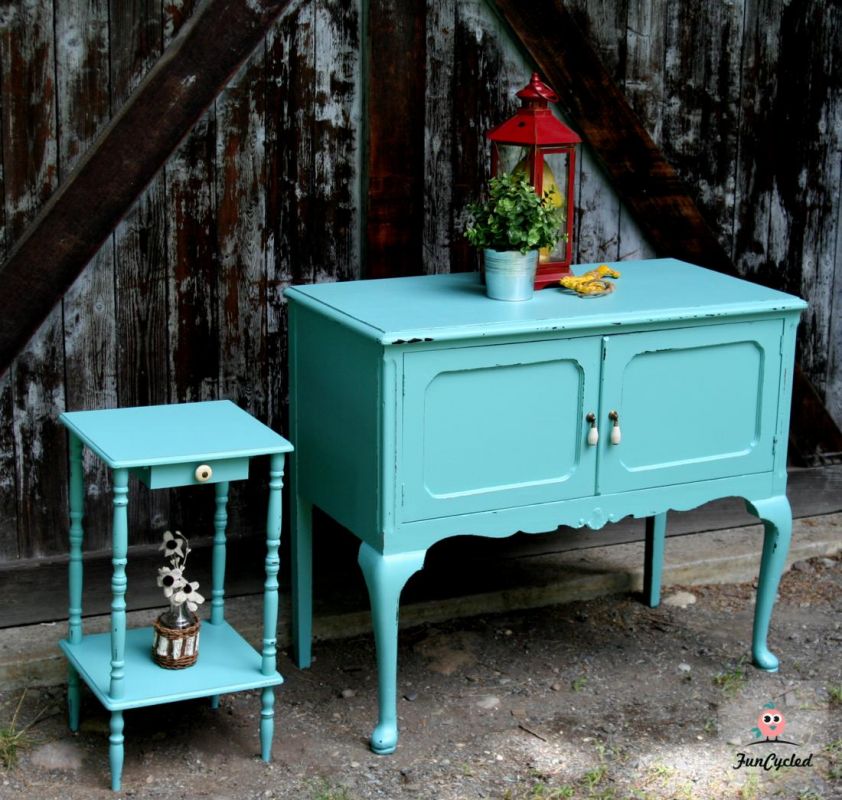
I bought this French Provincial style vanity…Ann noticed it on our Upcoming Projects Page and asked me to save it for her. We chatted about colors and decided to go with Benjamin Moore’s Caribbean Blue Water 2055-30. I painted it like this… How To Paint Furniture, glazed it and sealed it for some extra protection.

We used the original handles and spray painted them a glossy black.

Ann drove 1 1/2 hours to come pick it up. Thanks Ann! :) Oh… and Ann loves music like me.

Now for the finished piece…

Happy Redesigns Everyone,
Sarah

If you like what you see, please like our face book page to keep up to date on the newest finds, vote on colors and give your input on our creativity.There is a box at the top right of this page to enter your email address in to receive notifications by email when I post something new on this blog. Please sign up today!Last but not least, let us customize a furniture piece for you. We create custom furniture and will deliver for customers in upstate NY and will also ship throughout the US.  Send us a note with what you would like using our contact page. Or buy something that we’ve already designed from our furniture for sale page.

Posted on

Dark Mango Dresser Thingy – Tuesday’s Treasures

Did I just call something a Dresser Thingy?? Why yes I did! Why? Because I’m a weirdo. Why else? I don’t know what to call it really. I picked up this dresser one day and knew it needed lots of work, but I ALSO knew it could be “funcycled”. You all know by now that I like to make the not-so-lovely lovely again.

My pal Tiff-phony wanted something for her living room for extra storage and this dresser had the lines she wanted. Oh, by the way, when you become my friend, you will have to deal with my weird names for you and crazy sense of humor – even about trailer parks and short husbands. The plus side is I can make pretty furniture for you. lol So I’m fairly sure Tiff puts up with me for the “trash into treasures” that I make for her. ;)

We chatted a bit and she decided that she could make it work if she put baskets where the bottom drawer would have been. Her keen little eyes even noticed that one of the legs was broken – I didn’t even see that. Would you have? No problem, I told her we could fix it!  Piece picked -check! Now on to the color. She wanted a coral color and we went back and forth on whether to go dark or light. In my opinion, it’s really hard to find the right shade of coral. Usually I’m a Benjamin Moore snob but in this case, the color Tiff wanted could only be found in Valspar Dark Mango. I agreed that it was totally “her” and was willing to get out of the car AGAIN to run back into Lowes only because I didn’t have the kids with me that day. lol I love you, Tiff. :)

Paint color bought. Check. Up next, the knob choice. We looked at quite a few but Tiffany loved these from Anthropology. Good choice, good choice!

Yummy, right??? Love, Love!

OK, on to that little problem of the broken leg. Normally when I’m with my husband and he’s talking about wood types or repair, I feel like an idiot. I don’t know half of what he knows. Well… this time … get ready, I was able to teach HIM something. Wow oh wow! Did I feel like one cool lady walking the aisles of Lowes. ;) I told him you could buy new legs for furniture. He didn’t believe me at first so I showed him and he was pleasantly surprised. So, I hacked sawed the legs off and he put the new ones on for me. I tried, but I just couldn’t get it to work. I told you he’s better at repairs than I am.

Then I primed, painted and glazed this sexy lady. Are you ready for the after picture? Yup, I knew it. Me too! :) Here you go!


Happy Redesigns Everyone,

Sarah

If you like what you see, please like our face book page to keep up to date on the newest finds, vote on colors and give your input on our creativity.

There is a box at the top right of this page to enter your email address in to receive notifications by email when I post something new on this blog. Please sign up today!

Last but not least, let us customize a furniture piece for you. We create custom furniture and will deliver for customers in upstate NY and will also ship throughout the US.  Send us a note with what you would like using our contact page. Or buy something that we’ve already designed from our furniture for sale page.

Posted on 5 Comments

How to Paint an Ombre Dresser

Good morning everyone! Since it’s a snow day here in NY, I thought I would share a quick overview on how to paint an Ombre (or gradient) colored dresser. We started with this dresser:

When I bought this little dresser, it had the right shape and I even liked the knobs to give it a modern, trendy look.

If you want to see step by step instructions on painting, see our post How to Repaint Furniture. I painted the whole thing in the burnt coral color. Benjamin Moore San Antonio Rose

After it was painted, I painted the top drawer white. Instead of trying to mix the color and eye ball it as I’ve done in the past for ombre dressers, I decided to measure it and know that if the measurements were right, it should come out just how I wanted it. First, I took 3/4 cup of the coral and 3/4 cup of white and mixed them together. This made the color I would use on drawer 4. I then took the drawer 4 color and took 3/4 cup of it and added 1/4 cup of white which made drawer 3 color. Then I took the drawer 4 color again and mixed 1/4 cup of it with 3/4 cup of white paint which made drawer 2 color. Am I confusing you?? Another important thing to remember when painting an ombre dresser is to use different brushes for each drawer or wash and thoroughly dry the brush every time you switch between the colors.

If you understand better with pictures like me, here you go!

I loved the look and placement of the knobs already, but I wanted to brighten them up with some gold spray paint. Usually I’m not a fan of gold knobs, but I love the way gold and coral compliment each other. As the final step, I sealed the whole piece with a water based poly in semi-gloss.

Oh so pretty to me!!

The best part about this piece is that it’s FOR SALE!! You can check to see if it’s still available on our Furniture For Sale page. I hope this helps if you ever decide to try ombre on your own. :)

7/15/13 update – A HUGE thanks to Country Living Magazine for featuring this post. You can check it out here: Flea Market Hall: Sarah’s Painted Dresser

Happy Redesigns Everyone,

Sarah

If you like what you see, please like our face book page to keep up to date on the newest finds, vote on colors and give your input on our creativity.

There is a box at the top right of this page to enter your email address in to receive notifications by email when I post something new on this blog. Please sign up today!

Last but not least, let us customize a furniture piece for you. We create custom furniture for customers in upstate NY and ship throughout the US.  Send us a note with what you would like using our contact page. Or buy something that we’ve already designed from our furniture for sale page.
Posted on 8 Comments

Grey and White Hutch Makeover

Is it snowing where you are today? Even though it’s mid-March here in upstate New York, we’re enjoying yet ANOTHER snow storm today. It’s days like these that I wonder why I live in NY. Lol! On a much more positive note, getting snow is much less painful now that I don’t have to drive anywhere to work. For those of you who made it into work today, kudos to you. I hope no one is in yet so you’ve been able to take a quick break and enjoy today’s Tuesdays Treasures. :) For those of you who are home with the kiddos, I’m so happy you stopped by even with a chaotic house. Make time for snow angels, ok?? ;)

This week in our house, we checked out a school for the kids next year. It’s so sad to think that they are both old enough for school, but I’m trying to stay positive about change. If you know me at all, you’ll know change is not my best friend. ;) Although I’m almost always thankful for it. Our little Sweetie cried because we had to leave the open house. Lol! I take it they approve!

Ok, ok, on to the furniture. I know I’m rambling. Today’s makeover is truly one of a kind. I’ve never seen a hutch like it! 

The beastly thing before. 

I looked at this hutch for WAY too long in  my garage trying to think of how it could be beautiful. I’ve noticed some beautiful grey hutches in everything from designer magazines, to Martha Stewart lines, to Pinterest makeovers and that color seemed just right for this hutch.

The first thing that had to go was the hideous hardware and those awful brass things in the glass door. When was that ever a good idea and why?? I love the combo of grey and copper and went hunting on Home Depot’s website. I found the new knobs and pulls in a jiffy. On to the bottom right door. It was off, but definitely repairable, however instead of putting it back on, we decided to put in a custom wine rack. On the left side of the bottom half of the hutch, there is a drop down section that reveals a dry bar. That just seems to be a perfect fit for a wine rack (or in my case a sparkling cider rack… lol).

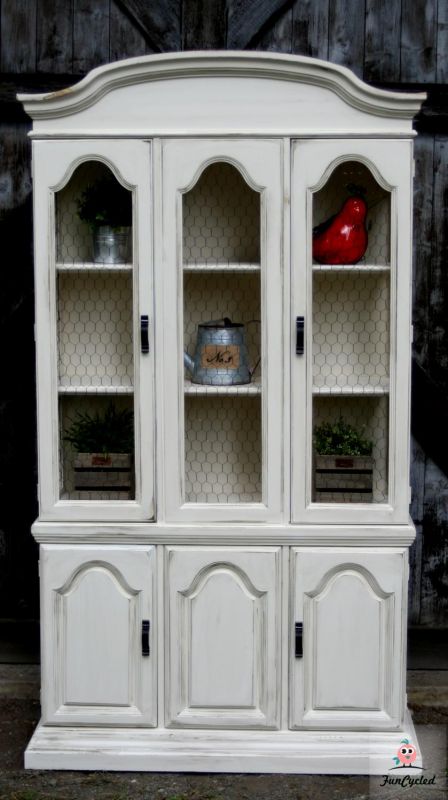
We went with a cream on the back of the hutch to lighten it up a bit. The grey we used is Benjamin Moore’s Anchor Grey 2126-30. After everything was painted, we distressed and sealed it. Are you ready for the after pictures?? I know I am!

A close up of the distressing…
 

I hope you like it as much as I do…  ;) Thanks for all of your support… this baby went crazy on facebook the other day.

Happy Redesigns Everyone,

Sarah

If you like what you see, please like our face book page to keep up to date on the newest finds, vote on colors and give your input on our creativity.

There is a box at the top right of this page to enter your email address in to receive notifications by email when I post something new on this blog. Please sign up today!

Last but not least, let us customize a furniture piece for you. We create custom furniture for customers in upstate NY and ship throughout the US.  Send us a note with what you would like using our contact page. Or buy something that we’ve already designed from our furniture for sale page.

Posted on

Caned Barrel Back Chair Makeover – Tuesday’s Treasures

Hey everyone! It’s been such a crazy week here with almost all of my projects being more complicated than I anticipated. You’ve probably seen on our Facebook page that 1/2 of my projects kept bleeding through this week. Which means, the stain color of the original wood kept bleeding into the new paint colors. I even painted one piece with different primers and paint 6 times. I normally can conquer bleed through pretty easily. but not this week.

That’s being said, I wanted to show you a fun, less stressful makeover. ;)  This chair is going on our Furniture For Sale page so please Contact Us if you’re interested in purchasing it.

I have a recent love for caned barrel back chairs. They just seem to go so quickly from drab to fab with a little bit of fabric and a pop of color. This one is a little trickier than some of the other caned back chairs because it has fabric on the back, too. My mom stripped the fabric off and re-upholstered everything for me. I painted it with a custom mix of a couple different teals and sprayed it on using my air sprayer.

Here she is in all her paisley glory!

Remember to check our Furniture For Sale Page to see if it’s still available. I also made a cute end stand to match the chair that is also available to purchase with or without the chair.

Happy Redesigns Everyone,

Sarah

If you like what you see, please like our face book page to keep up to date on the newest finds, vote on colors and give your input on our creativity.

There is a box at the top right of this page to enter your email address in to receive notifications by email when I post something new on this blog. Please sign up today!

Last but not least, let us customize a furniture piece for you. We create custom furniture for customers in upstate NY and ship throughout the US.  Send us a note with what you would like using our contact page. Or buy something that we’ve already designed from our furniture for sale page.

Posted on 3 Comments

Big Black Hutch on Tuesday’s Treasures

What could be better than a lighted hutch -a huge lighted hutch painted black and distressed to give it just the right feel? Yes indeed, you’re right! This is my first ever black hutch. This hutch may look average size, but it is about 7 feet tall, no small task! I stopped by Joe and Sarah’s house to see how their other black furniture looked so I could make this fit right in. They had the perfect wall for it and in the end it all came together so perfectly.

So here she is before:

We did this one a little differently because the other furniture that they had didn’t have any primer underneath. Just black paint distressed to show the wood. We sanded this hutch down really well and painted it black right onto the wood using our air sprayer. Then, I distressed all of the black to show through the wood. Oh, and a word to the wise… take the glass shelves out when you transport a hutch. We didn’t and both shelves shattered… to replace them was almost $100. Now that’ll hurt the pocket. I didn’t anticipate that it would be so expensive to replace the two shelves. Live and learn. ;)

Also, I repainted the knobs with Rustoleum’s Hammered Bronze spray paint, but I didn’t really like them so I repainted using Hammered Black and I LOVED them.

Are you ready for the after pictures?? Oh did you know how hard it is to get good pictures of black furniture? Thanks to my amazing brother Jesse, I have a new camera. It makes photoing black furniture much easier. You’re the best, Jesse!!! Thank you so much!!

Here’s a close up of the bottom half.

Continue reading Big Black Hutch on Tuesday’s Treasures

Posted on

Sage Dresser Turned Entertainment Center

Happy Monday everyone! I thought I would surprise you this morning with another quick before and after. I bought this little dresser and loved the shape. We’ve done many dressers in this style, but for our customer, Pam, we were going to mix it up a bit. She had a small wall for her entertainment center and this dresser was the perfect size.

We pulled out the top two drawers and then did molding around each drawer. Then we drilled holes in the back so all the wires for her electronics could go through the back. I painted it a light sage green (sorry I don’t have the color… I bought it a while ago). Then I lightly distressed it and painted the inside of the drawers a cream and painted the knobs the same cream and distressed them.

Here’s the after for you!

I know it’s not the best picture, but the sunlight wasn’t working with me that day and I had no time to get another one. You get the idea though, right?? ;) Good!

Happy Redesigns Everyone,
Sarah

If you like what you see, please like our face book page to keep up to date on the newest finds, vote on colors and give your input on our creativity.

There is a box at the top right of this page to enter your email address in to receive notifications by email when I post something new on this blog. Please sign up today!

Last but not least, let us customize a furniture piece for you. We create custom furniture for customers in upstate NY and ship throughout the US.  Send us a note with what you would like using our contact page. Or buy something that we’ve already designed from our furniture for sale page.


Posted on 1 Comment

Coffin Turned Coffee Table

OK, OK, it’s not really a coffin… it’s just a HUGE beat up old trunk!!! It’s so big that I probably could bury my little sister in it (of course I wouldn’t – you know that, right, Lee Lee?).

Happy Tuesday’s Treasures! Has another month nearly gone by?? How can this be? Between custom orders, life changes and the dishes…  I feel like I blinked and this month is about gone. I’ve shown you so many pinks and reds during this month of love, so today I’m sharing a love of wood that I also enjoy. Sometimes I get comments on Facebook or on my website about how I should have refinished a piece instead of repainting it. I respect their opinions, but usually disagree. lol  I just like the painted look much more on most furniture pieces… except ones like this. ;)

Here’s the before picture… an over 5 foot long wooden box. We bought it from a man  who said it came from a farmhouse in Connecticut. It was in really rough shape… scratches and abuse all over it. I could see past it’s ugliness and thankfully have a hubby who trusts my gut by now. He carried this coffin turned coffee table in and out of my work space for me and that was no easy(or light) task.

After 4 hours of sanding, it was finally ready to be beat up by yours truly. Yes, you have to make it look perfect before it can be beat up or “distressed” in the right way. So, I went at it with a hammer, screws, and a 5 in one tool to give it the distressed look that I wanted. After you beat it up, you have to hit it again with a 220 grit  sanding to smooth out what you’ve just distressed.

Then I stained it with Minwax’s Jacobean 2750 to give it a nice deep, dark base and for the second coat of stain, I used Minwax Red Mahogany 225 because I wanted it to have a red hue without screaming redness at me!

We custom ordered corner brackets from an iron smith. They were one of the hardest parts to find. I wanted something that would wrap around the corners of the trunk, but something that was also long enough to be the right size for a 5 foot trunk. I looked everywhere online to find something, checked local hardware stores, called trunk makers from California to New England and no one had what I wanted. Finally, I found the right shape online and then I asked an iron worker if he could make the right length and style for me. He was awesome and put the 90 degree corner in it and hand hammered each arrow head a the end. I loved that they are not exactly the same and it gave the trunk a more authentically rustic feel because that’s how it would have been done 100 years ago.

I also added antique caster wheels from old engine carts to the base. They look so tiny on this trunk because it’s huge. I LOVE the whole look and definitely didn’t want to hand this one over to our customer Jen. Jen let me go with my gut for everything with this trunk and was so sweet. When we finished it, John said, let’s just keep this one. I had to break the news that it was a custom job. He was a sad puppy! lol 

Are you ready for the after pictures?? I know I am and I’ve already seen it!! Oh, and I think it looks a little murky in the pictures, but it didn’t look that way in person at all. The photo of the top gives you a better indication of the finish. As Jen said when she picked it up, “It looks even better than in the pictures!” Yay!
Continue reading Coffin Turned Coffee Table

Posted on

Black French Provincial High Boy Dresser Set For Sale

If you aren’t a fan of our Facebook page yet, you might have missed that we added this beautiful Black French Provincial Dresser Set to our For Sale Page. I thought I would surprise you this Monday morning and share the before and after pictures with you. If you’re interested in purchasing it, please double check our Furniture For Sale page here to make sure it’s still available and email me using our Contact Us page.

Here she is before and what you can’t see is all the scratches on the top not to mention the yellowy wood that you can see  which made it scream “PLEASE PAINT ME”. If you’ve been on the hunt for a french provincial style dresser, you already know two things… usually you can only find the while laminate versions of this style,  not the hardwood antiques and they almost never come cheap. I love the french provincial style because it has such a rich, sophisticated feel. I went back and forth on a couple different colors and styles, but decided on black because I liked the look and it’s been almost a year since I painted a dresser black so I had the hankering. ;) lol 

Here’s the before pictures of both pieces.

And here it is with black paint and metallic silver glazing. I used all of the original hardware and painted it sliver to highlight the glazing. I love this set!  

Thanks for looking and I hope it makes it’s way to your home soon. Have a marvelous Monday everyone!!!!

Thanks,
Sarah

If you like what you see, please like our face book page to keep up to date on the newest finds, vote on colors and give your input on our creativity.

There is a box at the top right of this page to enter your email address in to receive notifications by email when I post something new on this blog. Please sign up today!

Last but not least, let us customize a furniture piece for you. We create custom furniture for customers in upstate NY and ship throughout the US.  Send us a note with what you would like using our contact page. Or buy something that we’ve already designed from our furniture for sale page.


Posted on

Valentine’s Day Red Hutch – Tuesday’s Treasures

To continue with my month of love and celebrating the reds and pinks, I’d like to share another red hutch makeover. We seem to be all about hutches this month with three hutch orders to finish. If you’re a fan of our facebook page, you already know how much I love red hutches. I own this California Poppy Red Hutch and have redone many a red hutch, but for some reason, I never stop loving red hutches. At the end of each project, they always take my breath away. Maybe it’s just me, but I couldn’t help but share my love for red hutches with you.

This was a custom order for Nicole and she was more than kind and gave me more than I asked for it when she came to pick it up. I can’t say anything but thank you, thank you, Nicole! Not to mention, I pretty much want to look as cute as she does after 6 kids! Adorableness for sure!

So, she found this piece on craigslist and brought it to me to add some love and color. 

Let me forewarn you that repainting a hutch is well worth the time that it takes to redo it, but it is ALOT of work to do right. I don’t recommend this project for the faint of heart or beginner DIYer. :) First, you’ll need to sand everything, tape off the glass, take off all the hardware, prime and paint it and then seal the whole piece. If you want to see step by step instructions on how we repaint furniture, you can see our post How To Paint Furniture.

I painted it with my new favorite Benjamin’s Moore’s red painted called Caliente AF-290. I’m in love with this red. So amazing!! Then we glazed it and sealed for protection. Here’s the after for you.

If you’d like one of these beautiful red hutches with some of your tax return, use our contact page form and ask me to find one to redo for you or even turn that ugly old thing weighing down your dining room into a stunning focal point in your room.

Happy Redesigns Everyone,
Sarah

If you like what you see, please like our face book page to keep up to date on the newest finds, vote on colors and give your input on our creativity.

There is a box at the top right of this page to enter your email address in to receive notifications by email when I post something new on this blog. Please sign up today!

Last but not least, let us customize a furniture piece for you. We create custom furniture for customers in upstate NY and ship throughout the US.  Send us a note with with you would like using our contact page. Or buy something that we’ve already designed from our furniture for sale page.