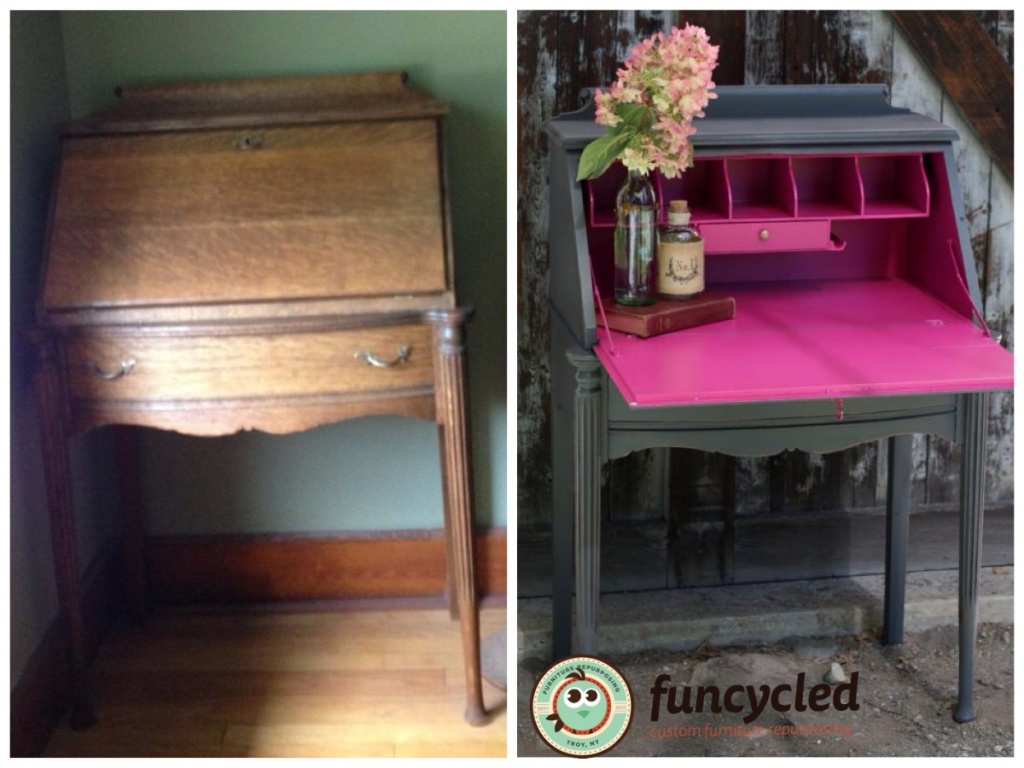
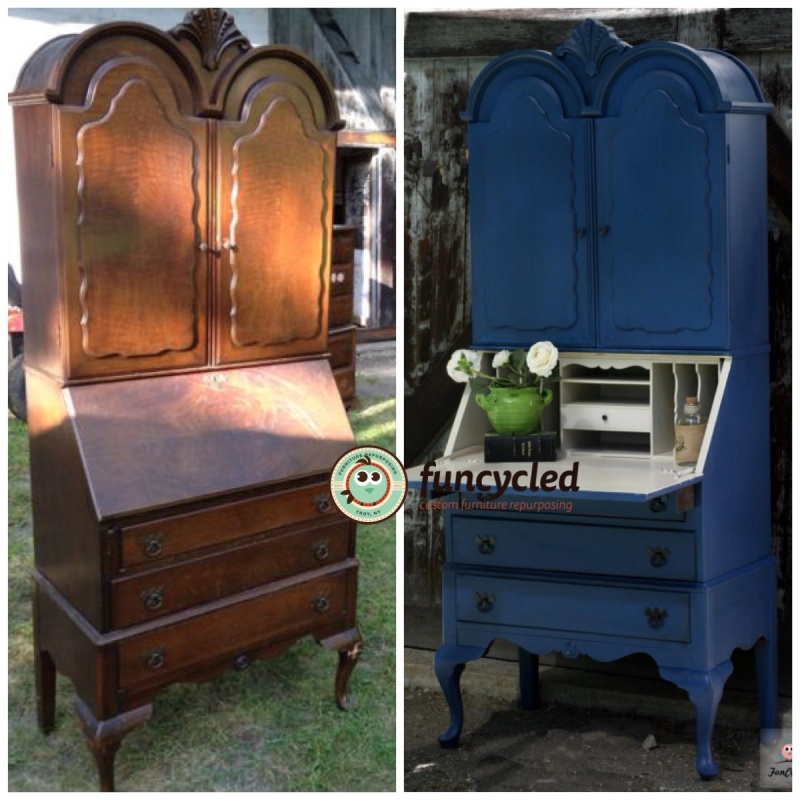
So many fun things have happened in the last week!! I can’t wait to share everything with you. Let’s start with the furniture this time around in case you’re here more to check out the before and afters than you are to read about my life week to week. ;) This secretary desk came from my friend Jo Ann’s friend Chris who wanted to sell it as she was moving to sunny Florida. She’s had it for years and years and it meant so much that she thought of us to make old look new, with some artistic flair and paint. Pretty much as soon as I put it on our Upcoming Projects page, Ann snatched it up! She loved it and we went back and forth about design but landed at painting the interior Benjamin Moore’s Navajo White and the exterior Benjamin Moore’s Symphony Blue. I turned the blue into a chalk paint so when I distressed it, there wouldn’t be white popping through from the primer. You don’t have to prime when you use chalk paint. After painting it, I very lightly distressed it and glazed it with Valspar’s antiquing glaze.
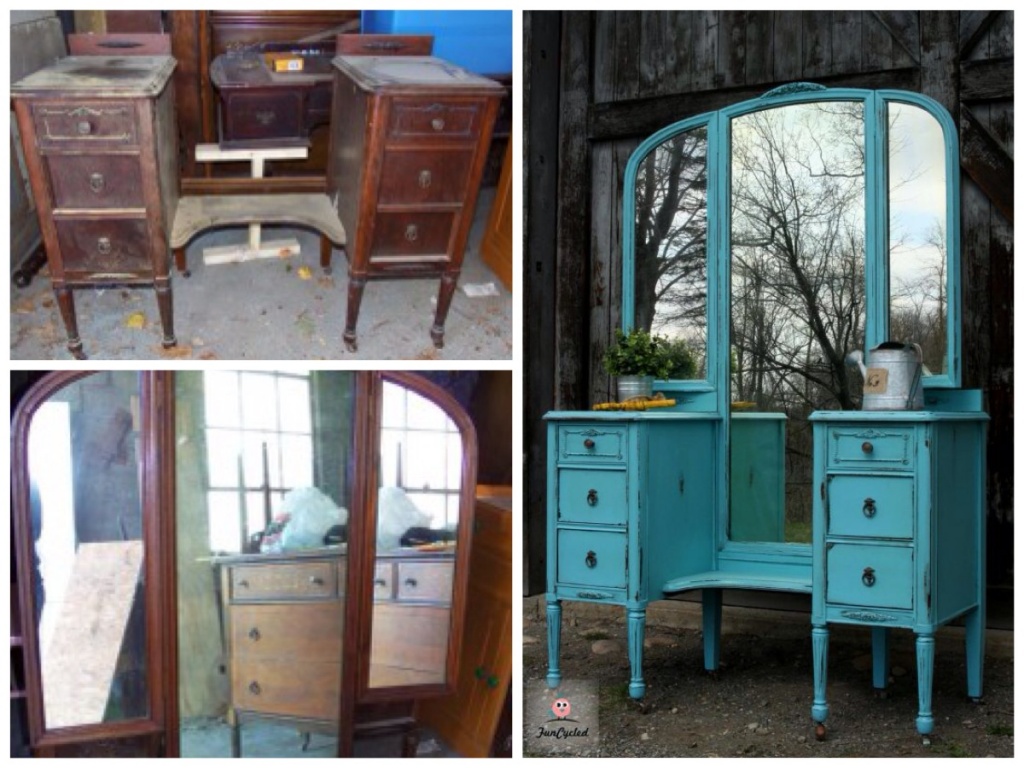
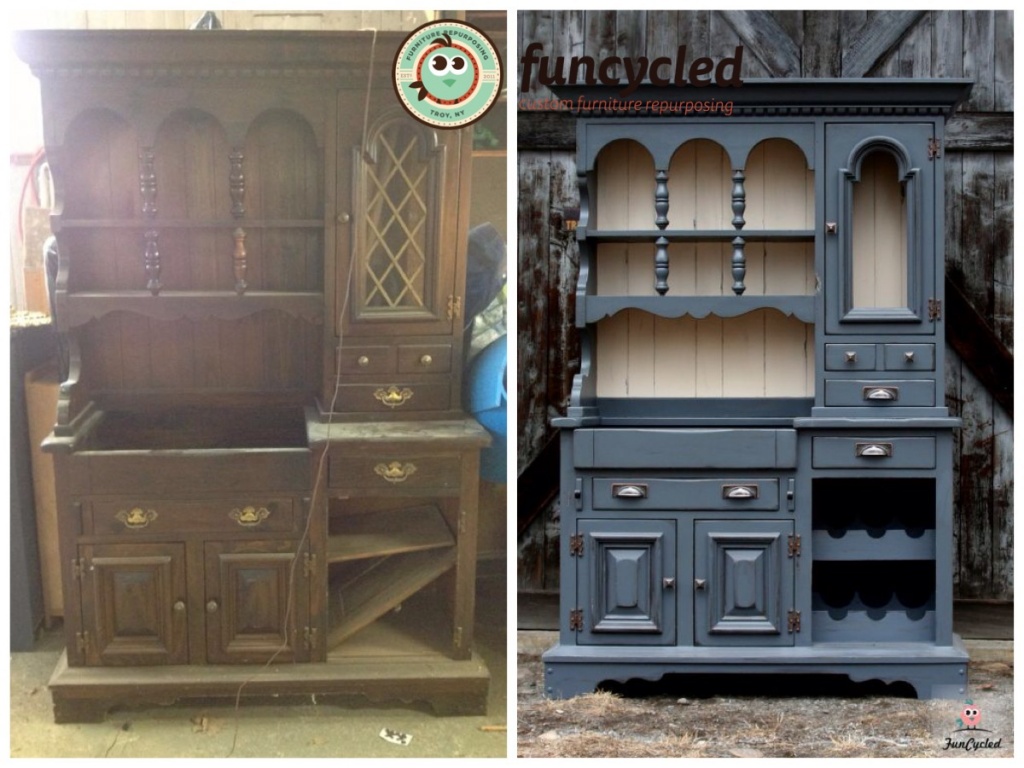
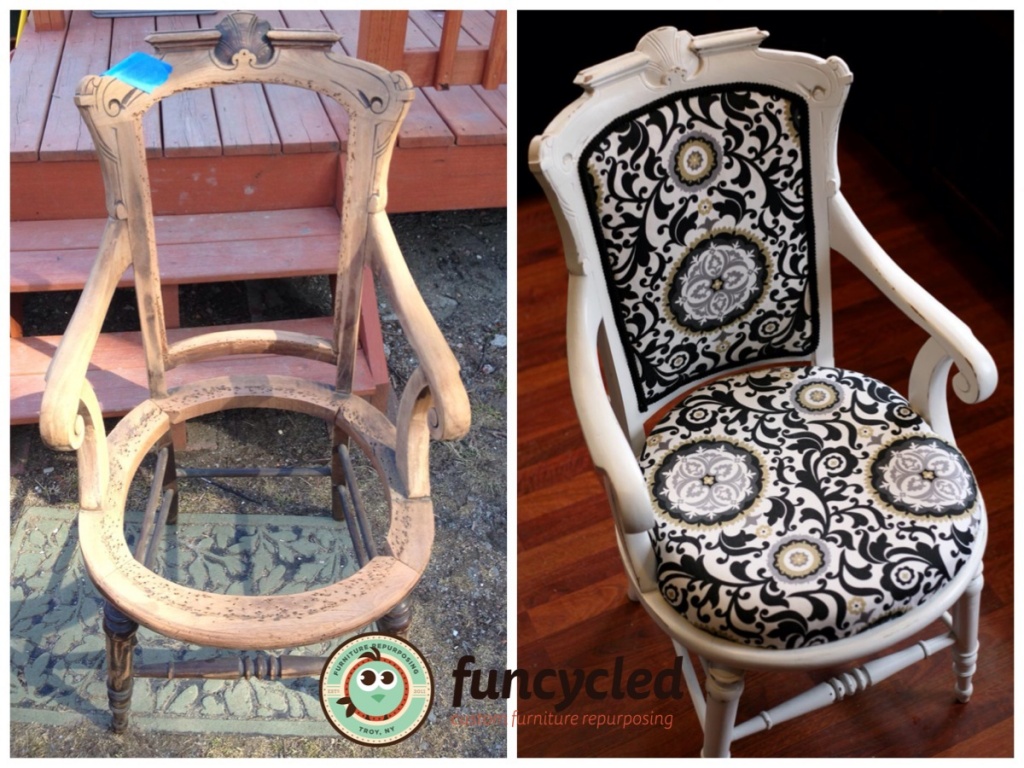
Here it is before!
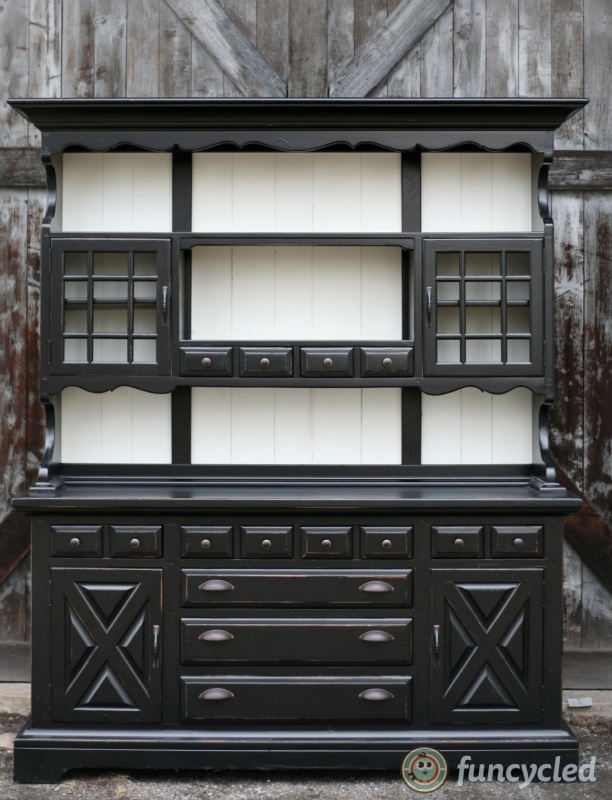
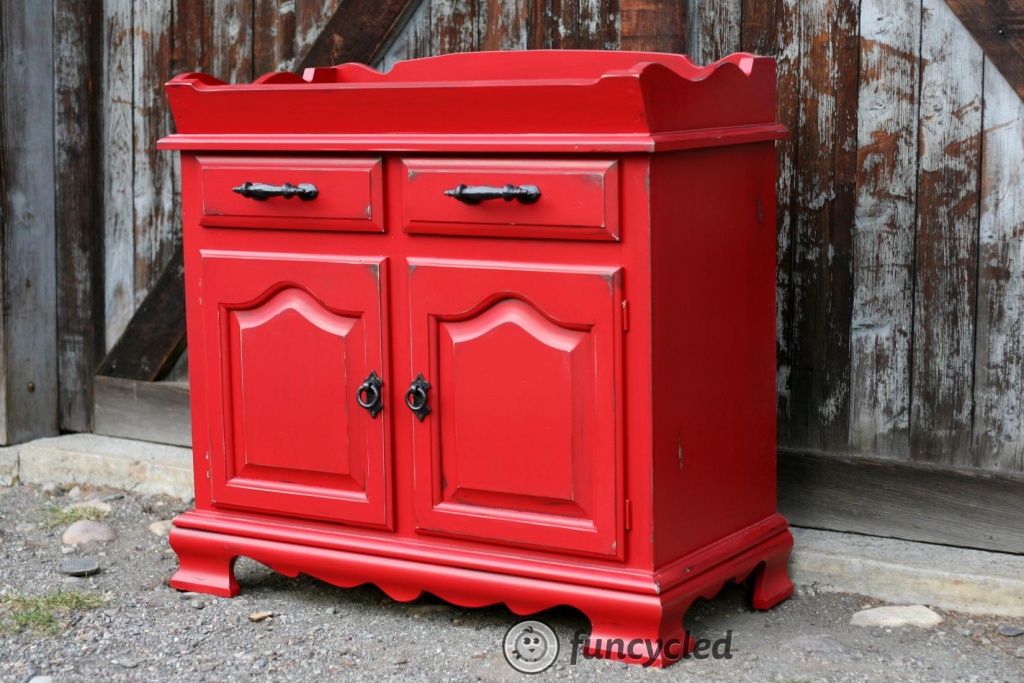
And after some love!
We used the original hardware and just spray painted it oil rubbed bronze by Rustoleum.
Love, l.o.v.e. how this one came out!! Thank you so much for the business Ann! Wait until you see her second project. It’s a beauty too!
Ready to hear about my day in NYC on the Rachael Ray, “Thanks for Giving” show?? I like pictures, so I’m going to run through the day with pictures! Oh, and a couple of people have asked why I was on the Rachael Ray show. They invited me because of my 30 Random Acts of Kindness on my 30th birthday. I found out after the fact that my sister submitted my story as a local hero. Thank you!!
On my way to NYC on the 5:55am… so tired.
Guess who came with?? My friend Sarah… Love this girl!
A quick picture before we got off the train.
Quick funny story about the train ride. We were coming into the city with about 20 minutes to spare. My friend Krista told me she was on the same train. We went up to say hi and then I decided to use the bathroom quickly. I started going to the bathroom and the train hit it’s breaks and a group of people were at the door waiting to exit into NY Penn. Well, the bathroom door swung open while I was peeing… and everyone was right there. Awesome! lol I waddled up and pushed the door closed, then came back and my bracelet broke off and dropped into the toilet. To take it out or not to take it out?? That is the question… yup, just got that baby so I took it out. Don’t judge people!!! lol I started washing it and then the announcer says to exit the train!! Oh my word! I had to rinse it as quickly as I could and run out of the train so I didn’t miss the stop. That woke me up a bit and kept me laughing for a good couple of minutes.
First stop… Caffe’ Bene!! Yummy goodness. I like there white mocha and organic croissant filled with cream cheese.
Then off we went to get in line at the show. First things first, sign your life away to the Rachel Ray show. Check.
Up next, meet some heroes in line. Loved getting to know Kathleen and Julie. They made me part of their group and I felt right at home with them.
Photo from: http://www.rachaelrayshow.com/gallery/16739_Thanks_for_Giving_Heroes_M_O/index.html
Then 120 local heroes were brought together as the audience members of the Rachael Ray show. We all had no clue that this was a giveaway show.
Photo from: rachaelrayshow.com
You can watch the very quick part of my interview on this video if you missed the show: http://www.rachaelrayshow.com/lifestyle/16795_Our_Thanks_for_Giving_Show_with_Our_Biggest_Giveaways/index.html
If you did get to watch the show, you know how many amazing things they gave to us! I wish I had a way to say thank you with more than just a “thank you” to Rachael Ray and all of her staff. They were kind, caring and a couple even remembered my name and specifically said hi on Wednesday and I left with a couple hugs. Truly a special memory!!
Then reality hit… I had to carry around a ton of merchandise throughout NYC for the rest of the day. #1 problem… how do I carry it all? #2 I hope I don’t get mugged. lol Here I am coming out of the studio.
Sarah and I headed off to find something to carry it all and bought this dolly at Jack’s.
We grabbed a late lunch at Freidman’s. It’s a great place to eat with someone who is gluten free like my Sarah. ;) Almost anything could be made gluten free. It was amazing!!! I loved the atmosphere, too.
Then we headed to SOHO to do some shopping. I love SOHO so much!! It made me want to leave real life and move there and open a furniture shop. I stopped by one chic furniture shop and loved this cute pink couch. Super cute, right?
Shopping in SOHO took the rest of the time that we had in the city. Before we left we also tried some cupcakes and had a chai latte. It was an amazing day!! Sarah was just like icing on the cake. She made an amazing day even better. It was a day filled with laughs, love and lots of design envy. ;) Thanks for carrying my stuff around with me Sarah. A girl couldn’t be more blessed!!
Also, thanks so much to everyone for all the sweet notes on our Facebook fan page and for texting me to see how everything went. You all know how to make a girl feel loved!! For realz.
Until next week friends!
Happy redesigns everyone,
Sarah
If you like what you see, please like FunCycled’s Facebook page to keep up to date on the newest finds, vote on colors and give your input on our creativity. There is a box at the top right of this page to enter your email address in to receive notifications by email when I post something new on this blog. Please sign up today!
Last but not least, let us customize a furniture piece for you. We create custom furniture and will deliver for customers in upstate NY and will also ship throughout the US. Send us a note with what you would like using our contact page. Or buy something that we’ve already designed from our furniture for sale page.


_968x1296")
_968x1296")