Posted on

How to Update Your Dining Room Chairs

Do you have an old dining room set that you would like to replace? Think about repainting it instead. This is step 1 of 3 in our redesign project – revitalizing an antique maple dining room set. The table is taking us longer than we expected and the hutch is almost done so we decided to break this up into 3 posts.

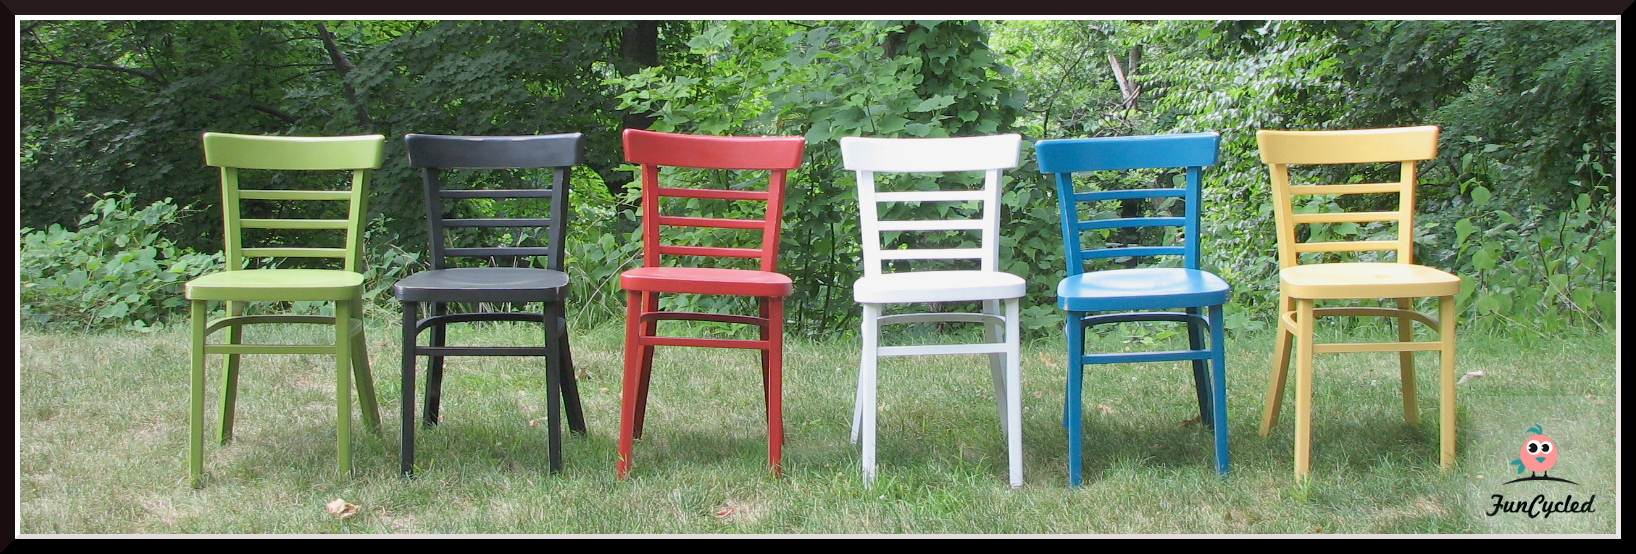
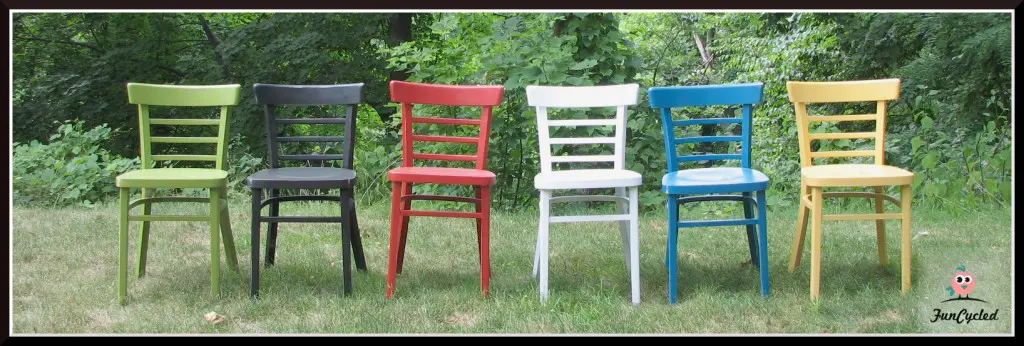
First, the chairs had a nice design about them, but we didn’t like the color of the wood. Also, we thought glazing would bring out the intricacy in the detailing. We lightly sanded each piece, primed and painted them using our air sprayer. Be careful, because it will drip easily. We had to touch them up quite a few times.

Love, love!

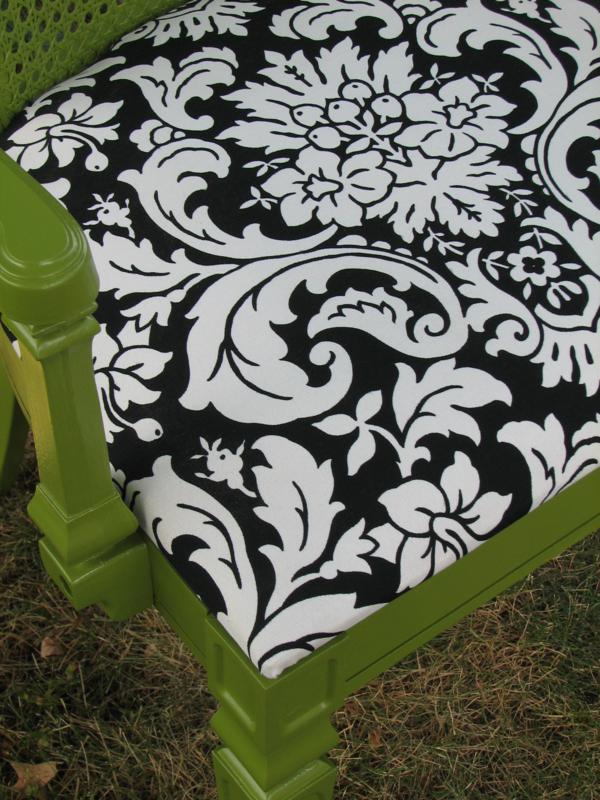
Next, we headed to Hobby Lobby and picked out new fabric for the seats. We brought it home and didn’t like it. Back I went with both little ones determined to pick the right thing. We ended up going with this beautiful fabric. I am breaking the news about the hutch, but I decided to do it red so this fabric should hopefully tie everything together.

There were two layers of fabric already, a green that we removed and this original gold color.

Here are the tools you’ll need:

Fabric scissors would work better, but I couldn’t find mine. You’ll want to flip the seat cushion up side down and then pull out all of the staples. Then cut the fabric leaving about 1-2 inches extra on all sides. The tough part about this pattern is that you have to keep it in a straight line. We carefully made sure that each pattern was lined up the same way for all four chairs, too. After the fabric is cut, lay the cushion upside down on the table and staple about one inch from all the edges and make the staples about 3-4 inches apart.

Bunch the corners like so and staple quite a few times to make sure they are secure. When you get to the last side to staple, make sure you pull tightly so their is no loose fabric.

Then trim the excess fabric to give it a clean look.

Then I sanded the corners of the chairs for an antiqued look. Last but not least… glazing. I rubbed it all over the detailed wood and waited about 5 minutes. After that I rubbed most of it off using a damp rag.

Pretty, right?

Up next, spray it with a Polycrilic to seal all of the exposed wood and keep it from being easily scratched. Last but not least, attach the seats with the screws that were originally attached. Here’s the finished product!

Remember to stay posted to see the rest of this dining room set makeover. See the hutch behind the chair?? That’s tutorial is coming next. If you like what we’re doing, please like us on Facebook at: www.facebook.com/funcycled or share this on Pinterest!

Happy Redesigns!

Sarah

Posted on

How to Repaint a Chandelier

So many people don’t notice the lighting in a room and settle for the run of the mill brass or silver light, but in this post we’ll show you a cheap way to add new life to your room by simply changing out the lighting fixture.

One of the hidden treasure in our area (and most likely in your area) is the Habitat for Humanity Restore. There are two within 45 minutes from our house. When houses are gutted or when people bring in donations for Habitat for Humanity, they are bought to the Restore to sell, helping to raise money for Habitat for Humanity. You can find anything from furniture pieces to paint.We went there to find new lighting for Sweetie’s (aka, our 2 year old daughter’s) room and our bedroom. Both rooms had simple dome lights and needed something. You CAN’T beat the prices. We bought a new light for our bedroom for $15 and Sweetie’s for $25. Here’s what it looked like to start with.

It’s a pretty typical brass chandelier? This was one of the next steps to Sweetie’s room transformation. I wanted it to match the pink in the Argyle Dresser that we just repainted for her. So, I bought Krylon pink spray paint for metal or wood. First, you want to pull the white candle stick parts off (they should slide right off). Then, I grabbed a scrap piece of wood and screwed 6 of the longest sheet-rocking screws that I could find and into the wood. If you put each candle stick part on a screw it will be much faster and easier to paint. Then I spray painted each one with cream.

Next, I cleaned every part of it really well with just a simple cleaner 1 part white vinegar to 10 parts water. Let the chandelier completely dry. Some people say to tape off the lights and that may be a good idea. I have never done that and it doesn’t seem to cause any problems, but I guess it couldn’t hurt, right? Ok, off to the barn to paint the chandelier. Try to get spray paint that is a paint and primer in one so you don’t have to prime the chandelier first. You want to remember to spray paint lots of light layers. Don’t over do or it will drip. I tried to keep them light and it still dripped. I think we did a total of 6 coats of spray paint. It only takes a couple minutes to dry so it was all still done in one night.   Here’s near the end of the coats.

Here it is… making the room fit for a princess.

If you like what we’re doing, please like us on Facebook at: www.facebook.com/funcycled or share this on Pinterest!

Happy Redesigns!

Sarah


Posted on 6 Comments

How to paint your dresser with a Pottery Barn-ish style!

I bought this dresser at the same time as the Grey Dresser with Black Glaze. She had quite a few scratches, but I knew she could become a beauty in no time at all.
First, we filled in all the scratches with putty  but you could use wood filler, too.Then we sanded those spots down lightly. I primed it using the air sprayer because I was already priming other things. Then I painted it with tan satin Behr paint that I had bought. It came out a little too much like a flesh color so I mixed it with a white/grey that I had and repainted it. Since we wanted to paint this two different colors, I used a foam roller brush to paint it.

While that was drying, I spray painted all of the handles using black satin spray paint. Remember to use tooth picks in the side of each handle to keep them handles up.

After the bottom was painted two times and dried, I tried using a black paint I already had for the top, but it came out grey and I didn’t like the look at all.

So, I decided to try a new paint that I had read a lot about online. It’s Benjamin Moore Low Luster Enamel. It’s pricey, but I would definitely say it’s worth the money. It’s the best black paint I’ve used so far!

Buying this paint was a funny story. For some stupid reason, I thought that Sherman Williams sold Benjamin Moore paint. Who would have thought that Sherman Williams sells Sherman Williams paint? lol  I walked into Sherman Williams and couldn’t find anyone who worked there. I walked all around and noticed one customer who was standing in the back so I asked him where the Benjamin Moore Paint was. Blonde moment! He laughed at me and said, they carry that at Benjamin Moore stores. Duh!! I just laughed at myself and headed off to our local Benjamin Moore store. They were very helpful and even gave me 10%; now I like that!! :)

One nice thing is that this paint is self priming. It has a glowing hunter green look when you first apply it. Don’t worry, it will turn black, I promise! :) I had to paint three thick coats using a foam brush for the edges and a foam roller for the top. Then, I applied a coat of Polyacrylic sealer just to make sure it would be well protected. We also used a 150 grit sanding block to rough up the edges of the drawers giving this dresser a Pottery Barn-like look.

Here’s the before and after

And some close ups for you!

If you like what we’re doing, please like us on Facebook at: www.facebook.com/funcycled or share this on Pinterest!

Happy Redesigns!

Sarah


Posted on 6 Comments

Try, Try Again Argyle Dresser

This dresser is the heaviest dresser I’ve carried so far! Holy heaviness batman! It wasn’t in bad shape, but it had some scratches and the paint had yellowed (probably from using polyurethane instead of polyacrylic). I wanted to try this idea that I read about online using gift wrap paper on the top of the dresser. I found some fun paisley pink and teal paper and it inspired me to try doing a girls room dresser. The problem was, I HATED it. It was such a bummer at the end. All of that work and to feel like it’s not great in the end. Here’s it at the first “finished” stage.

I guess this could be someones cup of tea, but it just wasn’t mind. The paper bubbled all over the top. Other sites said that it would, but it would have a leather-like look. I disagree. I think it had a wrinkled paper look. Maybe they had a trick I didn’t, but I just couldn’t take how much I disliked it. So, I started again. This time I was doing it for our little Sweetie’s bedroom.

First, here’s all the products we used to redo the dresser the 2nd time.

Citri-Strip (it’s safe to use inside), Behr interior eggshell paint, Minwax Cherry Mahogany stain and poly, Rust-Oleum hammered brown spray paint, Martha Stewart’s metallic glaze – mercury satin, a plastic scraper (I forgot to put that in the picture), a foam roller and foam brushes.

This was my first time trying out the Citri-Strip based on recommendations I read about online. I thought it worked really well. The only tough part in this case is that I had some gift wrap that just wouldn’t come off so it made stripping the top very difficult. Use a paint brush to apply the stripper and let it sit for at least 30 minutes. Then use a plastic scraper to scrape it off. I used a metal one at first, but found the plastic to work just as well if not better.

The paint came off quickly and I redid this step about 3 or 4 times to get it all off. Then we hand sanded it to make sure it was ready to use the Minwax.

I then used the foam brush and roller to hand pain the bottom section. I mixed a tan and grey that I had to make a beautiful cream color. This is the first time I’ve used the roller and I LOVED it. No drips, spray, light spots. It takes a little longer than using an air sprayer, but still a good option for future projects.

I went to Hobby Lobby and bought an awesome argyle stencil. Her room already has argyle on her kitchen so I thought it would work well.

I mixed the grey (that I had mixed with the tan)  and the pink (that I had used for the first finished dresser) to make it a very light pink. I wanted it to almost blend with the current color on the dresser. I taped the template using painters tape and started painting.

I really love how it came out!

Then I used a foam brush to apply the Minwax to the top. While that was drying, I used the glaze on the bottom half to give it subtle depth. I also took the handles off and sprayed them with the hammered brown color. I went with hammered because they were pretty simple, and it added some character. Thanks to my mom for this one! She drove all the way to the store for me to get it even though she wasn’t feeling well herself. I was home with sick little monkeys so it meant a lot! :)

Here she is… the first step to Sweetie’s room makeover. You’ll see the rest of the room makeover as we go. Even if it takes me a year. What do you think??

If you like what we’re doing, please like us on Facebook at: www.facebook.com/funcycled or share this on Pinterest!

-Sarah


Posted on 2 Comments

Grey Dresser with Black Glazing

This was in great shape so it was a quick, easy makeover. Here’s a quick overview!

  1. Fill the top two handle holes with wood filler so I could make it one knob
  2. Lightly sand the whole piece
  3. Prime
  4. Used the air sprayer to paint it with a medium grey (satin)
  5. Prime and paint the handles black
  6. Glaze the edges with Martha Stewart’s dark glaze
  7. Cover the whole thing with a polyacrylic sealer

A couple shortcuts this project.
Put tooth picks in the handles to hold them up while spray painting them. It makes it a much faster step.
Put duct tape on each drawer and leave them in place while spraying the whole dresser.

Here’s the finished project!

If you like what we’re doing, please like us on Facebook at: www.facebook.com/funcycled or share this on Pinterest!

Happy Redesigns!

Sarah :)

Posted on 6 Comments

Tree Room Ideas

Right now we are working on a dresser for Sweetie’s room. This is the first step of her room redesign. I really want to repaint her room and put a tree on one wall. Here’s a couple sites that have inspired me so I thought I would share them to hopefully inspire you.

Hugh’s Room by Nest Design

Nursery for Baby Cragg

Levi’s Nursery Room via OhDeeDoh

Tiffany Thiessen’s baby nursery via Celebrity Babies

Marion House via Bloesem

Big Brown Tree via HGTV

Stella’s Room by lindebrowningdesign.com 

Wall Sticker by wallmuralgallery.com

Wall decal from Janey Mac – Vinyl Wall Decals

So, which one is your favorite?

Posted on 2 Comments

Shabby Chic Style White and Teal Hutch

This hutch redesign was fun and required some creative thinking. Thankfully, John and I like being creative. We drove almost an hour from home to buy this hutch from a nice family who had so kindly allowed Spiderman to live with them. I didn’t know Spiderman is 3, almost 4, and looks for lions in the jungle. :)

We liked the structure of the piece, but once we inspected it more closely, we noticed flaws we hadn’t seen when we picked it up. One was the fact that the right hand door didn’t meet the center wood piece. It would be a pain to fix and I thought that the doors made it too closed in looking. See the gap?

Also, I didn’t like where the handles were located on this piece. Not only on the top, but also on the drawers. I fixed the drawers by simply filling the holes with spackling compound, sanding them down and then priming over the whole piece.

To fix the top, I hammered off all of the front of the hutch. It actually came off pretty easily; no cutting required.

I primed the whole piece with the pale grey primer that I already had from the Red Hutch redesign. After that dried, the second step was to paint the entire hutch a warm white color. I had to let that dry and paint it a second time. I used a paint brush for all of these steps because I thought it gave the piece the antique, chic look I was going for. Next up, I put painters tape around each shelf so the teal I was painting on the back of each shelf wouldn’t get on the white.

I also added a stencil between both bottom drawers to give it a more sophisticated look.  This time I used a painting sponge instead of a paint brush and it worked much better.

See the cute knobs? I picked those up for $1.50 each on sale at the Hobby Lobby! Love the fleur-de-lis with the black showing through. That inspired me to distress the piece to bring out some of the original wood. So, I went at it with our electric sander. I tried using a sanding block, but it just wasn’t getting to the wood as quickly as I wanted. I know, so impatient! lol

Anyway, I found that if you use the side of the sander it gave me the look that I was going for. I went on all the edges of the shelves and drawers and then randomly on the sides and back of the hutch. Then we added white trim on either side of the front of the shelves to give it a more polished look. And what’s the last step? That’s right, Polyacrylic it with our sprayer. Are you ready for the finished beauty? Here she is!

Oh, and while I was taking the picture… my little beauty wanted her picture taken with it.

How can you say no to that? It was family movie time… hence the bowl of popcorn. :)
So, once again here is the before and after.

If you like what we’re doing, please like us on Facebook at: www.facebook.com/funcycled or share this on Pinterest!

Thanks,
Sarah

Posted on 2 Comments

A Splash of Teal Brings New Life

This buffet is actually the first piece of furniture John and I ever worked on together. When we first got married we had VERY little money  so our friends John and Devon gave us this buffet. It was almost that orange yellow wood color… not my idea of pretty. So we lugged it down the stairs of our 2nd floor barn apartment and bought a couple cans of spray paint and painted it black. Then headed off to the hardware store to grab new handles. It’s been almost 9 years now and it’s held up well. Thanks John and Devon! :)

Remember the beautiful California Poppy Red Hutch that we just finished??  Well, that took this oldies place in our dining room. As I was lugging it around to make room for the new hutch, I just couldn’t bare to get rid of it. I still love the look of it and it’s a solid piece of furniture. Ok, insert sentimental comment here. :) Anyway, we decided to give it a quick face lift instead and make it our entertainment center. It’s a simple, makeover that really gave our living room a unique look.

First, we sprayed the whole thing with a couple coats of black.

Then I decided I wanted teal, you know how I love teal! So, I put two strips of painters tape across the top (once I knew the black had time to really dry and set). I hand painted the teal with the same color teal I had hand mixed from the Pine Dresser. Trying to be thrifty and I LOVE the color. Have I mentioned that already?

I wanted to try out using stencils on this piece, as you know I like to try new things on my own pieces first. I bought a $2.99 stencil from Hobby Lobby and taped it on using the painters tape. I am not sure if this is the best way, but it seemed to do the trick for me. I just centered the stencil to the hole where the knob was going to go. I should have used a sponge to dab the paint on, but I used a paintbrush. It made it a bit of a pain, but it still turned out well. I’ll just remember that for next time.

And voila, the pop of color I was looking for!

Ok, time to seal it twice (three times on top because I know my kids will beat it up with swords, etc). Here’s the finished project.

Oh, and another thing I was reminded of while doing this project. It’s REALLY hard to get good pictures of black furniture. I’m not sure why, but it’s true…. this is so much cuter in person.

Once I have my new TV and everything looking pretty, I’ll post a picture of it in my living room. Now, time for you to go make something old look like something new for less than $10. Enjoy!

If you like what we’re doing, please like us on Facebook at: www.facebook.com/funcycled or share this on Pinterest!

Hope your enjoying a restful Sunday!
Sarah


Posted on 6 Comments

How to Repaint a Hutch

My next furniture project came from my dear friend, Lara. When I was a little girl, she was a teenager  who went to the same church as I did. I remember watching her and admiring her joy, beauty, compassion, and love for God. She was kind to me even though I’m sure back then most would have considered me to be just another annoying little kid. Now we’re both married with kids and I still admire her and am so thankful for her friendship. She has had this hutch for years, but she is remodeling her kitchen and it will no longer fit. It’s a monster! It’s so big, I couldn’t stand both pieces up in my basement! So, I’m sorry for the not so great before pictures.

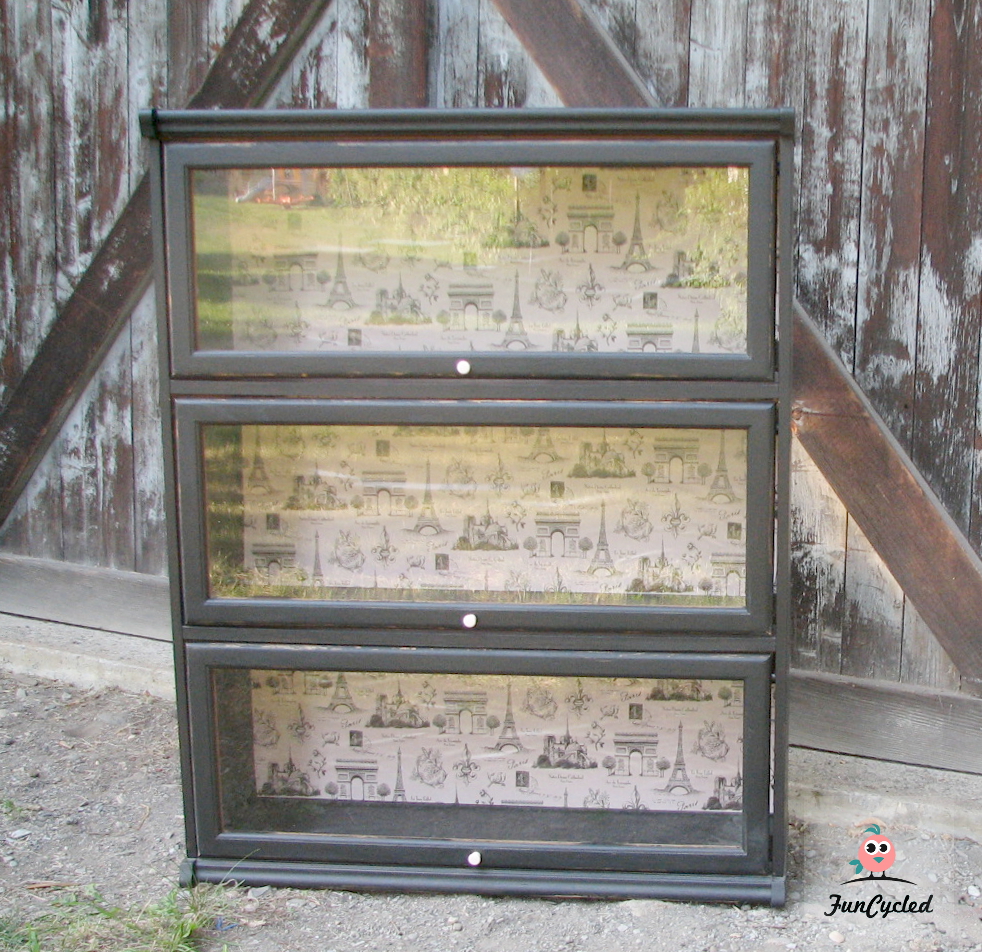
I had already started filling the deep holes with spackling compound and then remember I hadn’t taken  a before picture. Why do I always forget the before pictures? The top doors of the hutch had screws that held the glass in and the decorative grating behind the glass just popped right out. I didn’t want to keep the grating because I thought it gave the piece a dated look.

After prepping the hutch by cleaning it and sanding the spackling compound, I headed to our local Home Depot store. I spent WAY to long trying to find the right type of red paint. My couch and the chandelier in my dining room are red. It had to match with them, but not be too bright or too orange. When looking online at red hutches there were only a  couple that (in my opinion) had the perfect red. Anyway, I narrowed it down to either California Poppy or Red Licorice. After asking my friend Jo Ann and the older gentleman who was the greeter at Home Depot, I went with the California Poppy. I was going to buy the Behr primer and satin paint in one, but a really helpful lady working in the paint department named Nancy changed my mind. She recommended that I use a grey primer and then painted with a primer and satin Behr in one paint. I took her word for it and I must say it covered REALLY well! Thanks Nancy!
Since I loved this piece so much and knew that I wanted to keep it for myself, I tried some new tricks to see how they worked. Normally I’m nervous about trying shortcuts with something I’m going to sell. First, I left all the doors on and spray painted it with primer and one coat of the Beehr California Poppy paint using our air sprayer. I didn’t want to have to take the doors off and wait for each side to dry for so long and have to do that 3 times each side. I also knew that I wanted to paint the handles anyway so I might as well prime them while I was at it. Another shortcut was to put duct tap (or thick painters tape if you have it) all the way around the drawer so I could paint the drawer without having to take the drawer out of the piece. Also, I didn’t want the paint to spray inside the drawer either. I taped it and then kept it open about 1/2 inch as I painted.

Both of these shortcuts worked really well. I will definitely be doing this again whenever possible. I started by priming everything with the grey primer.

After I did the whole thing grey, I almost changed my mind and wanted to pain the hutch grey, but John told me to trust my gut and go with the red. That man is perfect for me! :) So, I got started painting the red! This was the red after the second coat. Pretty fire hydrant red, right?? To be honest, I was a little nervous about how bright it was.

But then I started glazing it. I used a little different technique when glazing this piece by using a foam brush and putting quite a bit of Martha Stewart’s Coffee Glaze glaze all over the detailing and edges and some on the smooth surfaces.

 
I worked in small sections and left the glaze on for 10 minutes and then smudged it off until it had the look I wanted. Since all the hinges and knobs were off at this point, I spray painted all of them (even the screws) a flat black. I like that each piece had red already painted on it, it gave them an antique look.
You’ve probably already noticed, but I left the inside of the top and bottom of the hutch the medium grey color. I liked having it a different color inside the glass doors. It made everything inside stand out.
Here she is… all happy in my little dining room!

And of course I had to show it to you with all my stuff in it! :) Thank you, Lara, for the hutch! I love, love, love it.

If you like what we’re doing, please like us on Facebook at: www.facebook.com/funcycled or share this on Pinterest!

Thanks,
Sarah


Posted on 4 Comments

Modern Tree Coffee Table

This was a really fun coffee table redesign! I wanted to push myself to try something new. We got this at a yard sale two summers ago. Sad, I know, that it sat for so long. Let’s get right to it, shall we? Here’s the before picture.

I didn’t mind the color and I liked the style, but I wanted to give it a modern feel. I forgot to take a picture of the underneath, but the whole thig was colored with markers and crayons. Believe it or not even primer wouldn’t cover it! So, I had to paint the underneath black as well. I was toying with the idea of making the picture on a piece of furniture by having the wood be the image color; kindof like backwards stenciling. I wanted to make a tree that had a modern feel, but I also wanted to add a bird. Just in the mood. So, I went to Hobby Lobby and bought contact paper and a swiveling X-acto knife.
I originally wanted to keep the outside edges brown so I put duct tape down in a square. I know, don’t use duct tape. John took the painters tape to work on the apartment so I didn’t have it. Hence, I gave duct tape a try. Believe it or not, it worked well (not that I’m officially recommending it). It would take paint off if you tried to use it on something painted.

Ok, this is a really bad picture, but I could not get it to come out well. I laid the contact paper down on the table and hand drew how I wanted the tree to look.

Once it was the right size and I liked it, I moved it to another table and put an old piece of Sheetrock underneath it, and got my cutting on. Then, I placed it onto the table very carefully. This took four hands, thanks Johnny. ;) Then I pressed all the edges down to make sure there were no air bubbles. I painted over the whole thing with a cream color.

I waited about 15 minutes until the paint was tacky and pulled the contact paper off. Are you ready for it??

Cool right?? Then, I wanted to add black around the border. So, this time I made another trip to Hobby Lobby and bought actual painters tape that was thinner. Then I painted the rest of the edges black. All of the painting on this piece was done by hand using a regular paint brush.

Then, I sprayed it three times with Polyacrilic just to make sure it was sealed well.

So, as my three year old son would say… How you think?? Oh, and this one sold in less than a day on craigslist. Thank you for buying it, Angela!!

If you like what we’re doing, please like us on Facebook at: www.facebook.com/funcycled or share this on Pinterest!

Sarah