My next furniture project came from my dear friend, Lara. When I was a little girl, she was a teenager who went to the same church as I did. I remember watching her and admiring her joy, beauty, compassion, and love for God. She was kind to me even though I’m sure back then most would have considered me to be just another annoying little kid. Now we’re both married with kids and I still admire her and am so thankful for her friendship. She has had this hutch for years, but she is remodeling her kitchen and it will no longer fit. It’s a monster! It’s so big, I couldn’t stand both pieces up in my basement! So, I’m sorry for the not so great before pictures.


I had already started filling the deep holes with spackling compound and then remember I hadn’t taken a before picture. Why do I always forget the before pictures? The top doors of the hutch had screws that held the glass in and the decorative grating behind the glass just popped right out. I didn’t want to keep the grating because I thought it gave the piece a dated look.
After prepping the hutch by cleaning it and sanding the spackling compound, I headed to our local Home Depot store. I spent WAY to long trying to find the right type of red paint. My couch and the chandelier in my dining room are red. It had to match with them, but not be too bright or too orange. When looking online at red hutches there were only a couple that (in my opinion) had the perfect red. Anyway, I narrowed it down to either California Poppy or Red Licorice. After asking my friend Jo Ann and the older gentleman who was the greeter at Home Depot, I went with the California Poppy. I was going to buy the Behr primer and satin paint in one, but a really helpful lady working in the paint department named Nancy changed my mind. She recommended that I use a grey primer and then painted with a primer and satin Behr in one paint. I took her word for it and I must say it covered REALLY well! Thanks Nancy!
Since I loved this piece so much and knew that I wanted to keep it for myself, I tried some new tricks to see how they worked. Normally I’m nervous about trying shortcuts with something I’m going to sell. First, I left all the doors on and spray painted it with primer and one coat of the Beehr California Poppy paint using our air sprayer. I didn’t want to have to take the doors off and wait for each side to dry for so long and have to do that 3 times each side. I also knew that I wanted to paint the handles anyway so I might as well prime them while I was at it. Another shortcut was to put duct tap (or thick painters tape if you have it) all the way around the drawer so I could paint the drawer without having to take the drawer out of the piece. Also, I didn’t want the paint to spray inside the drawer either. I taped it and then kept it open about 1/2 inch as I painted.

Both of these shortcuts worked really well. I will definitely be doing this again whenever possible. I started by priming everything with the grey primer.

After I did the whole thing grey, I almost changed my mind and wanted to pain the hutch grey, but John told me to trust my gut and go with the red. That man is perfect for me! :) So, I got started painting the red! This was the red after the second coat. Pretty fire hydrant red, right?? To be honest, I was a little nervous about how bright it was.

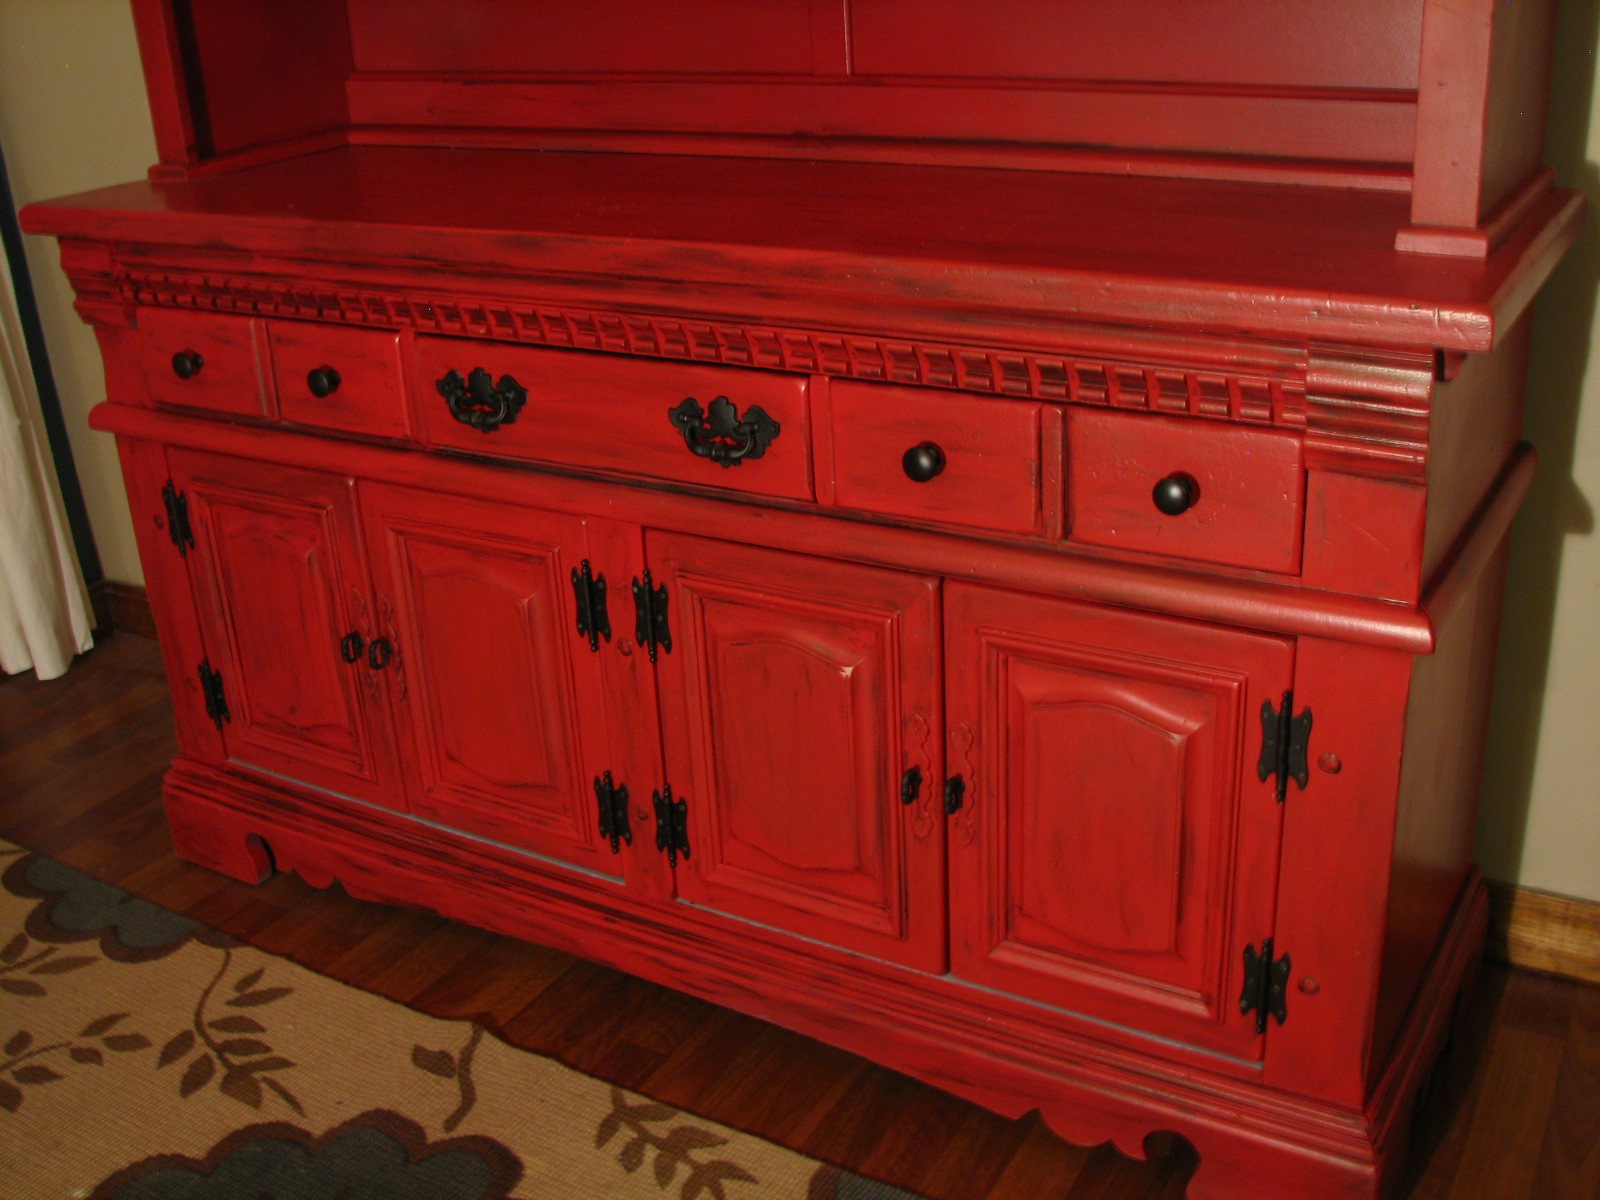
But then I started glazing it. I used a little different technique when glazing this piece by using a foam brush and putting quite a bit of Martha Stewart’s Coffee Glaze glaze all over the detailing and edges and some on the smooth surfaces.


I worked in small sections and left the glaze on for 10 minutes and then smudged it off until it had the look I wanted. Since all the hinges and knobs were off at this point, I spray painted all of them (even the screws) a flat black. I like that each piece had red already painted on it, it gave them an antique look.
You’ve probably already noticed, but I left the inside of the top and bottom of the hutch the medium grey color. I liked having it a different color inside the glass doors. It made everything inside stand out.
Here she is… all happy in my little dining room!


And of course I had to show it to you with all my stuff in it! :) Thank you, Lara, for the hutch! I love, love, love it.
If you like what we’re doing, please like us on Facebook at: www.facebook.com/funcycled or share this on Pinterest!
Thanks,
Sarah

I think this is my favorite piece you’ve done. It has a great retro flair. And your rug is pretty great- someone pretty cool must have given it to you. ;)
So beautiful! So happy I chose you to make a home for this piece! Love you, Sarah!
Nice! I love the white inside and the glass bottles.
Thanks! Oh, and thanks for taking the time to look at our blog. :) Means a lot!
Beautiful job !! Love love the red…. You asked why do I always forget the before pictures ? I a lot of times forget that very important part to, and it’s because I get so excited to hit that brush on a new project .. And I am thinking that’s why you forget as well :) again awesome job on the hutch …
I am doing the same effect on my cupboard n china cabinet! Your hutch looks great! Wish me luck!