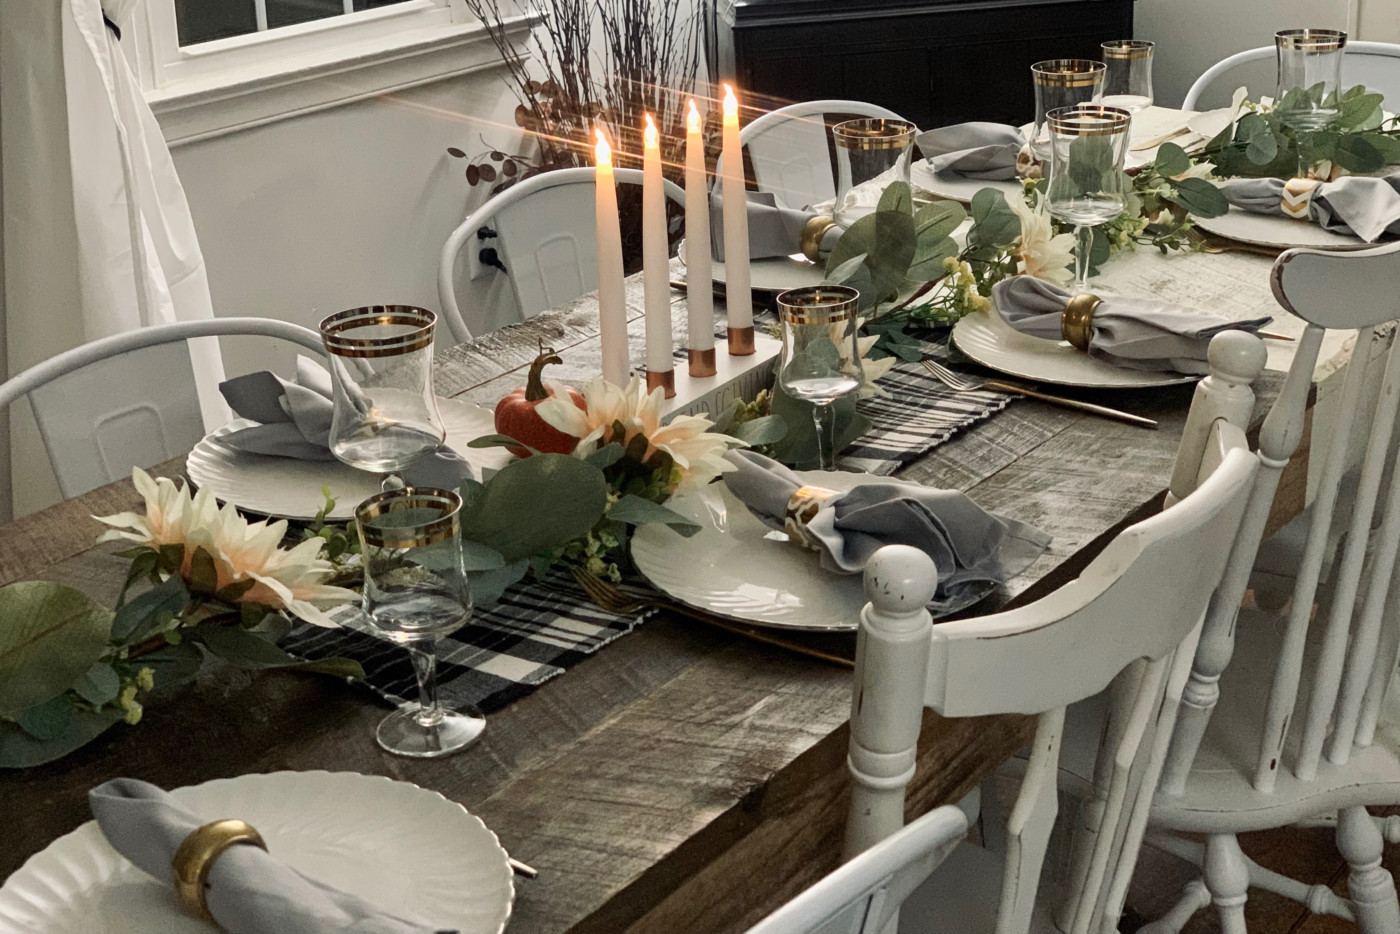
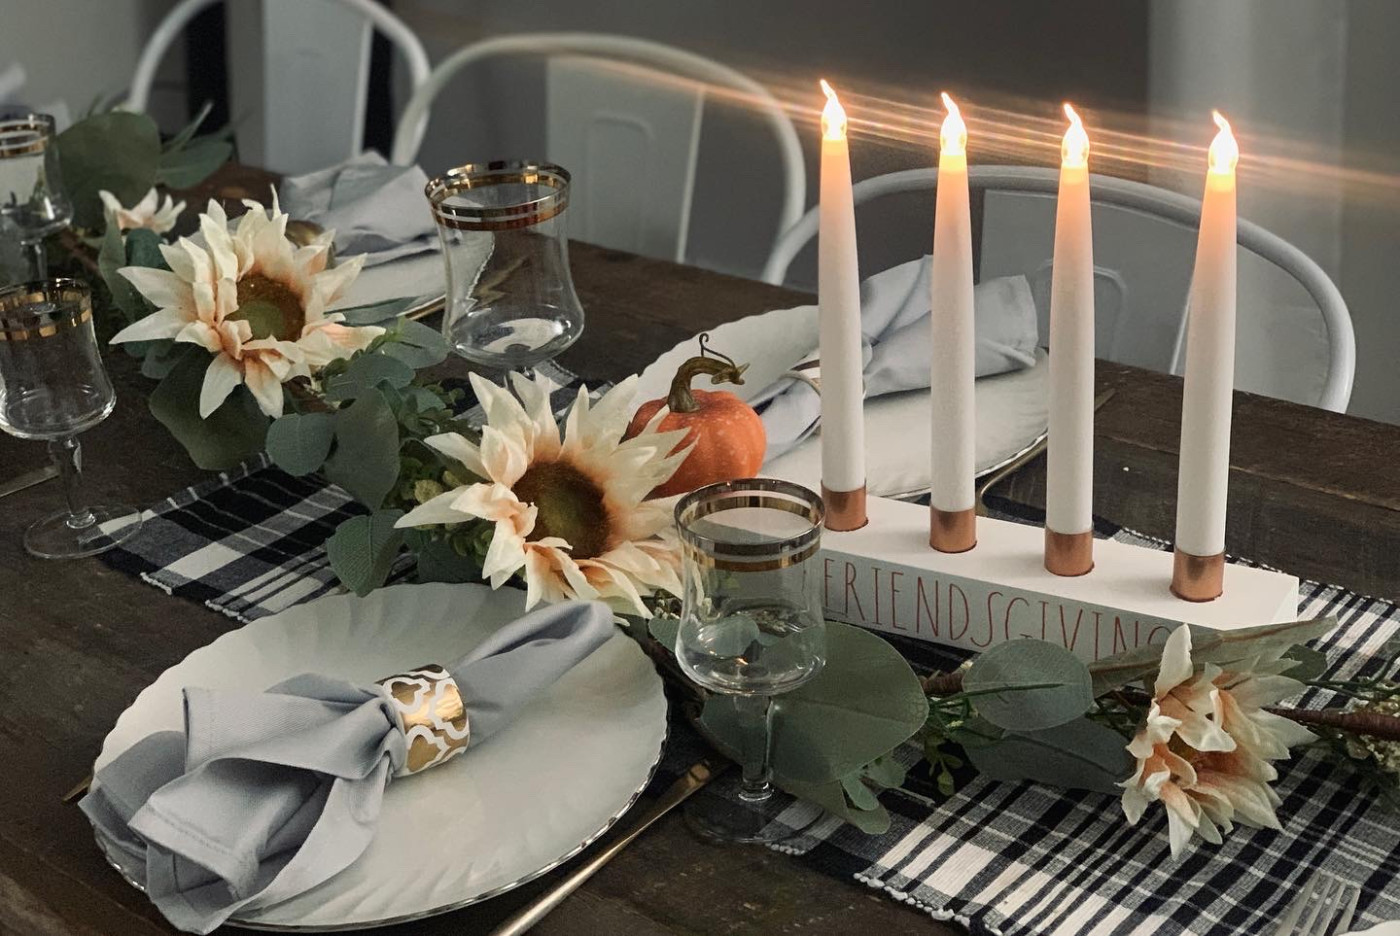
How are you? I hope you had a nice Thanksgiving!! We had a beautiful day with family and friends. Here’s a little sneak peek of the table settings we did that day!
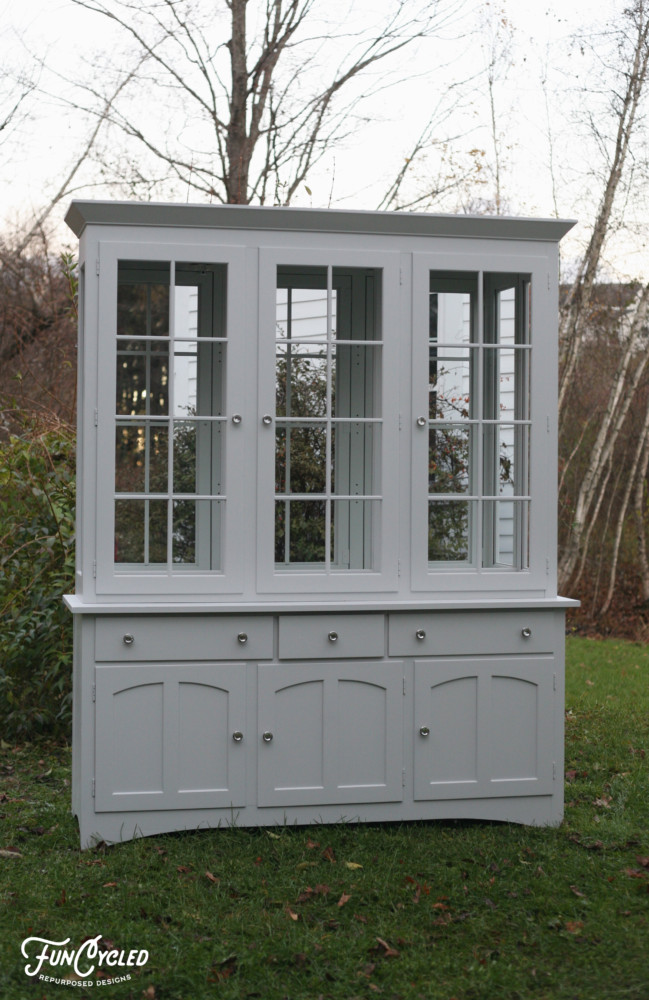
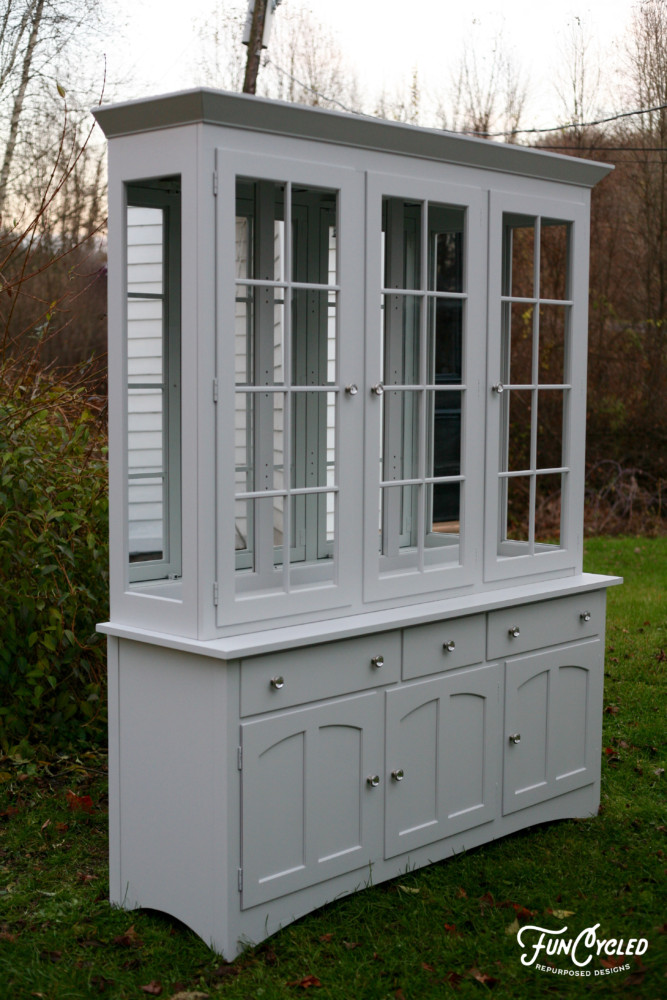
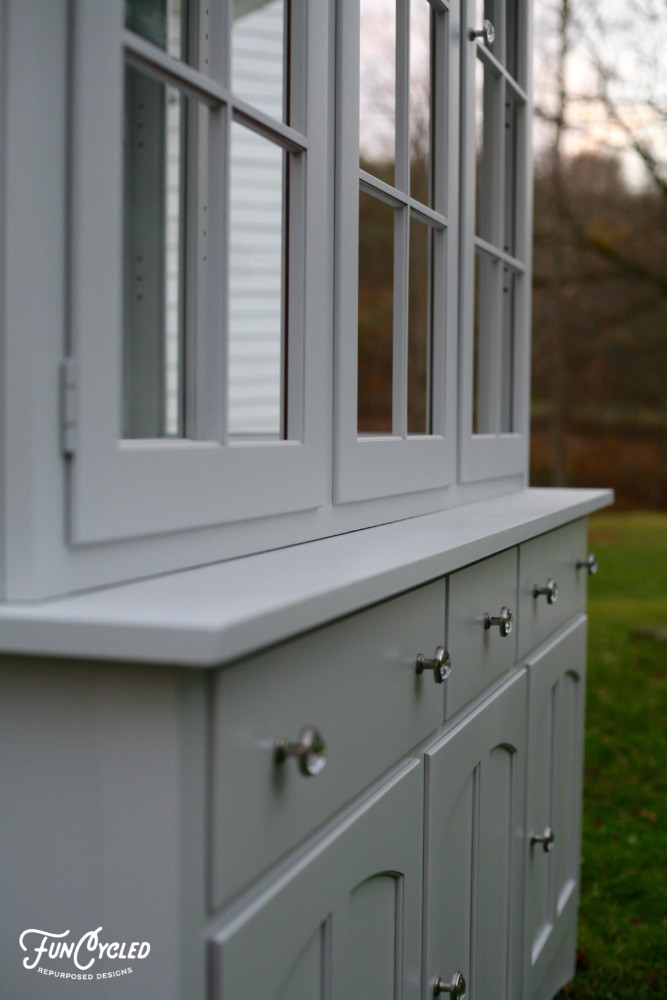
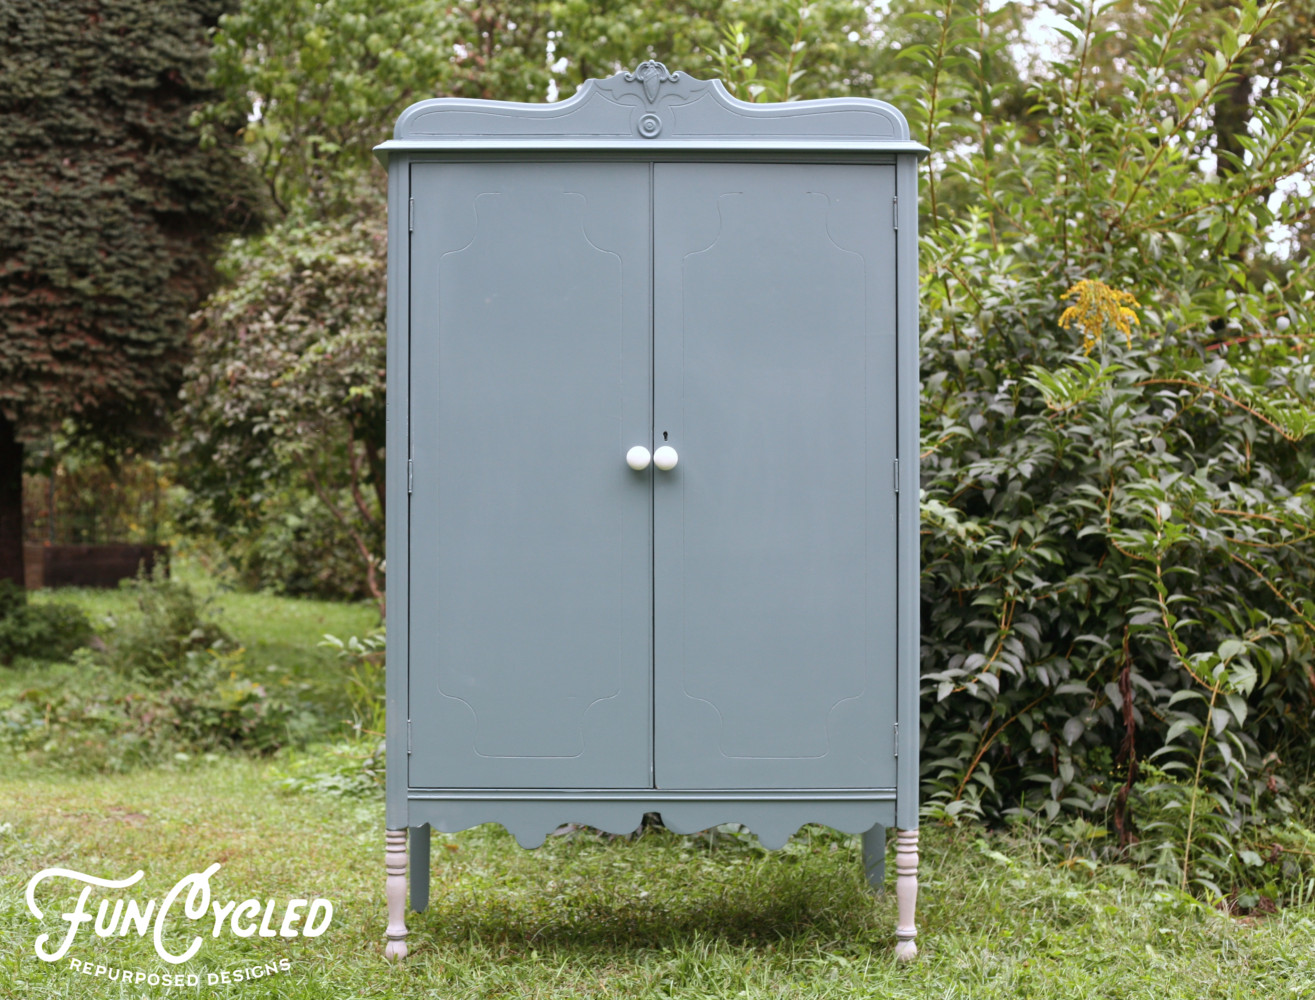
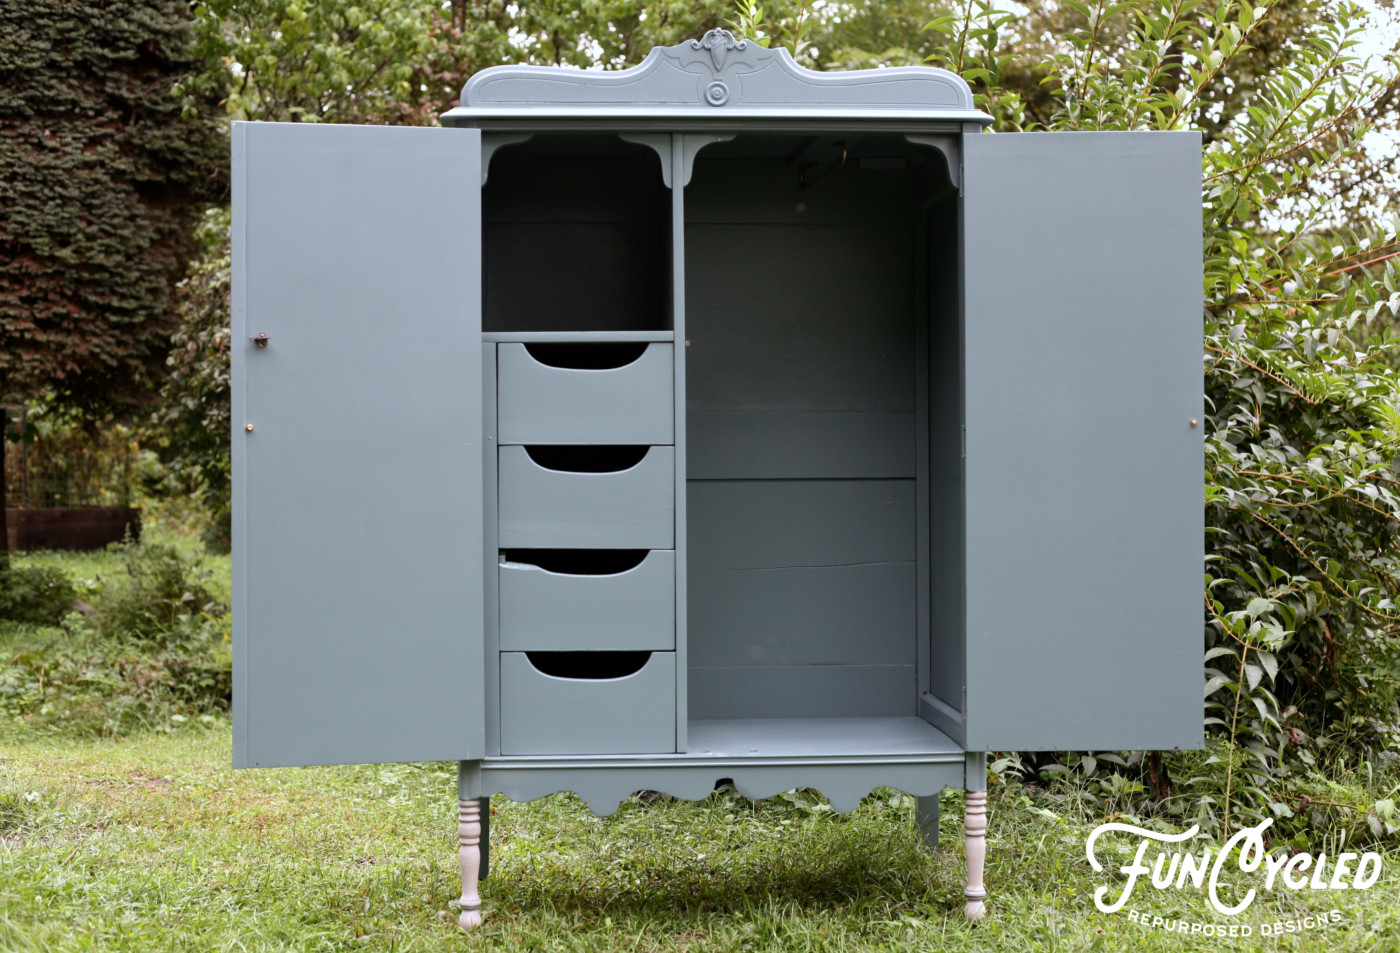
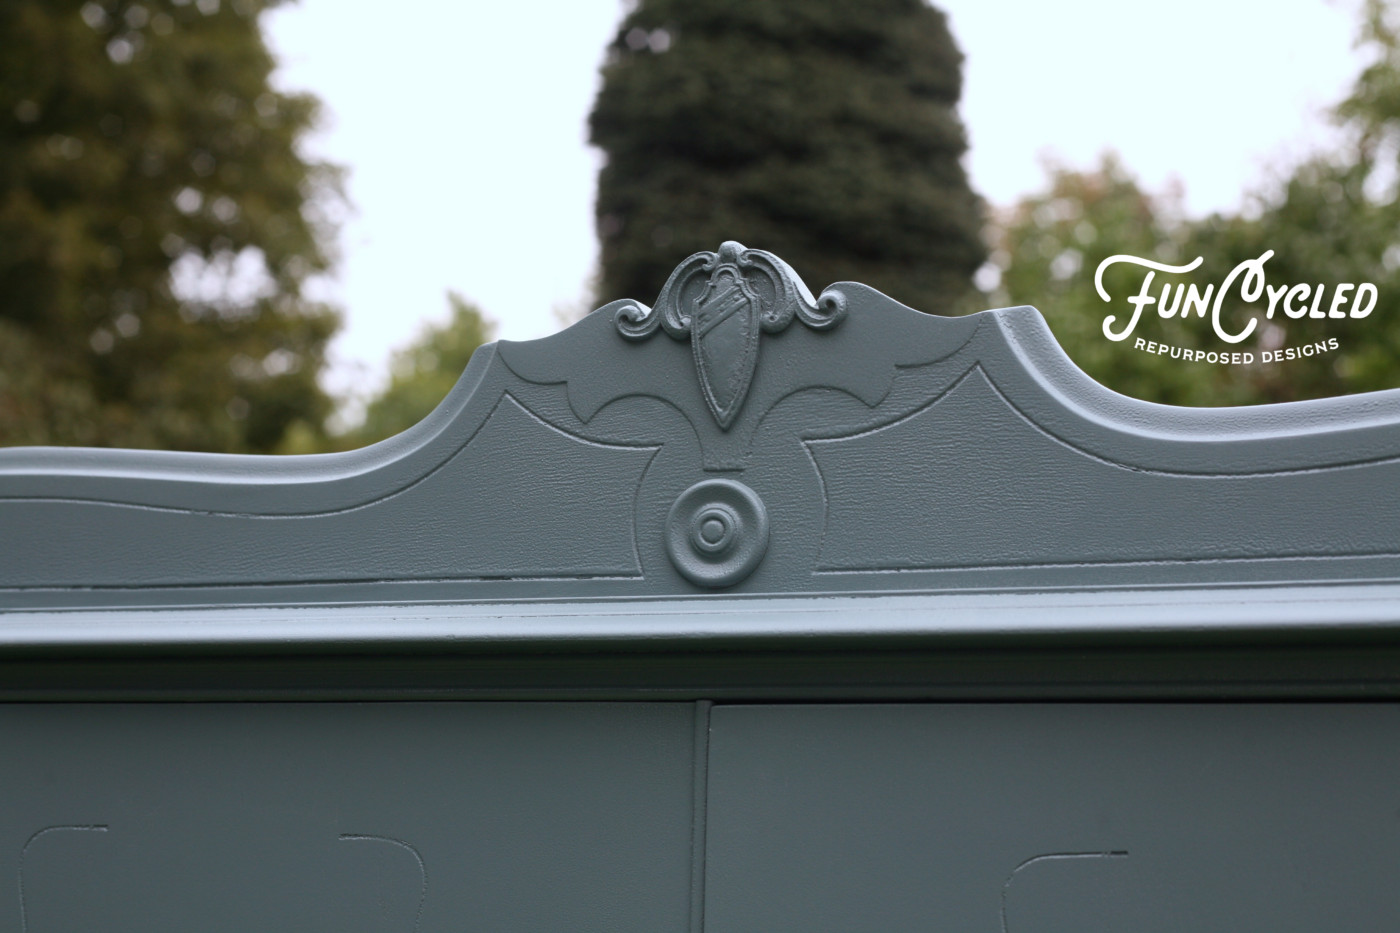
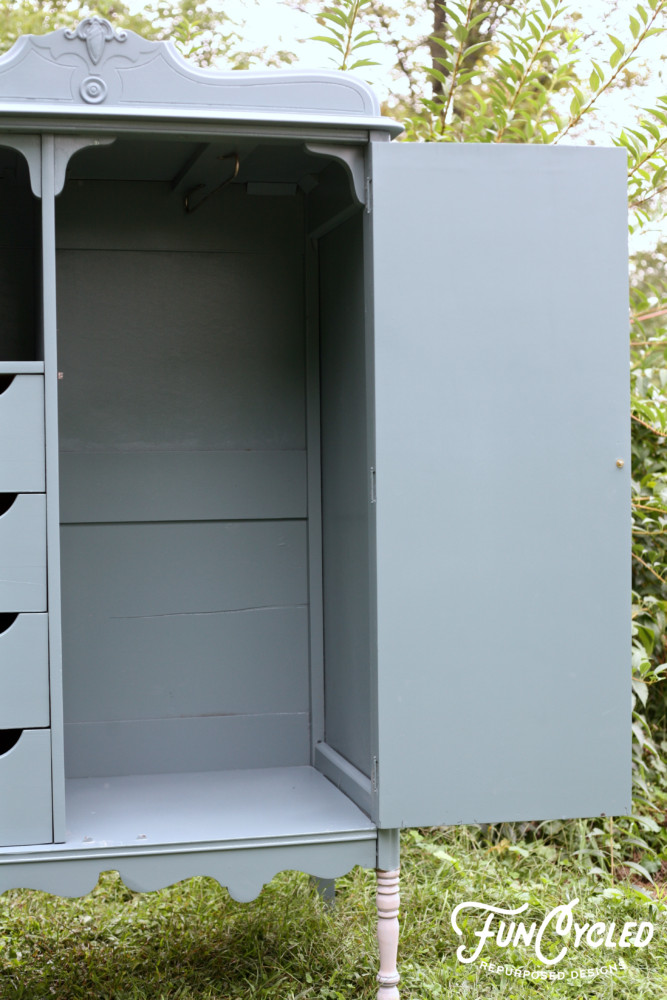
For this week’s makeover, I’m sharing a recent hutch project that we did as a custom order.
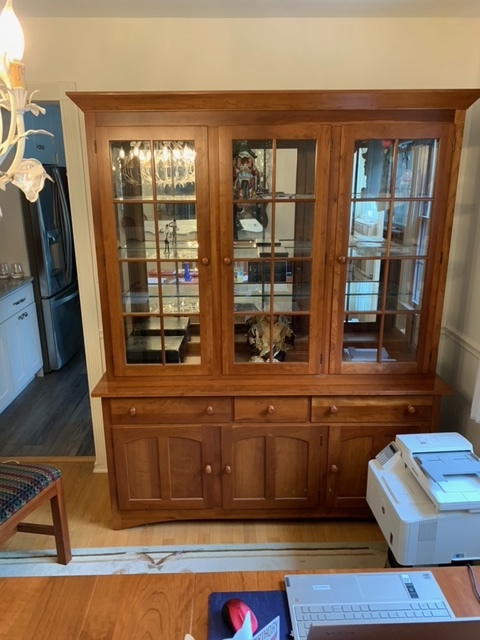
Here’s the hutch before:
We painted the hardware white and painted the boxes Stonington Gray by Benjamin Moore. If you want to see how we paint furniture, check out our How to Paint Furniture post. Ready for the after photos?
This hutch was a custom order so it isn’t available purchase! Head to our Shop Page to check out the other items available though!
Thank you all for following along! If you’d like to get this blog in your email once a week, please sign up for our weekly newsletter by adding your email in the little box below my picture.
If you’ve enjoyed this post, please like FunCycled on Facebook, Instagram and Pinterest if you don’t already. Keep up to date on the newest finds, vote on colors and give your input on our creativity. We share fun tutorials, great before and after, and new design inspirations.
We offer interior design, kitchen cabinet painting, and custom built tables, barn doors, and repurposed furniture. Thank you, again, for working with us and for taking the time to spread the word about what we do.
How’s your week going? We’ve had some changes on the home front over the last few week to hopefully simplify life a bit and give me more time to focus on FunCycled. I’m really excited about those changes and the focus that it allows me to have. I’ll share more about it soon, but today, I wanted to share a recent furniture makeover that was so much fun to do!
I was working with a design client to redo a sitting area in her house. One of the things that sets me apart as a designer is that I always try to curate new designs using items in my clients home that have meaning or significance. I love to repurpose old items into show stoppers if we can and for this client… I think we did just that.
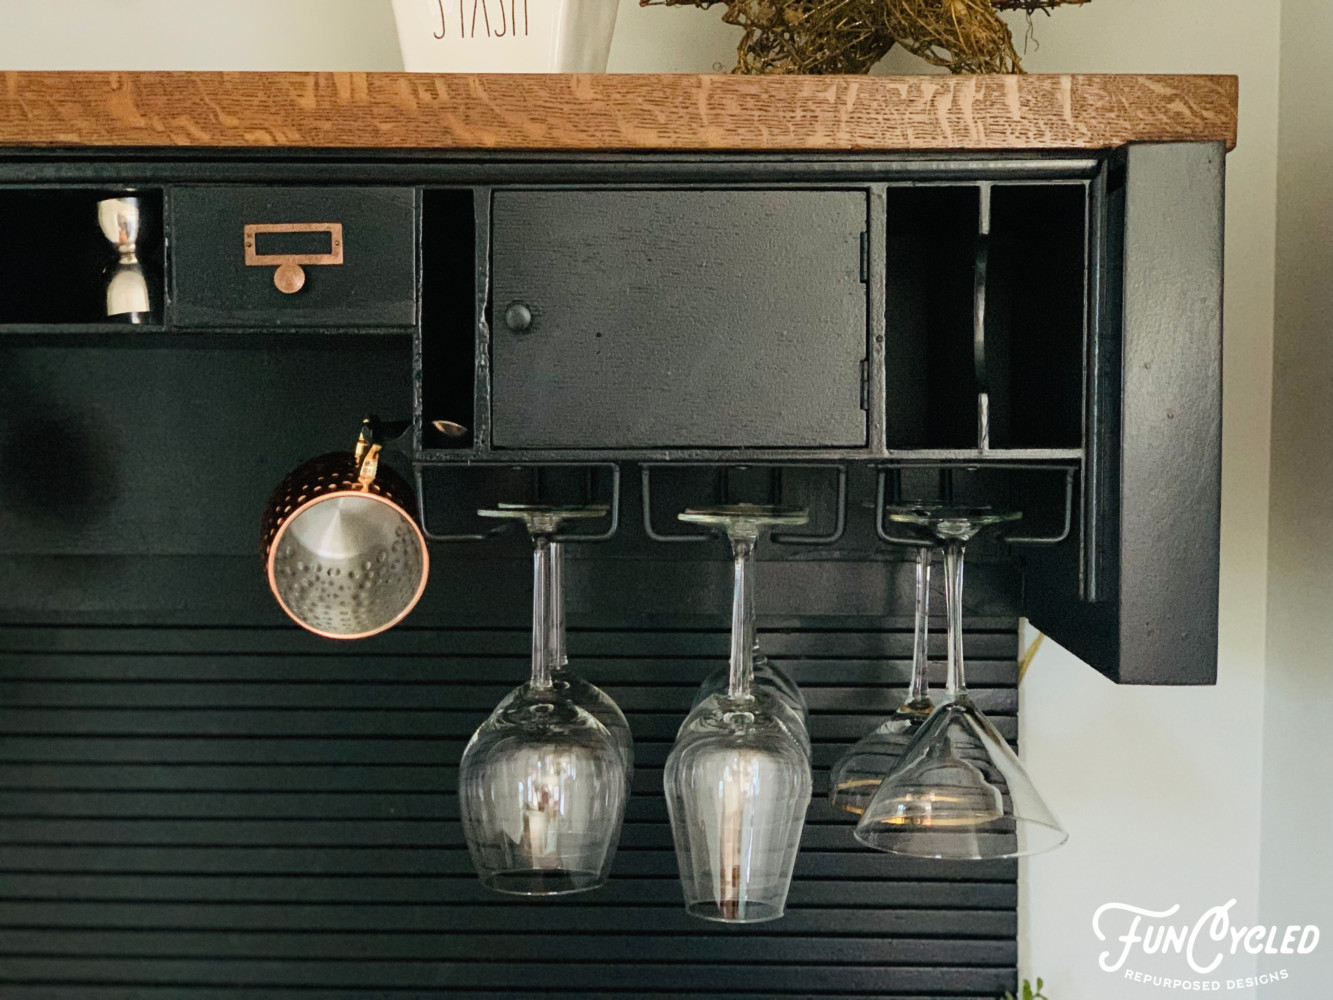
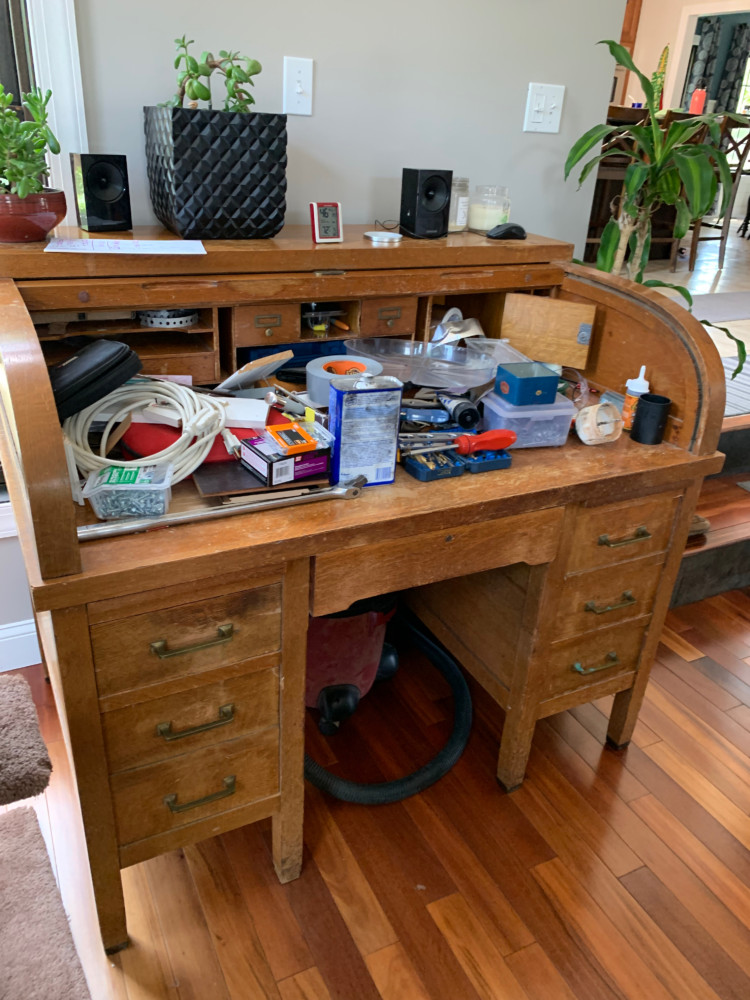
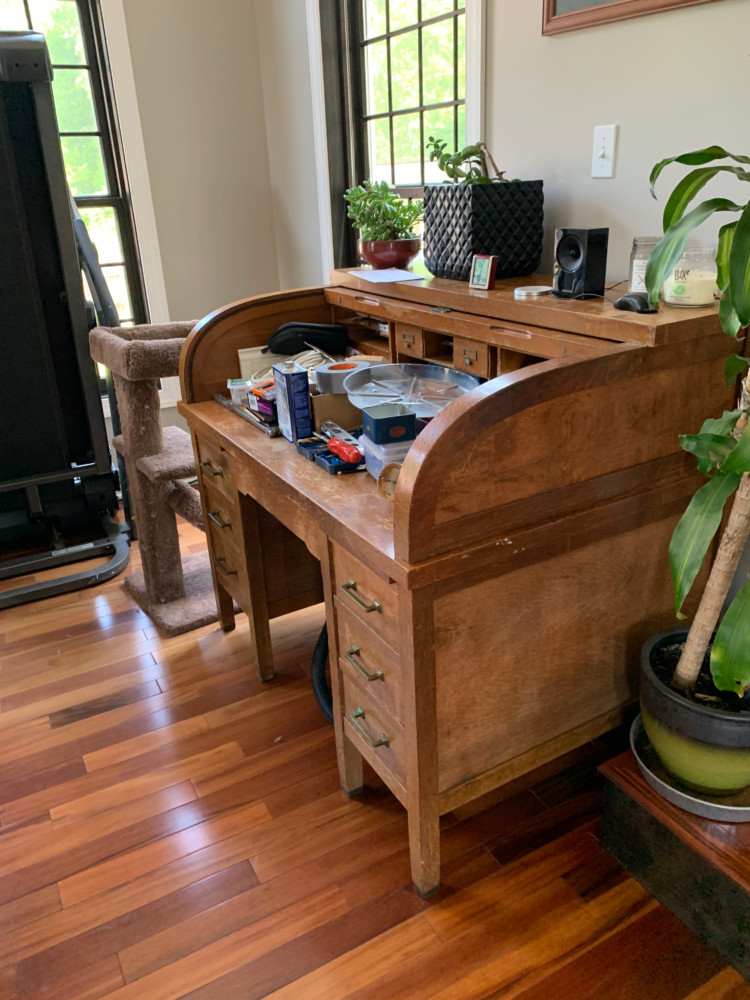
She had wanted a wine bar and as we talked about different ways to make that happen, I asked if she’d be open to repurposing the roll top desk she already owned into a wine bar. I could just picture it right away! This desk has been in their family for years so she really didn’t want to get rid of it. She was game for using it in a new way though. Yay!
Here’s the desk before:
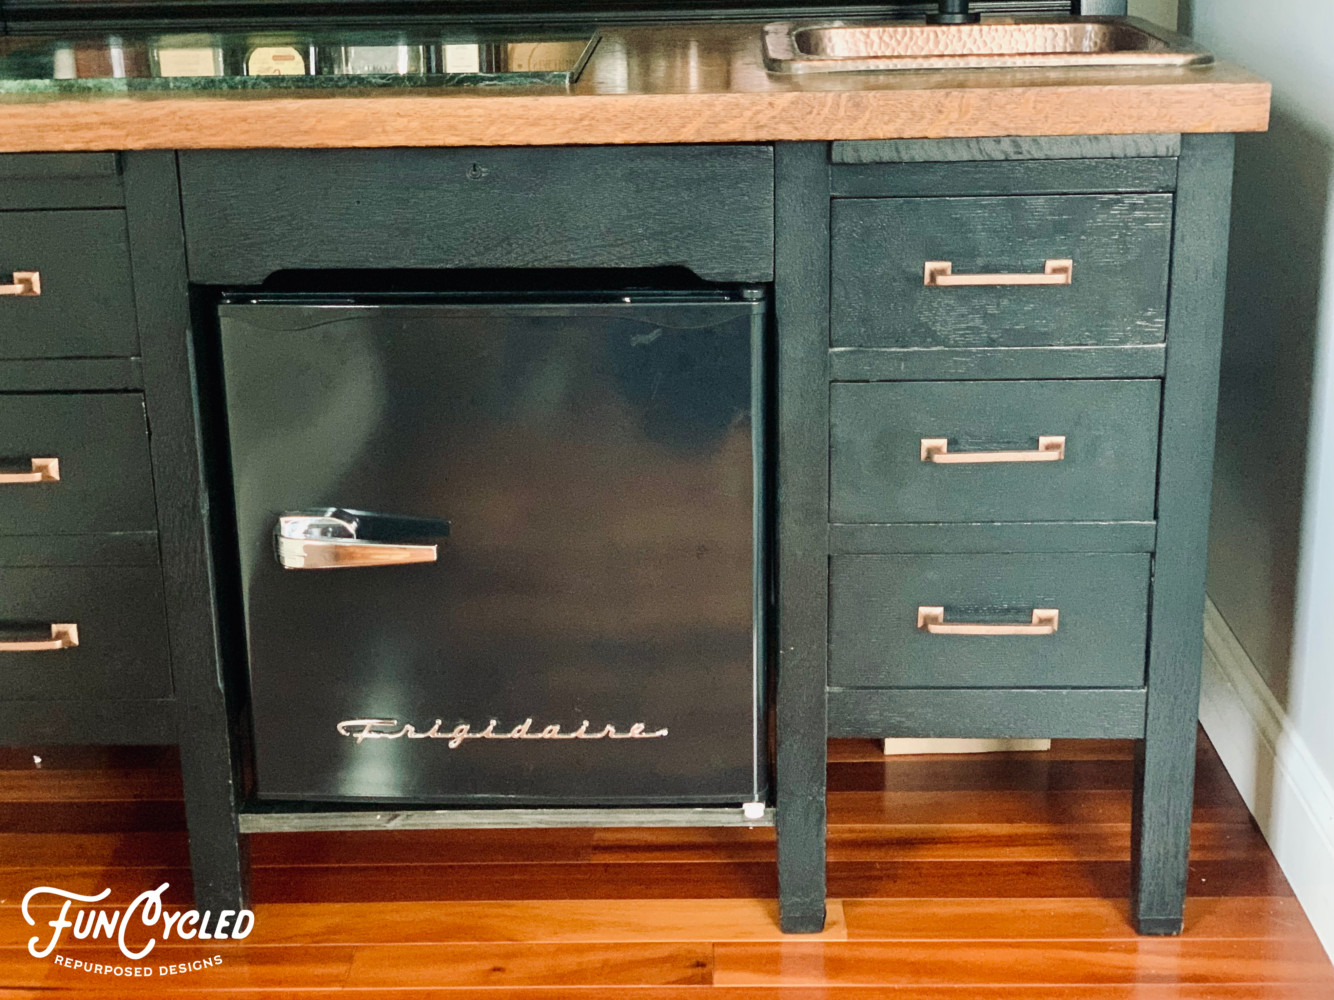
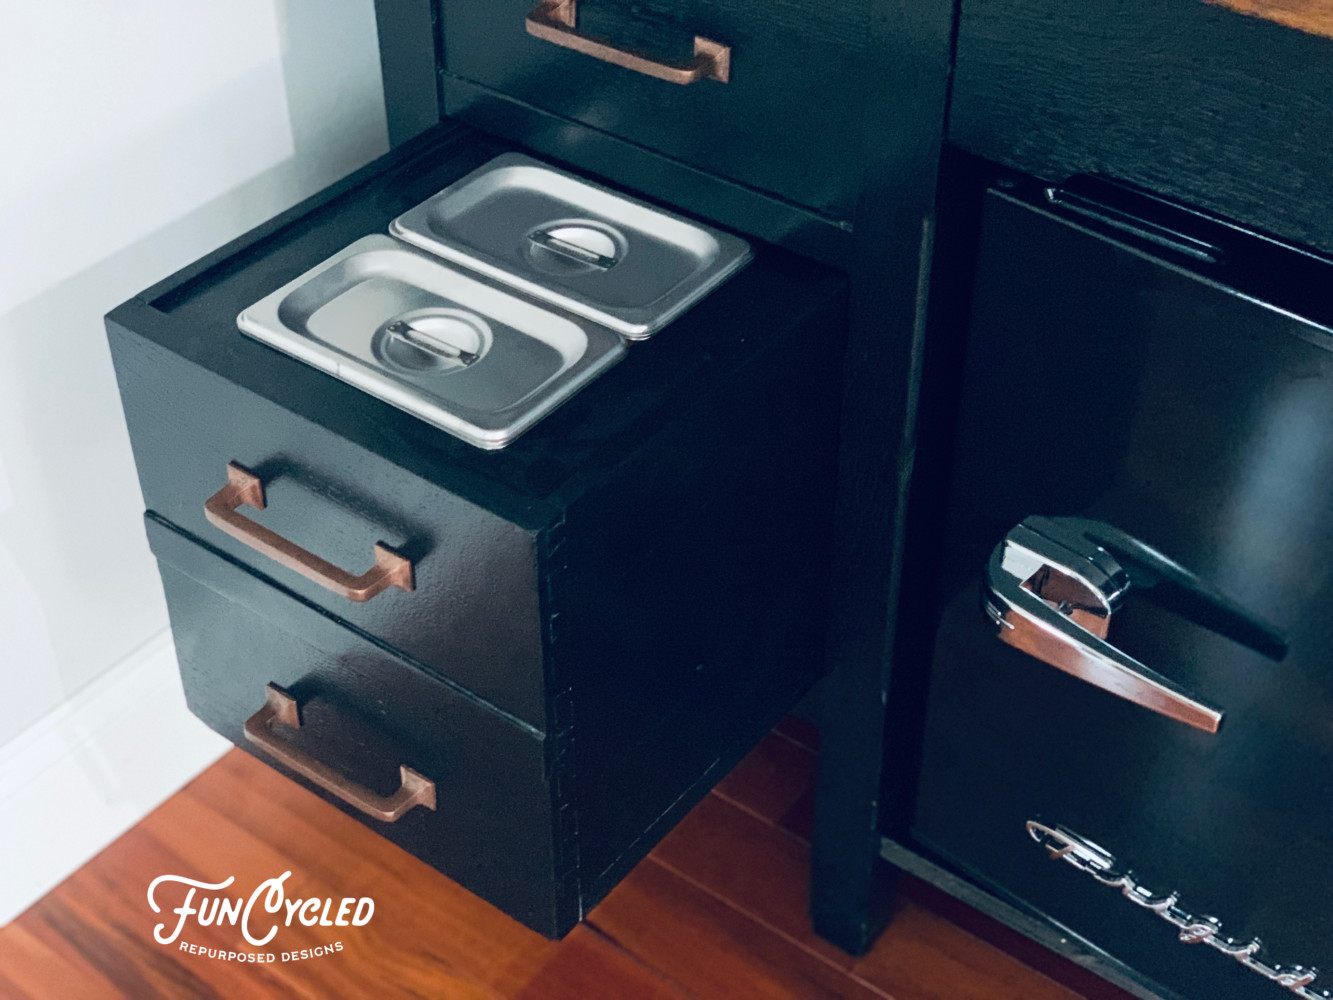
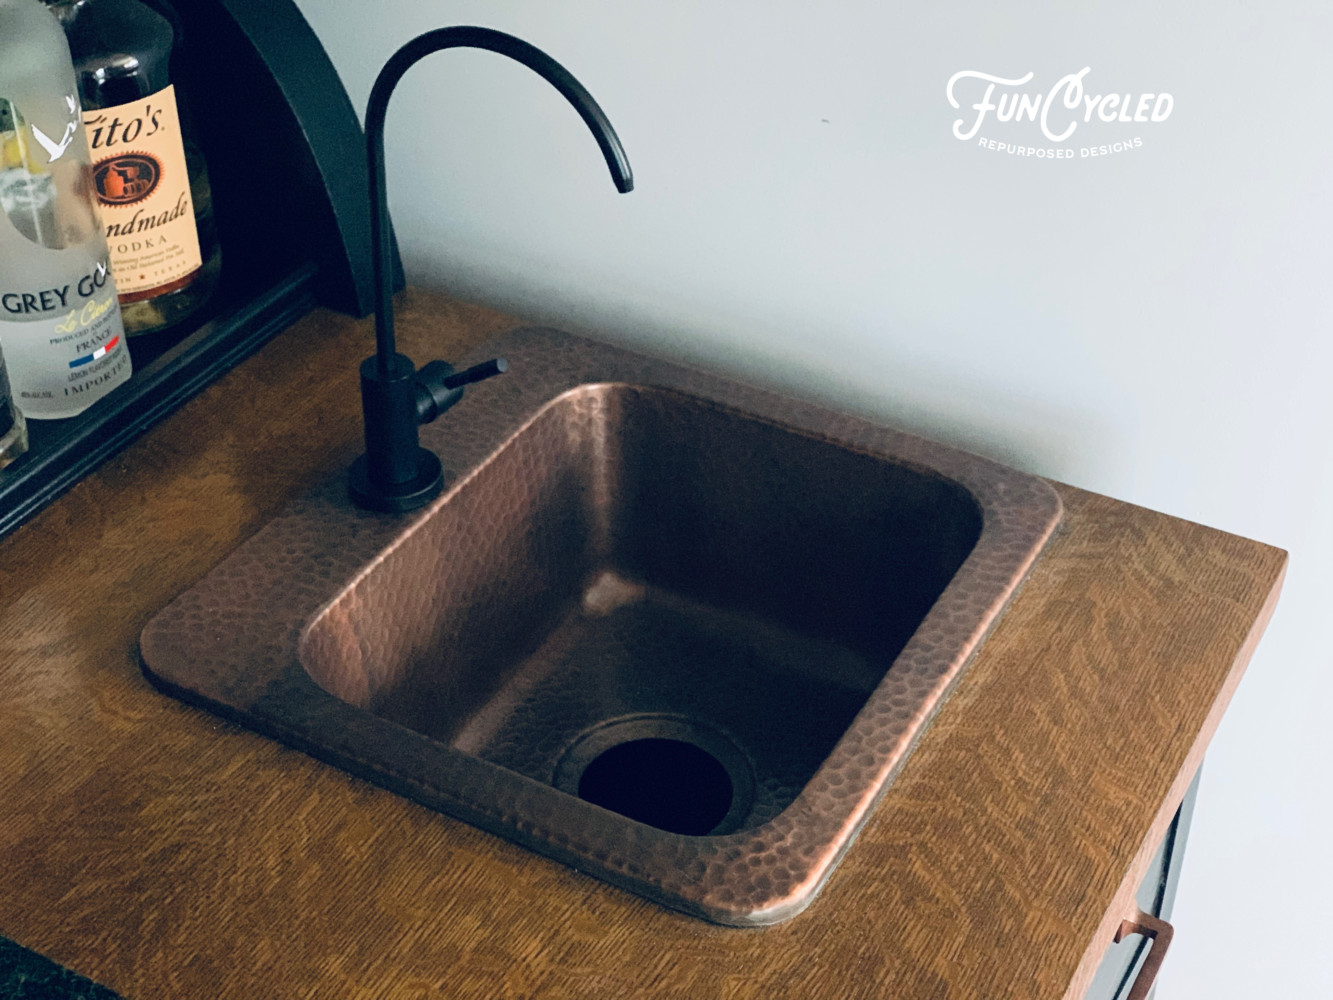
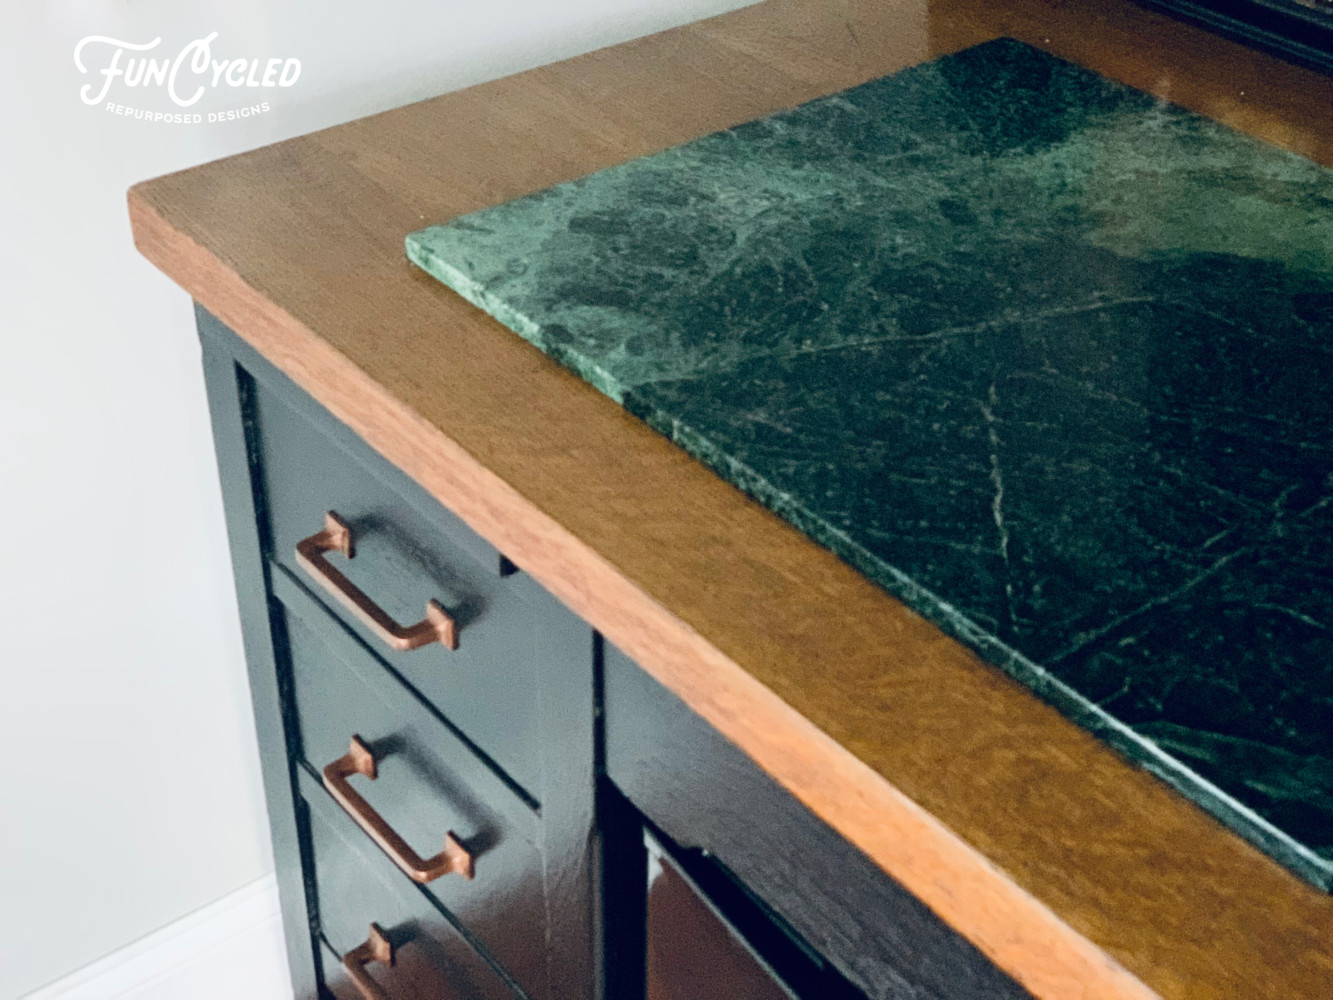
We talked through what they would like the wine bar to have. A fridge, food storage bins, a sink, a cutting area, and a place to store liquor bottles and glasses.
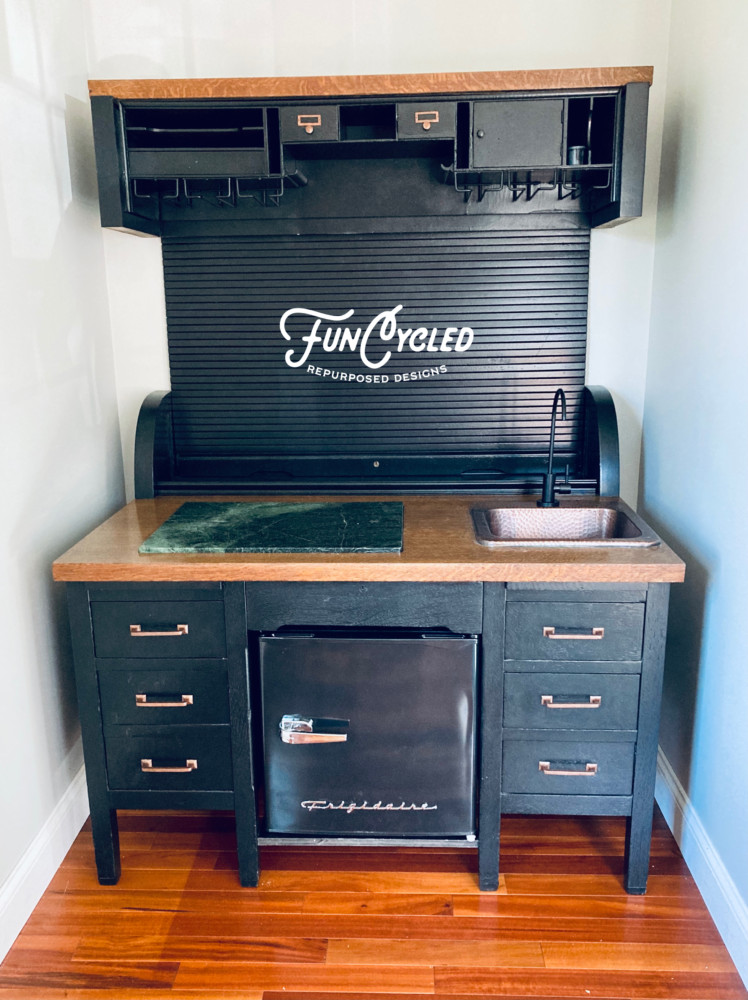
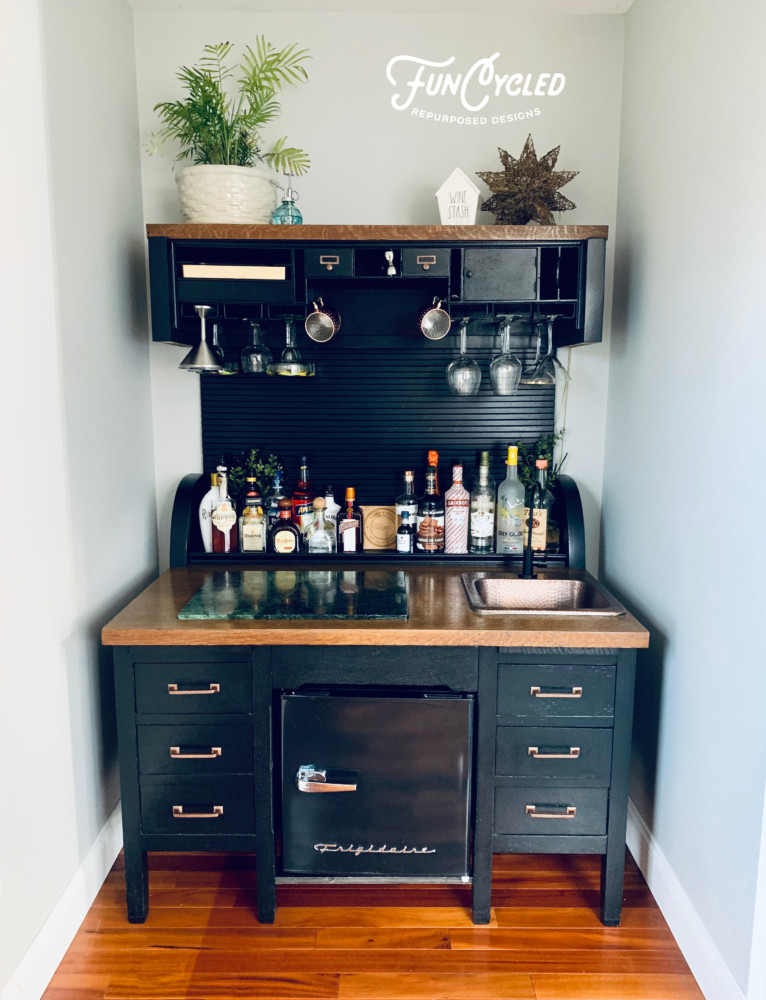
As you’ll see in the next photos, we did the following alterations:
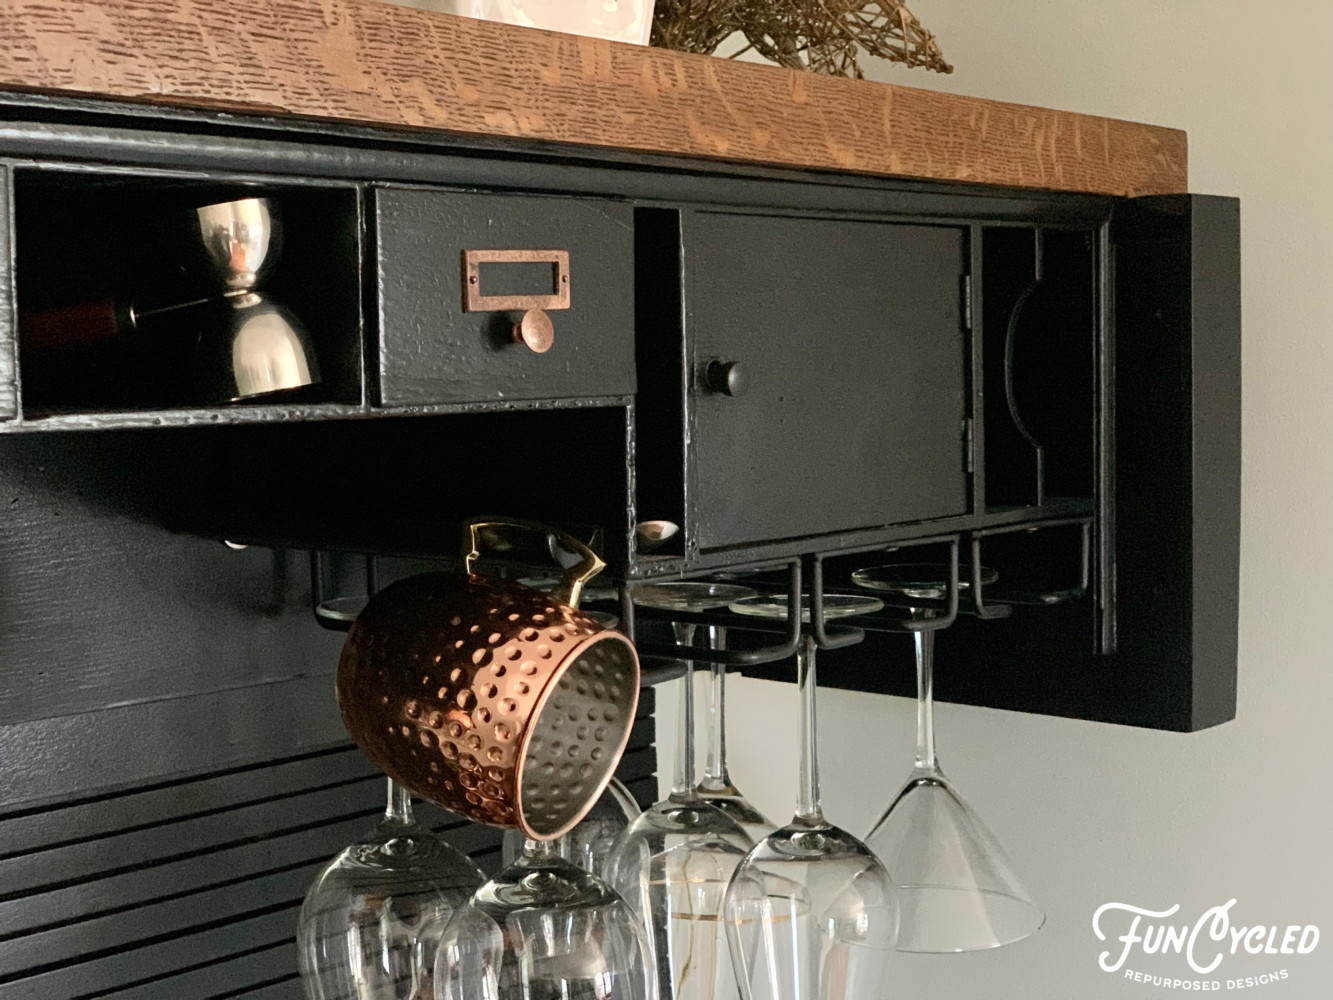
We took the roll top section and made it the backsplash for the wine bar.
We took the top of the desk, refinished the top and painted the rest, added wine glass hangers, and attached it to the wall.
We installed soap stone on the top for an surface area to cut lemons and limes and prepare the drinks
We installed a copper sink and faucet.
We installed metal food bins.
We created a little area in the back for liquor bottles.
We installed a mini fridge and built a shelf for it to sit on.
We cut down the top side sections to create more visual interest on the back of the counter section.
We watched our clients smile big! :)
Ready for the after photos?
Before Being UsedAll set up and ready to go! Vintage mini fridge installedFood storage containers in the drawers.Copper sink and faucet.Soapstone installed into the desktop.Wine glass storageUsing the roll top as the backsplash.
Do you like this transformation? We’d love it if you’d tell your friends and family about it. Creating custom pieces that you’ll love for generations to come is kind of our thing!
Thank you all for following along! If you’d like to get this blog in your email once a week, please sign up for our weekly newsletter by adding your email in the little box below my picture.
If you’ve enjoyed this post, please like FunCycled on Facebook, Instagram and Pinterest. Keep up to date on the newest finds, vote on colors and give your input on our creativity. We share fun tutorials, great before and after, and new design inspirations.
We offer interior design, kitchen cabinet painting, and custom built tables, barn doors, and repurposed furniture. Thank you, again, for working with us and for taking the time to spread the word about what we do.
How are you? I hope you’re having a great week so far!
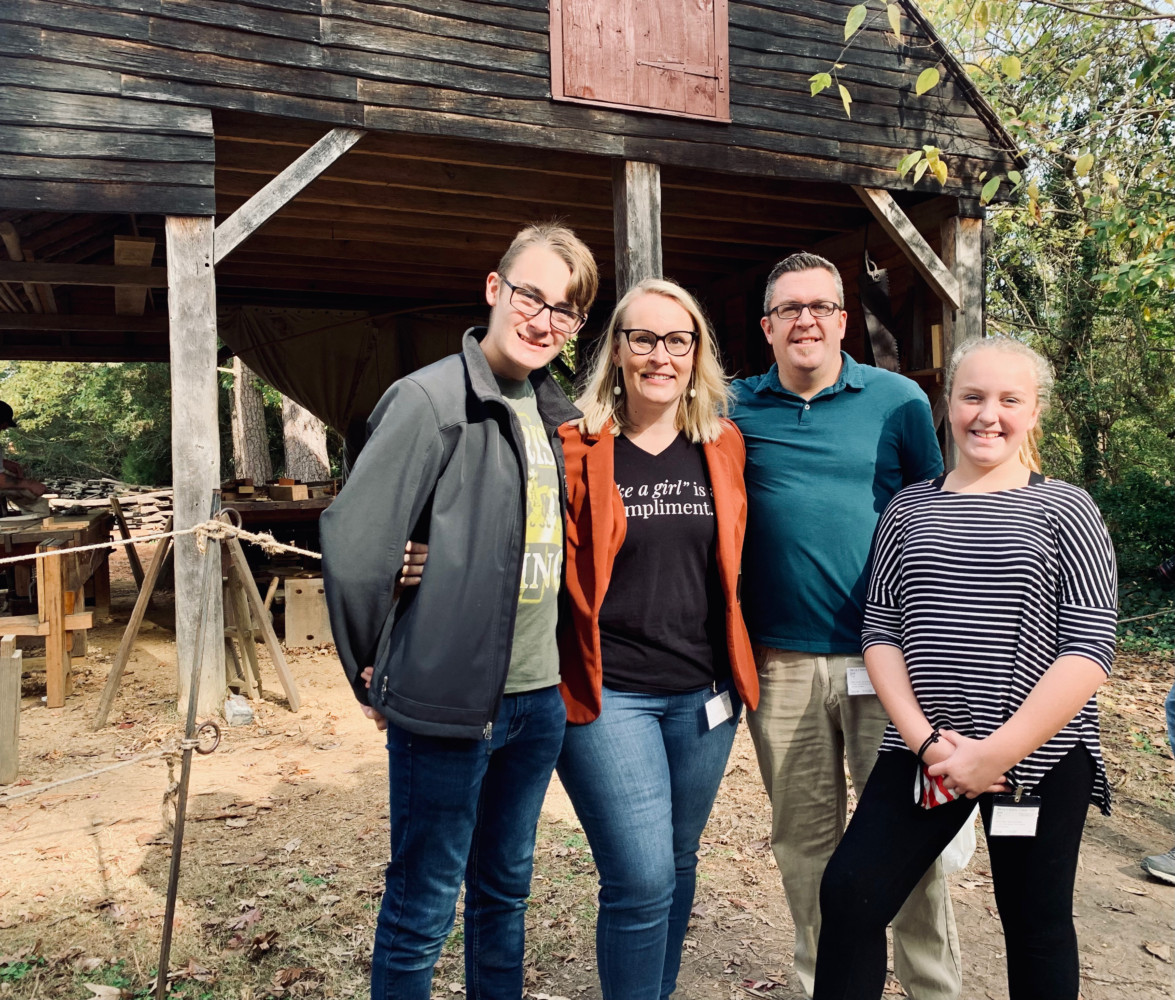
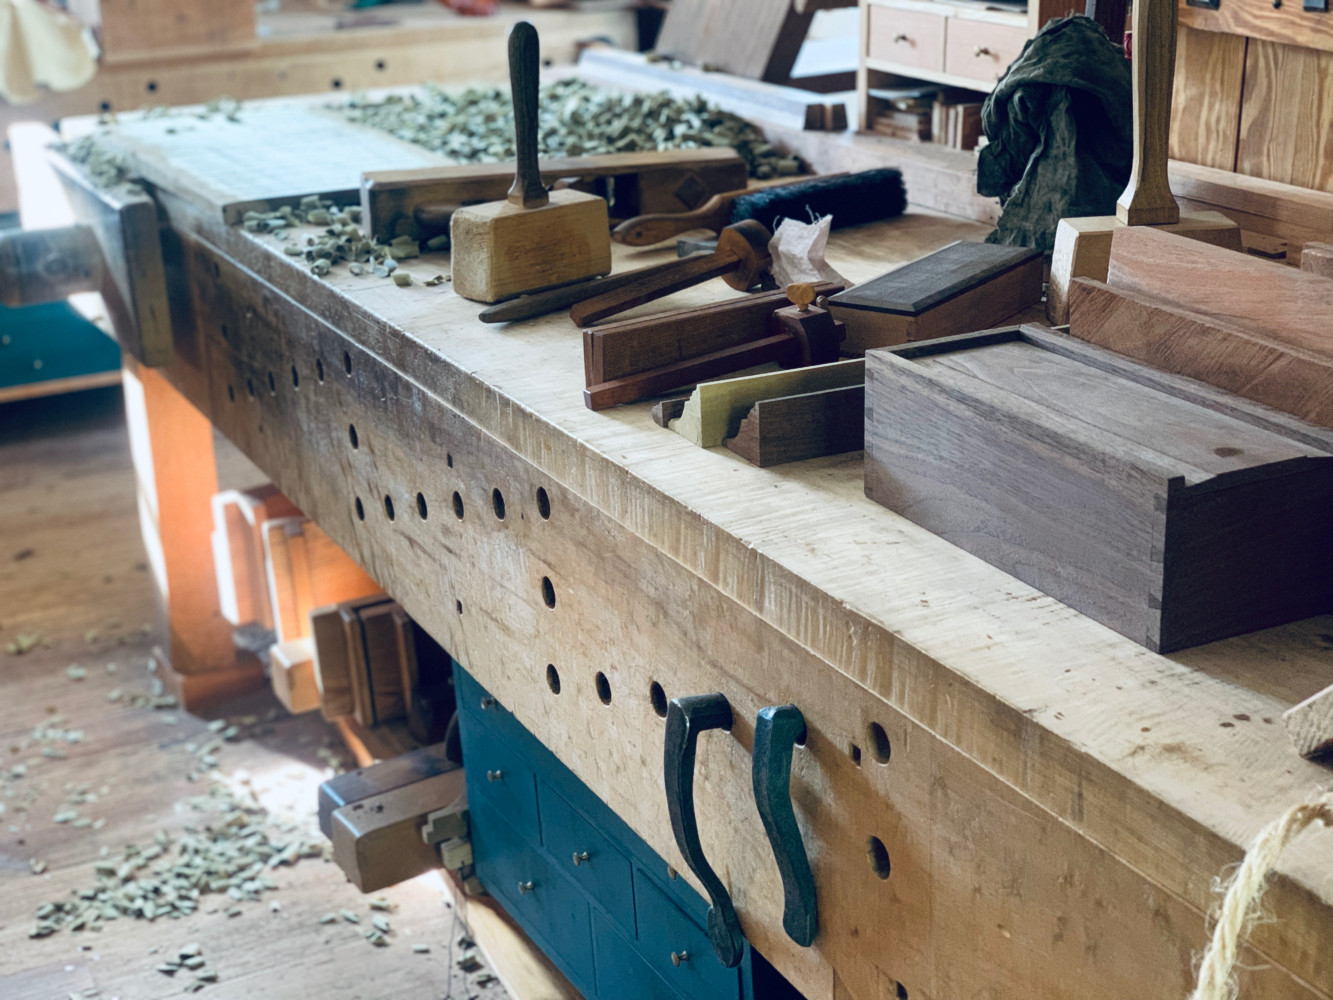
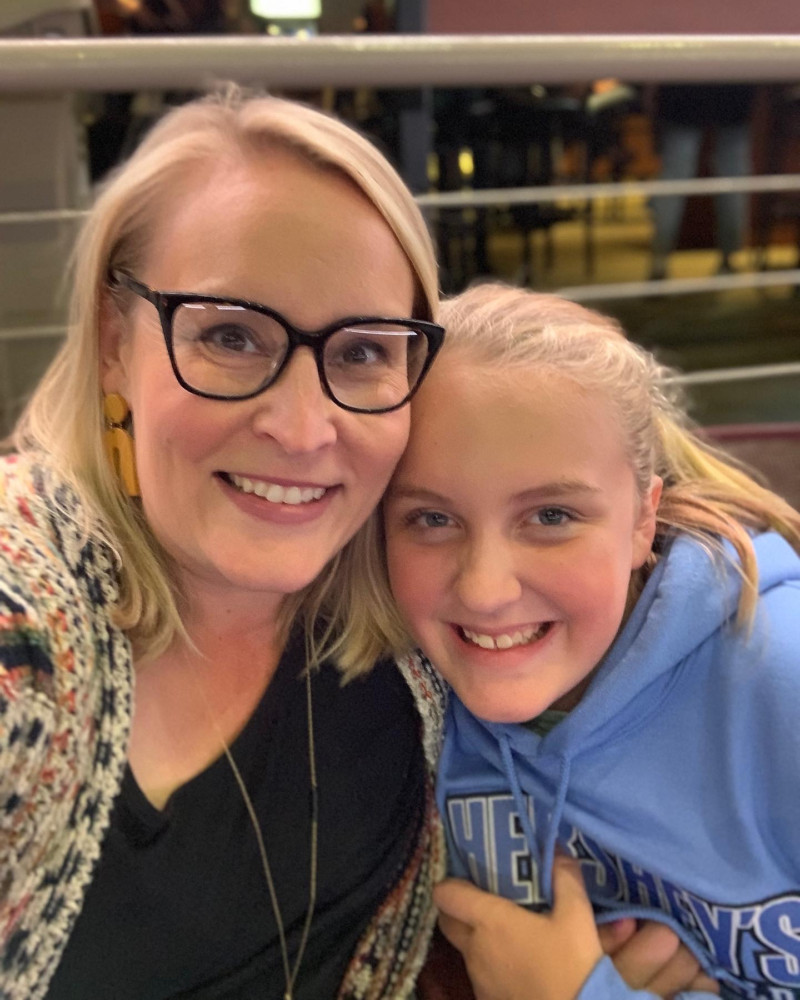
We’ve went on a trip to Williamsburg, VA and had such a wonderful time with the kiddos. We explored Jamestown, Yorktown, Williamsburg, went to a Lauren Daigle concert, and even had the chance to see Queen Esther at Sight and Sound Theater. Our hearts are full and we feel so thankful for the time with our kiddos.
Check out some of the highlights from our trip:
Jamestown
Williamsburg
Carpenters Shop
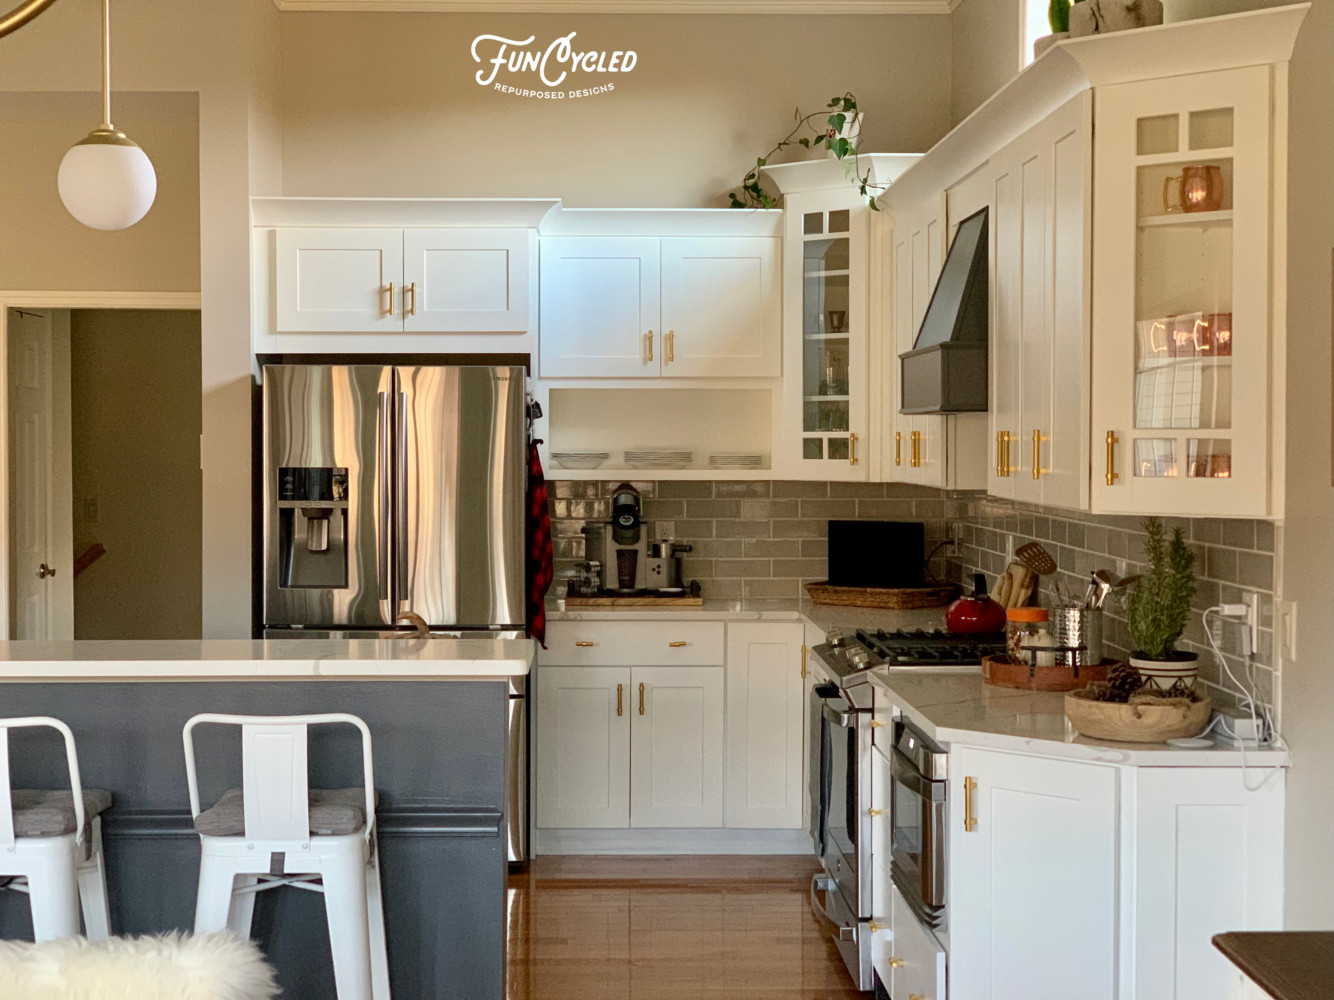
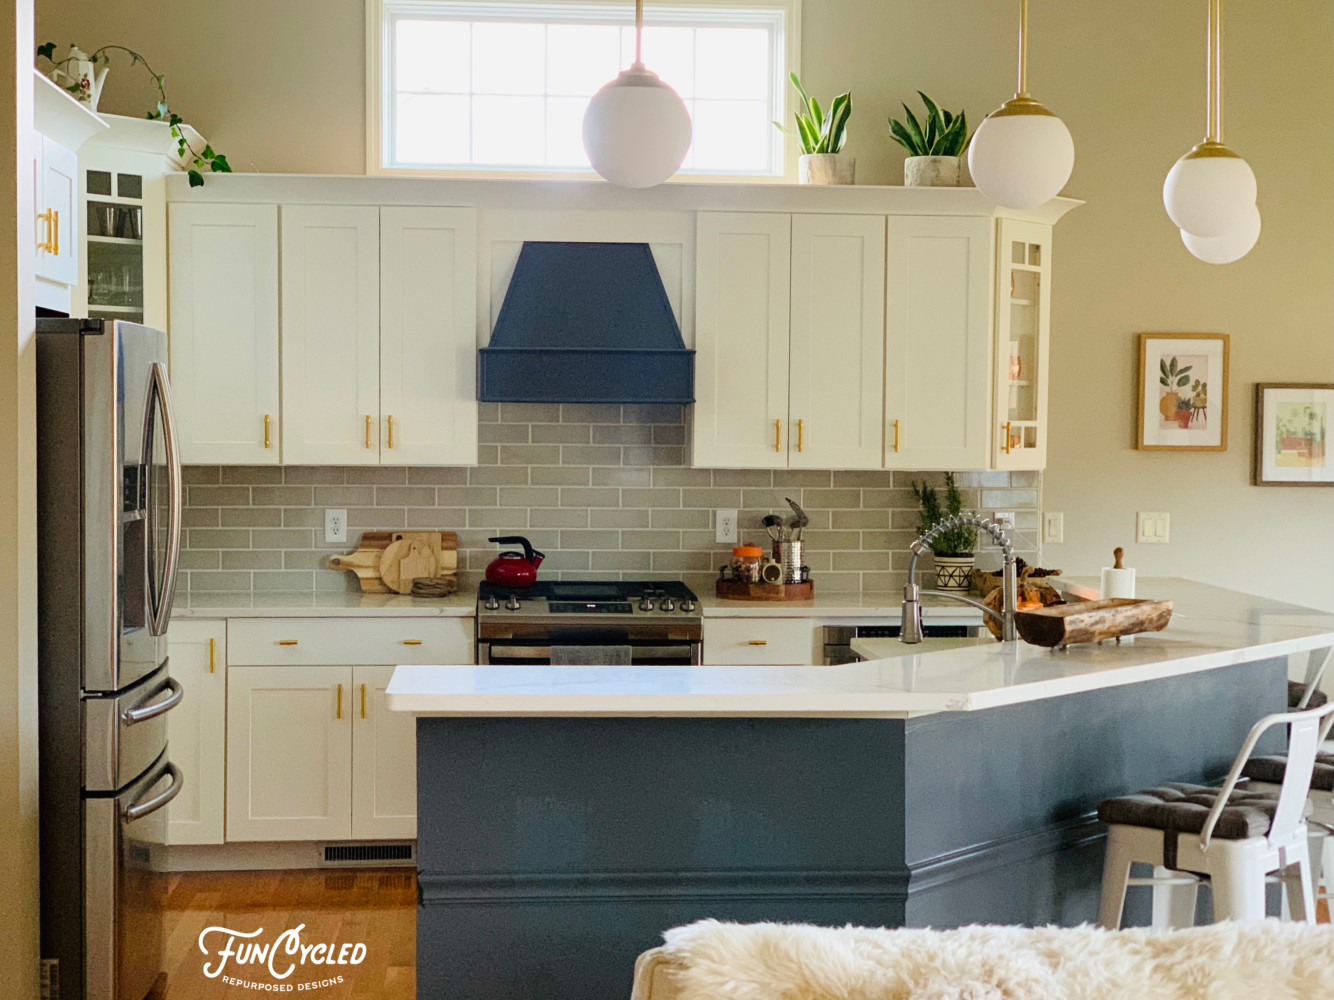
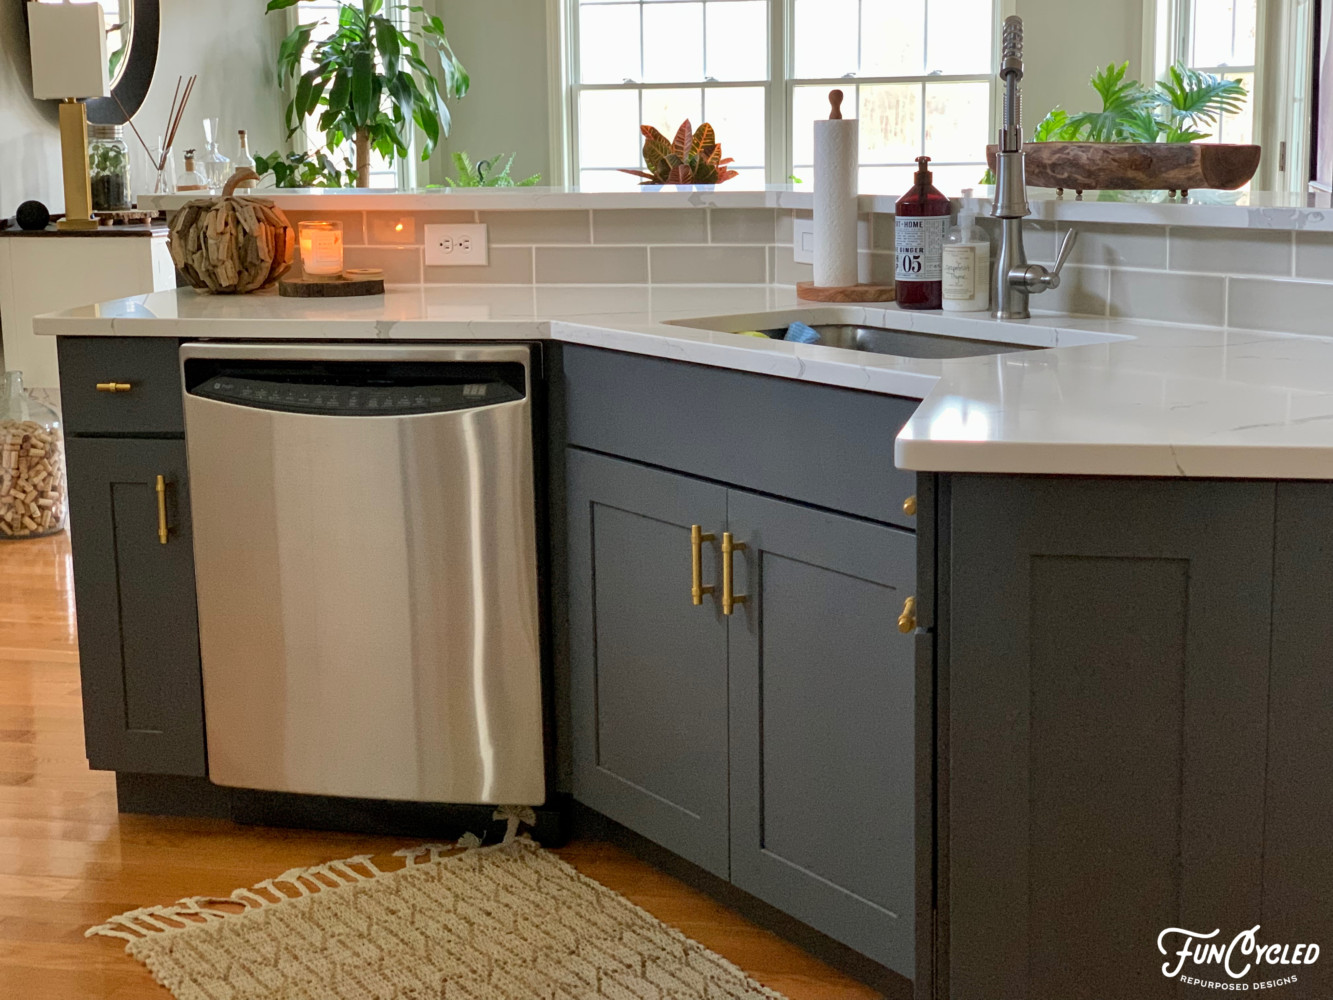
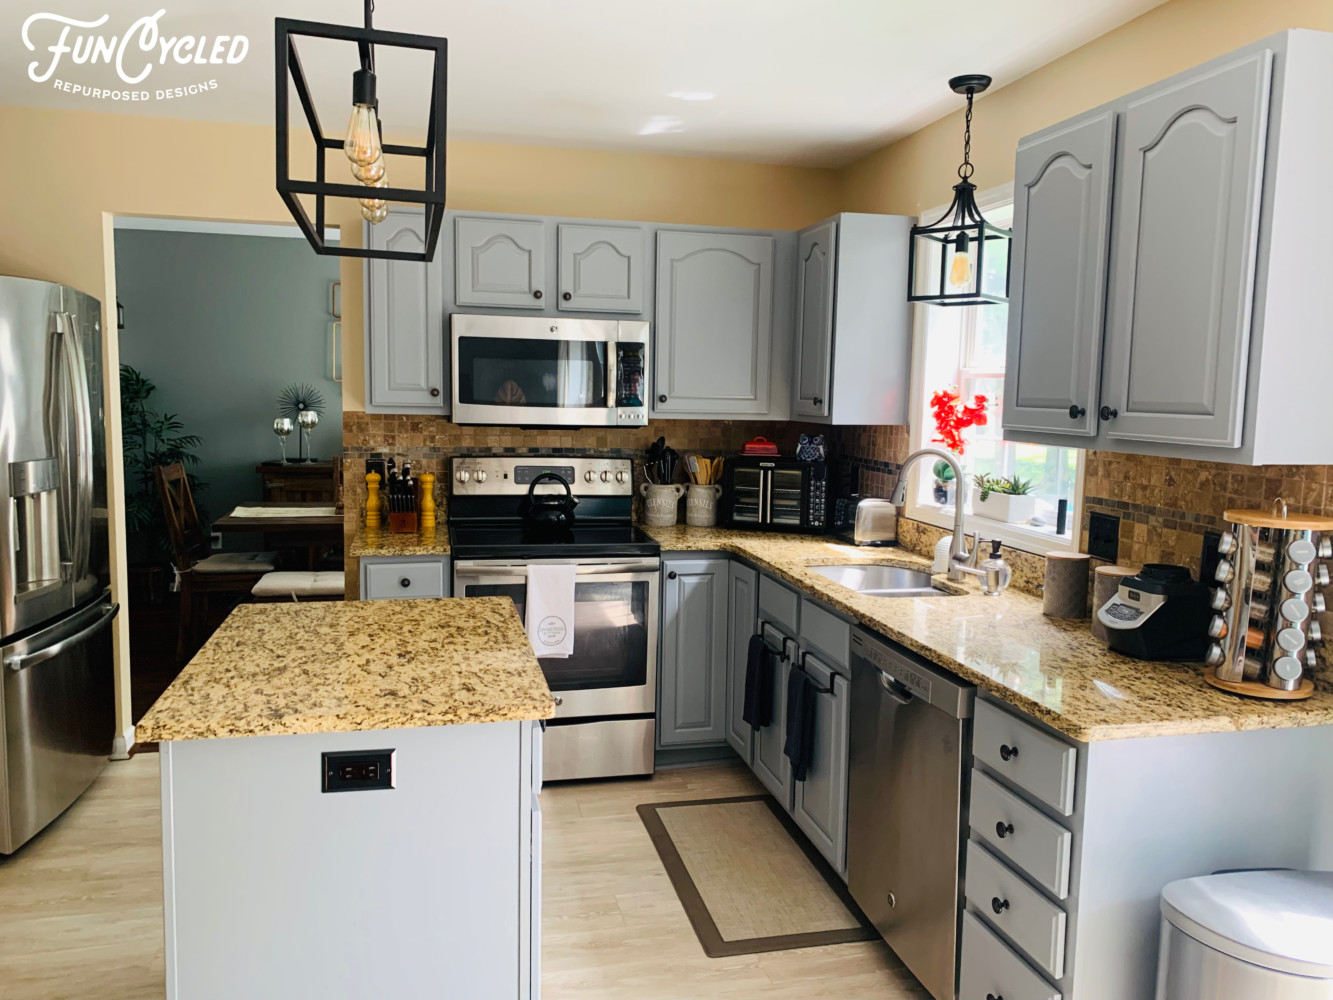
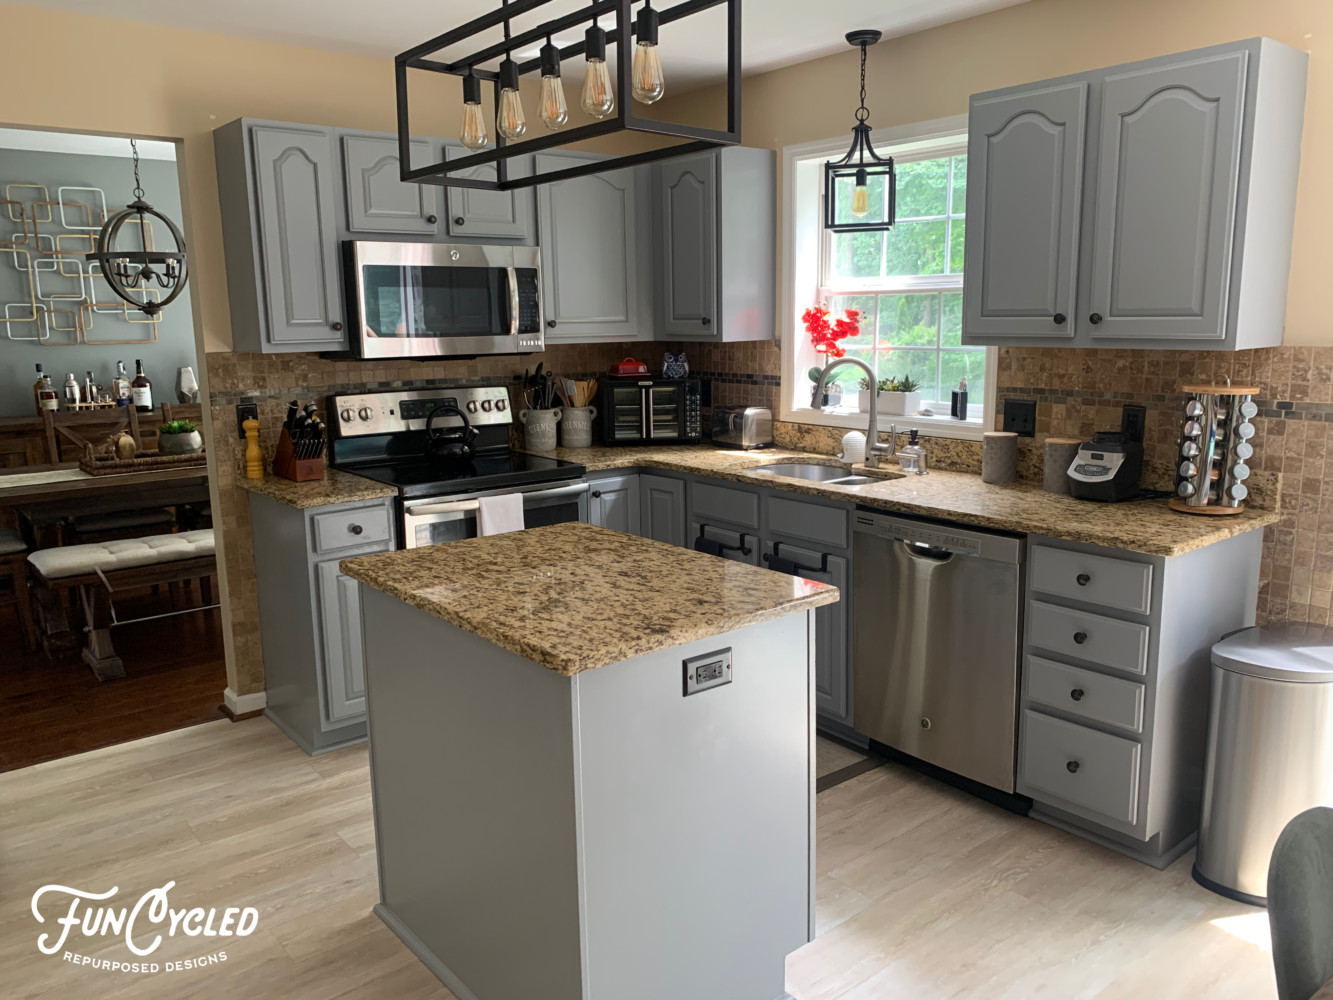
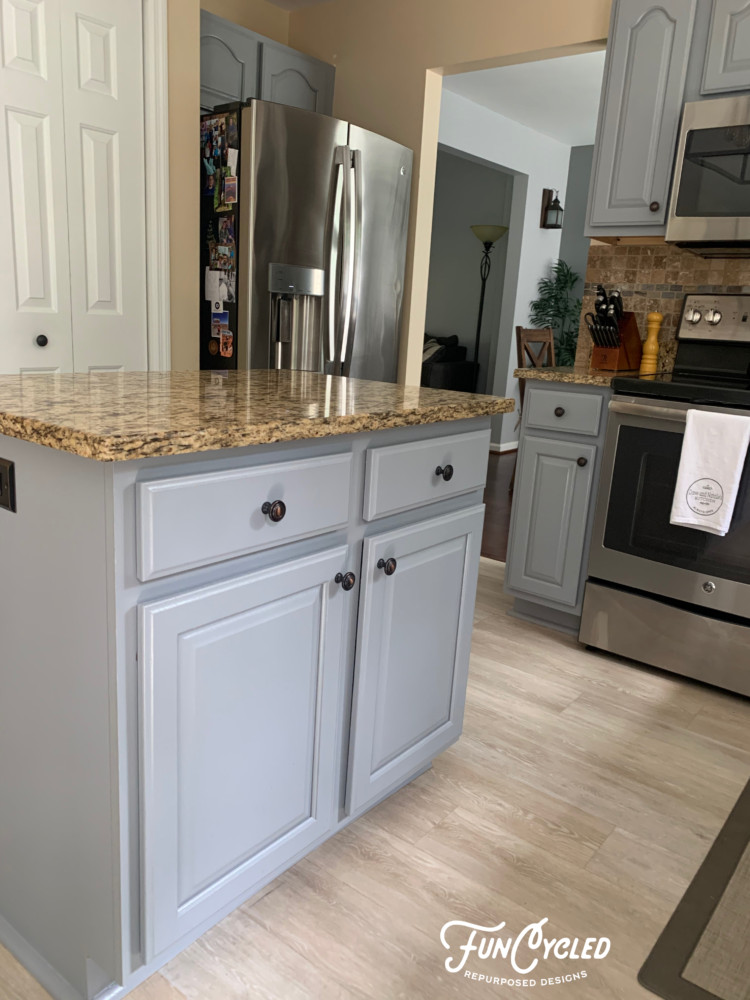
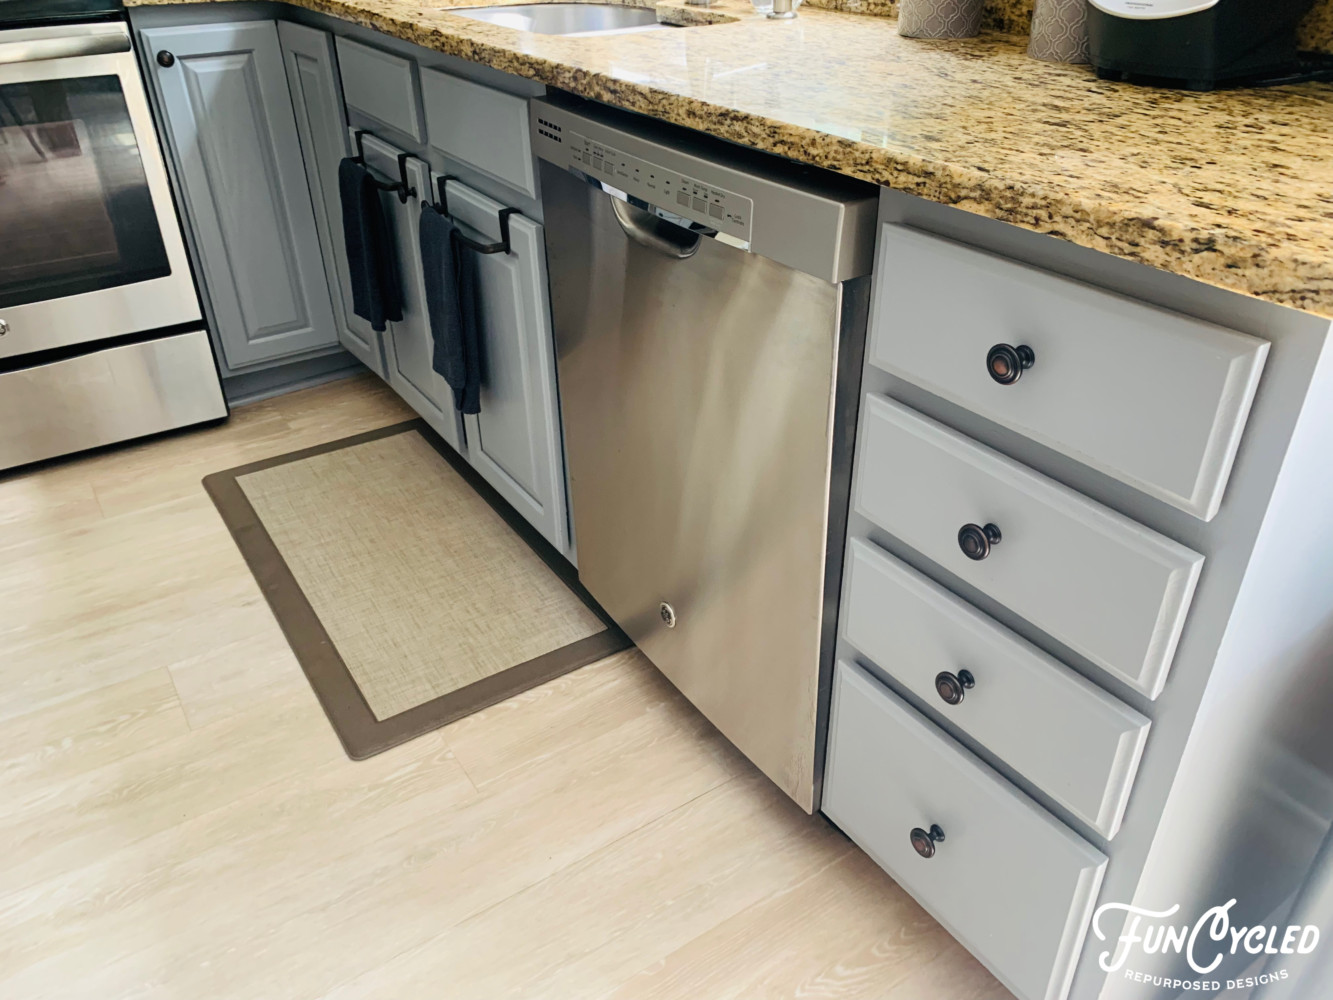
I’m also SO EXCITED to share this week’s kitchen makeover with you!
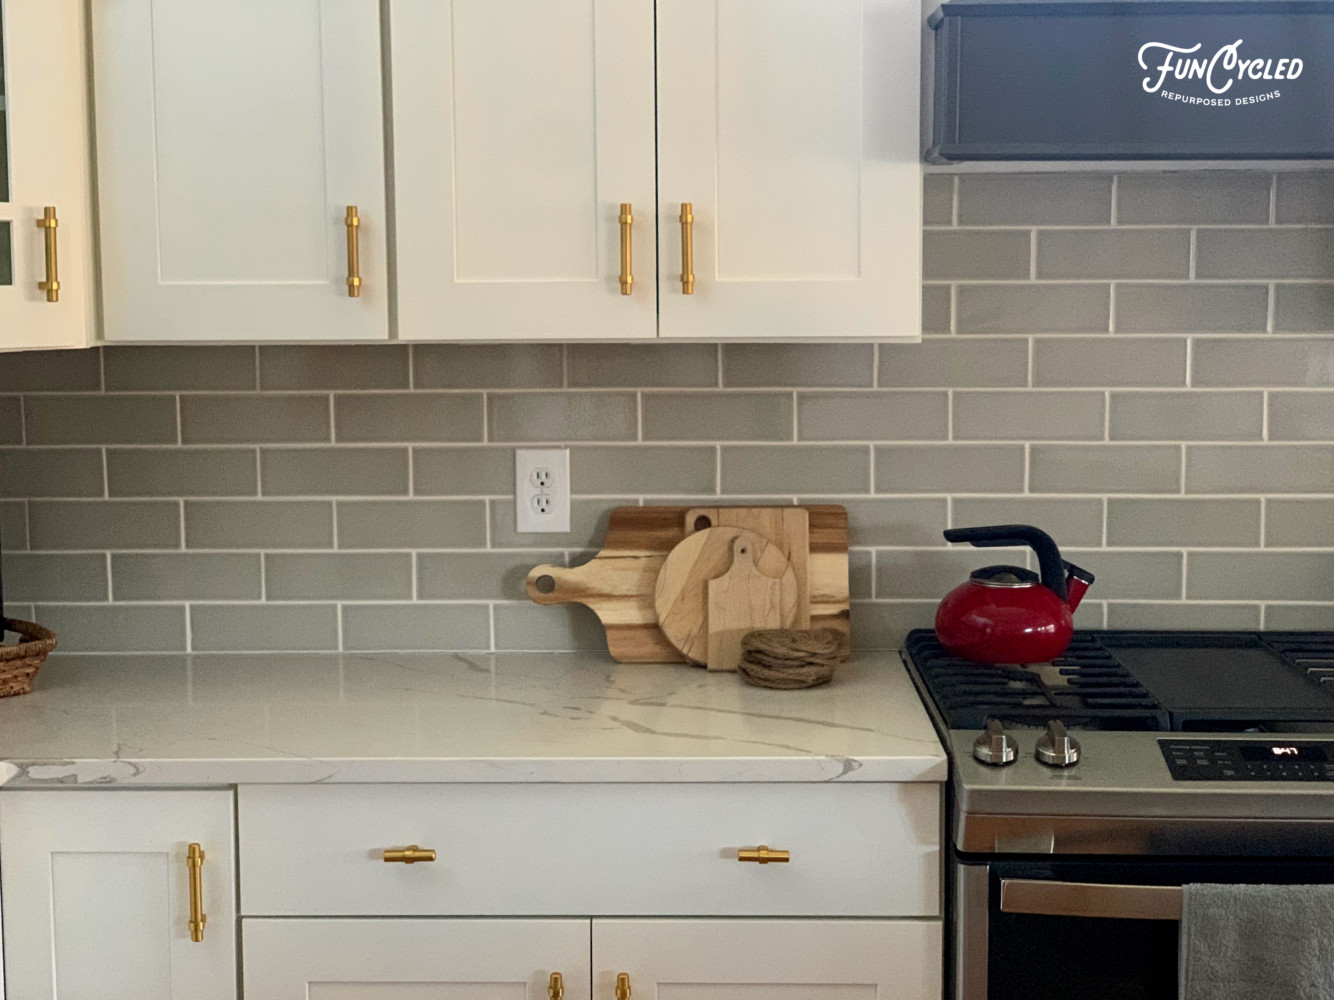
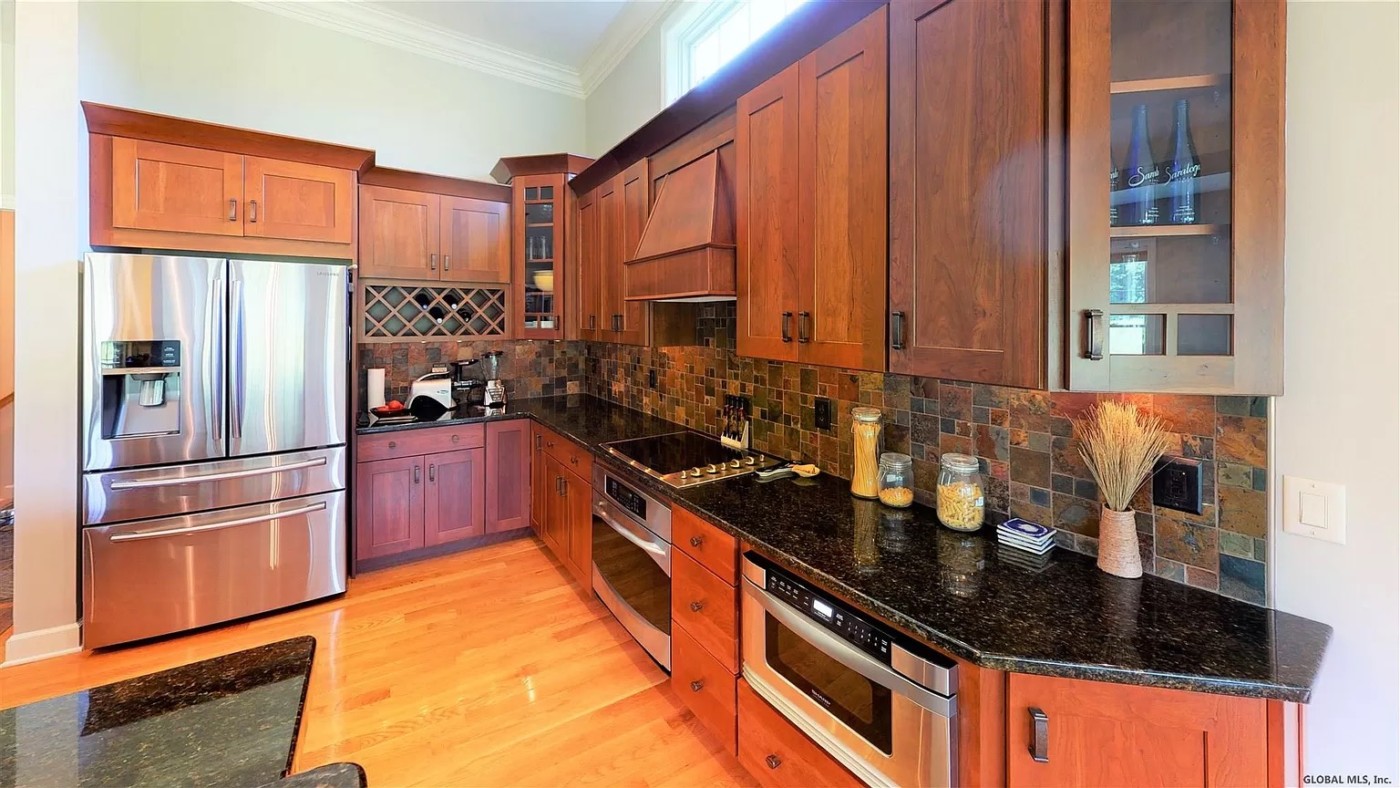
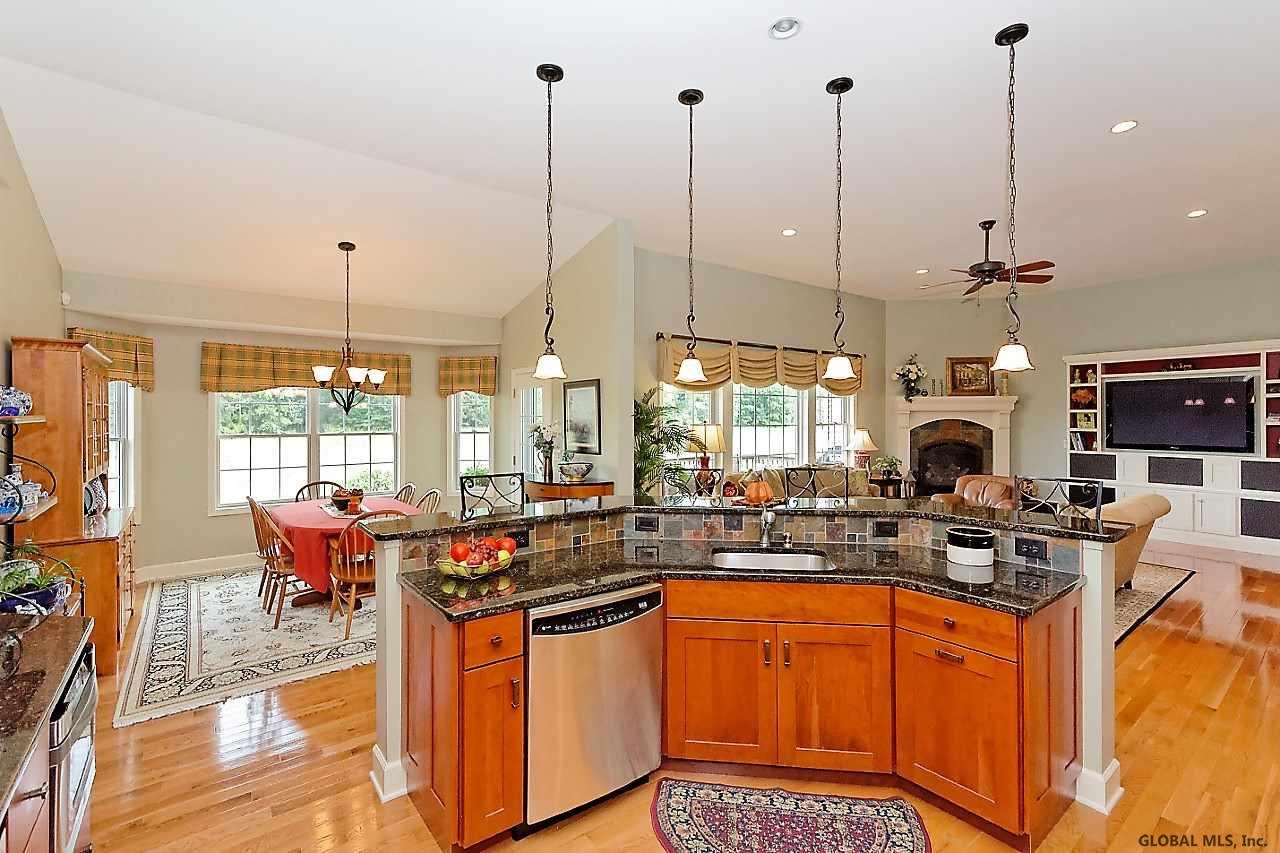
When our clients, Ginny and Ty, bought their new house so many people told them not to paint the kitchen cabinets because it was high quality wood. Ty said to me… “well, good, then it’ll be high quality wood with paint on top of it”. I couldn’t agree more! Painting the cabinets created a huge update in this space.
Here’s the kitchen before:
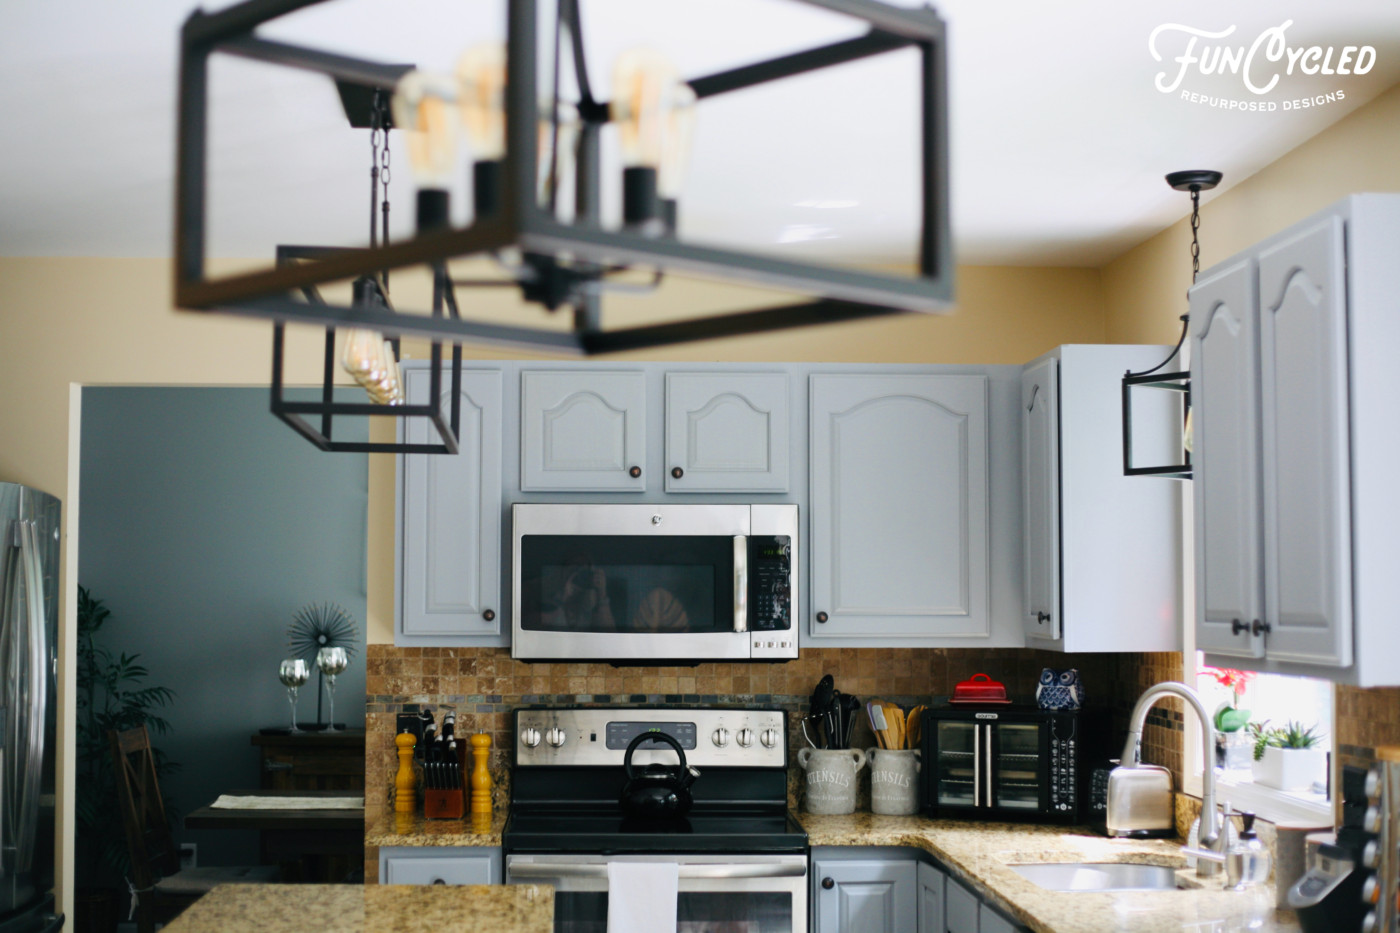
We painted the kitchen cabinets Simply White by Benjamin Moore, sprayed them with a protective clear coat, and added new hardware. We also painted the island Gray 2121-10 by Benjamin Moore.
They updated the counters to Quartz and updated the backsplash which made a huge impact, too.
If you’d like to see how we paint Kitchen Cabinets, click here to check out our video on YouTube.
Could your kitchen use an update? We’d love to help!! We can help pick out colors, finishes, product and do the cabinet painting, tiling, add new hardware. You can use our Contact Us form to request our design services or a quote for painting your kitchen. Please check out other kitchen projects on our For Sale page. We’ll need to see a picture of your kitchen, a list of how many doors and drawers there are, and where you are located to email you an estimate. This change ups the value of your home and gives you a whole new look at a fraction of the cost of new kitchen cabinets!
Thank you all for following along! If you’d like to get this blog in your email once a week, please sign up for our weekly newsletter by adding your email in the little box below my picture.
If you’ve enjoyed this post, please like FunCycled on Facebook, Instagram and Pinterest if you don’t already. Keep up to date on the newest finds, vote on colors and give your input on our creativity. We share fun tutorials, great before and after, and new design inspirations.
We offer interior design, kitchen cabinet painting, and custom built tables, barn doors, and repurposed furniture. Thank you, again, for working with us and for taking the time to spread the word about what we do.
How was your weekend? I was able to go on a quick weekend with a group of 17 ladies up north. We stayed on Mirror Lake. The view was beautiful and I had time to work a bit and relax a bit! If you have never been to Mirror Lake in Upstate Ny, I highly recommend it. It’s a beautiful spot and only about 2 hours from Albany. There are quant shops, beautiful hotels, and delicious food.
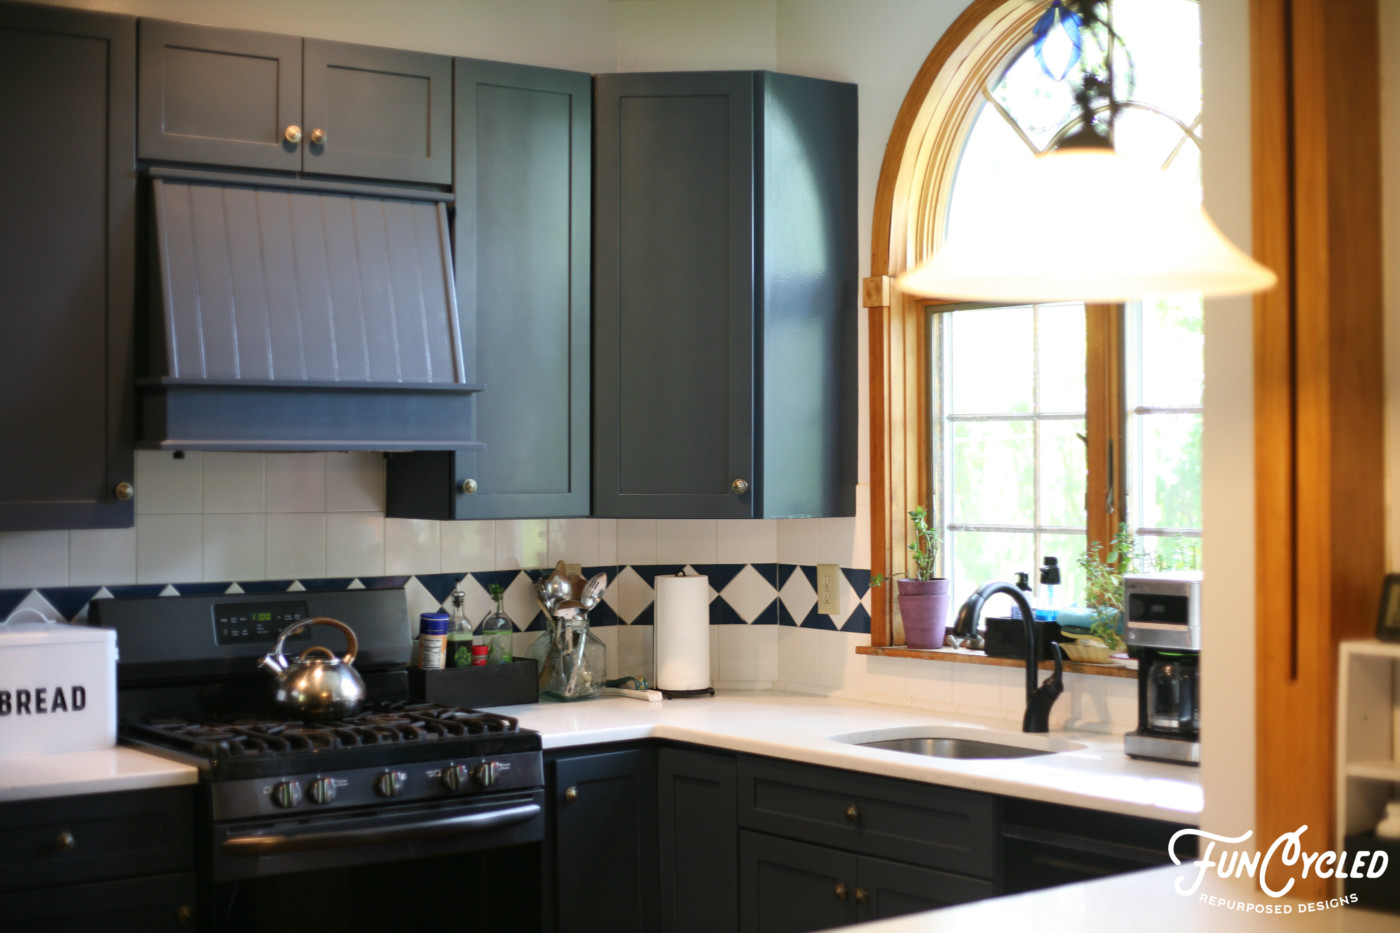
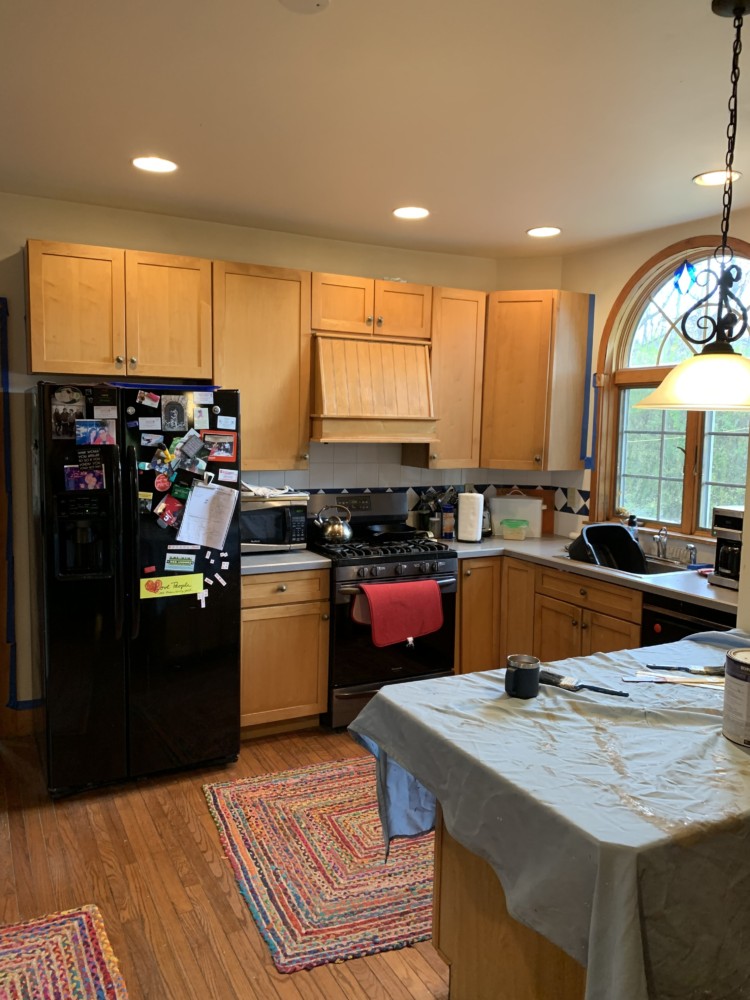
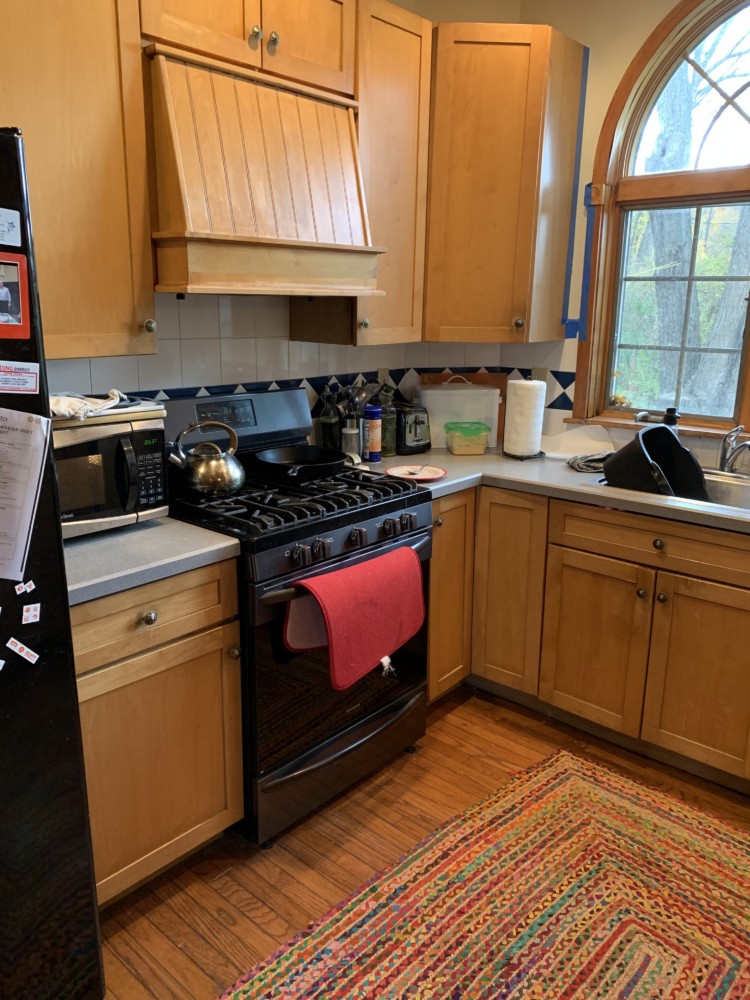
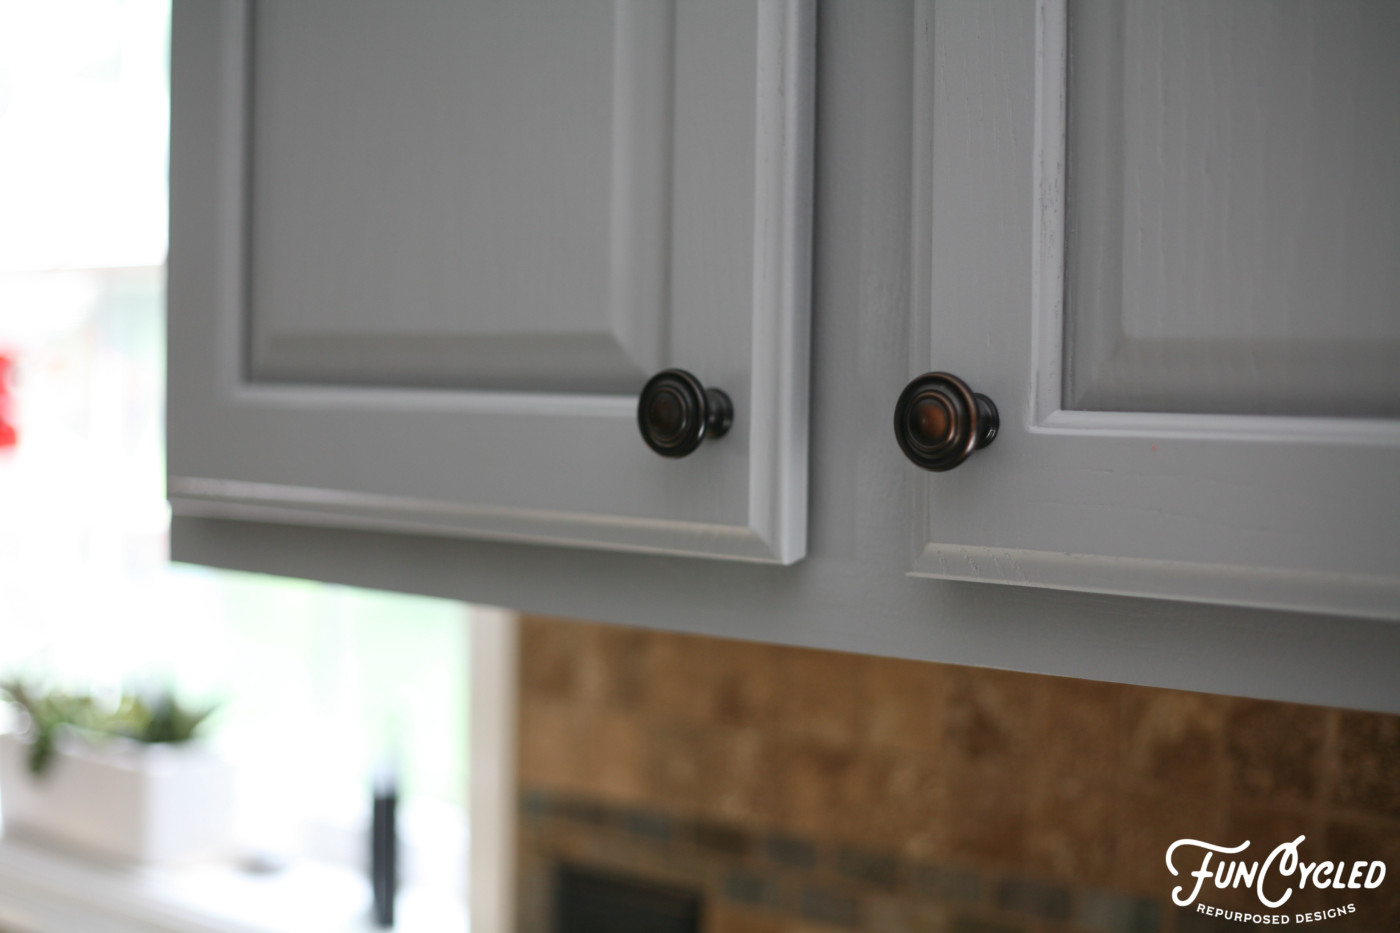
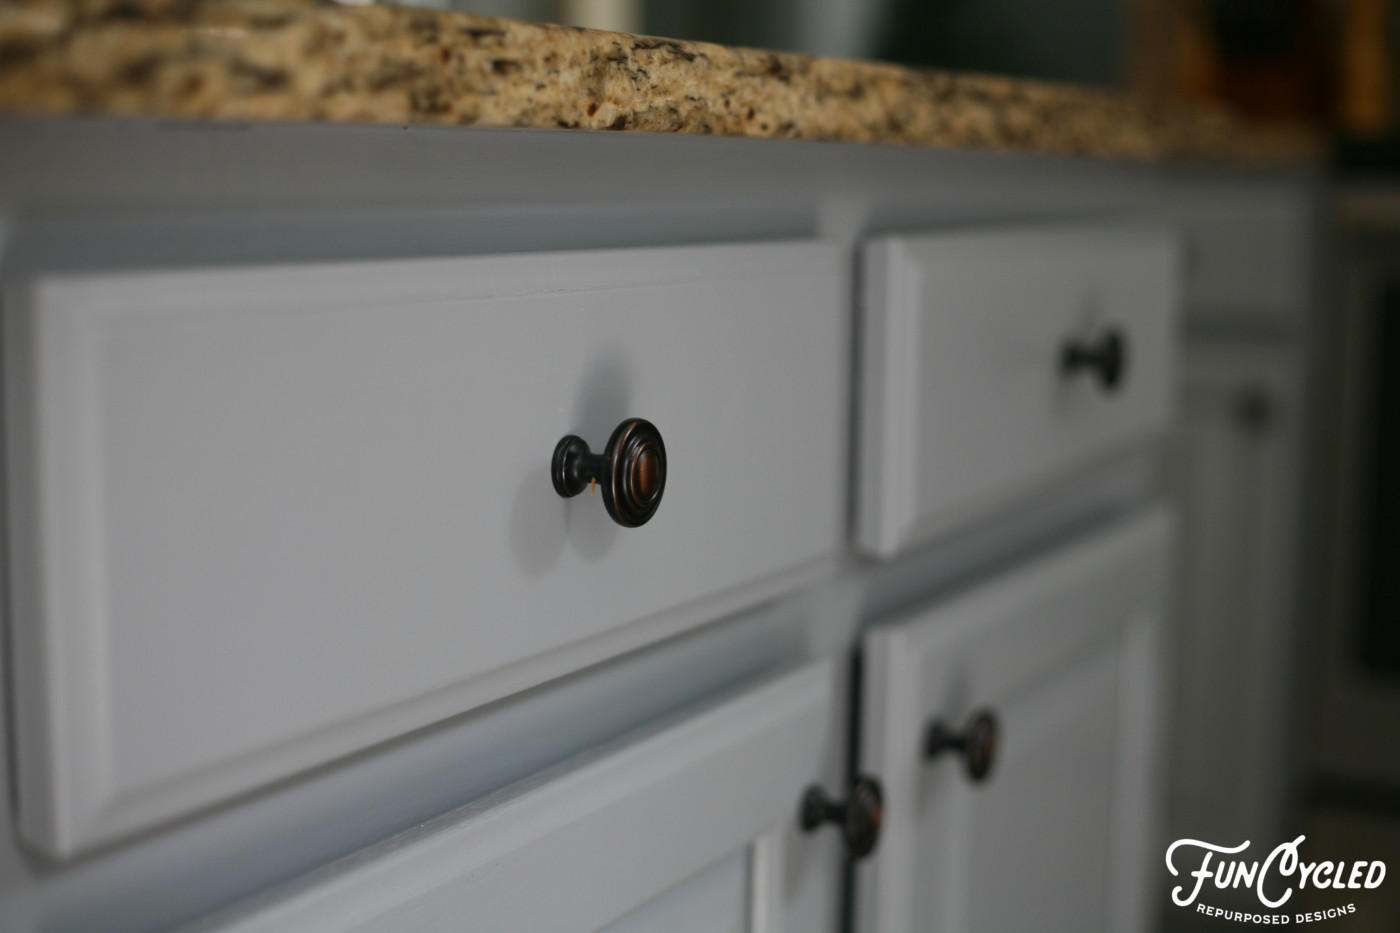
This week, I want to share a makeover on a small kitchen that we recently finished. I like it because I love that the clients with with a dark blue cabinet color. People always say dark colors make small kitchens feel smaller, I don’t always agree with that. I feel like the darker color in this kitchen made it feel richer and larger.
Here are the before pictures for you:
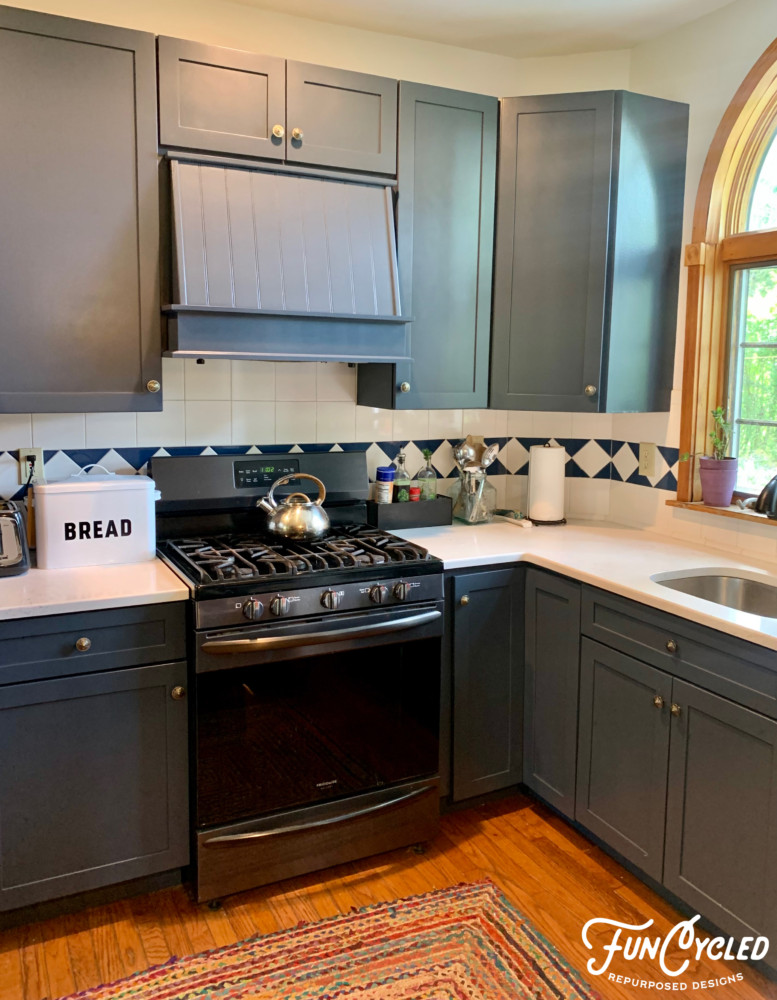
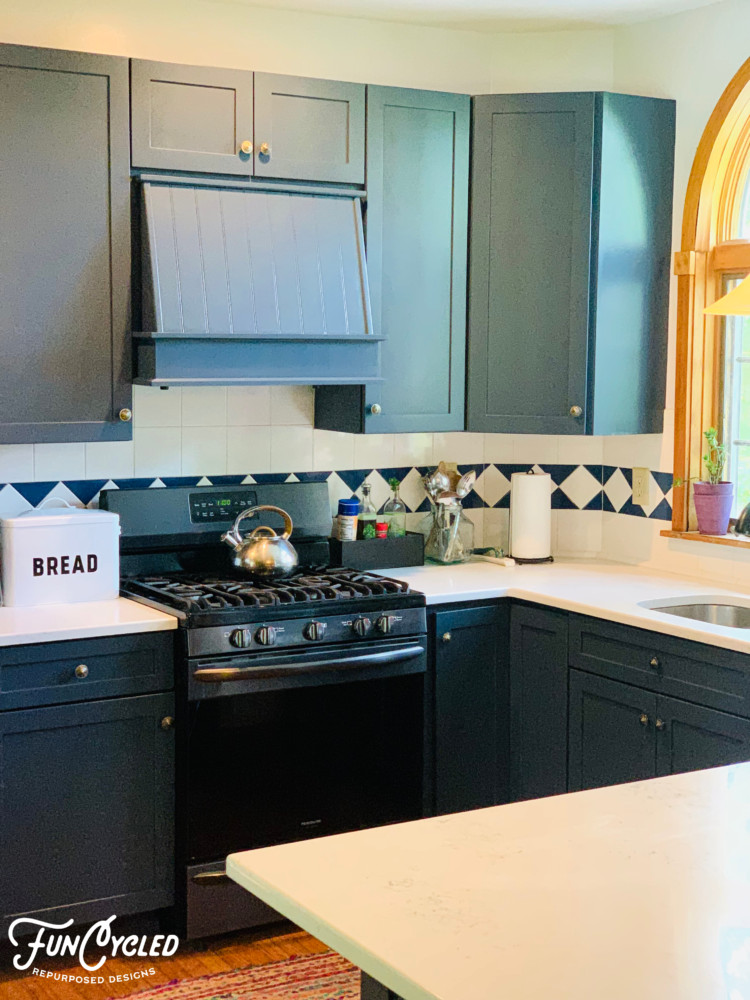
We painted the kitchen cabinets Hale Navy by Benjamin Moore and sprayed them with a protective clear coat.
If you’d like to see how we paint Kitchen Cabinets, click here to check out our video on YouTube.
Ready for the after photos?
Could your kitchen use an update? We’d love to help!! We can help pick out colors, finishes, product and do the cabinet painting, tiling, add new hardware. You can use our Contact Us form to request our design services or a quote for painting your kitchen. Please check out other kitchen projects on our For Sale page. We’ll need to see a picture of your kitchen, a list of how many doors and drawers there are, and where you are located to email you an estimate. This change ups the value of your home and gives you a whole new look at a fraction of the cost of new kitchen cabinets!
Thank you all for following along! If you’d like to get this blog in your email once a week, please sign up for our weekly newsletter by adding your email in the little box below my picture.
If you’ve enjoyed this post, please like FunCycled on Facebook, Instagram and Pinterest if you don’t already. Keep up to date on the newest finds, vote on colors and give your input on our creativity. We share fun tutorials, great before and after, and new design inspirations.
We offer interior design, kitchen cabinet painting, and custom built tables, barn doors, and repurposed furniture. Thank you, again, for working with us and for taking the time to spread the word about what we do.
How’s your week going? I hope everyone had a fun weekend spending time with your friends or family and eating too much candy!
I had some pretty adorable tricker treaters here! Katniss Everdeen and Napoleon Dynamite. So adorable!!
Oh man! Josh made me laugh so much!
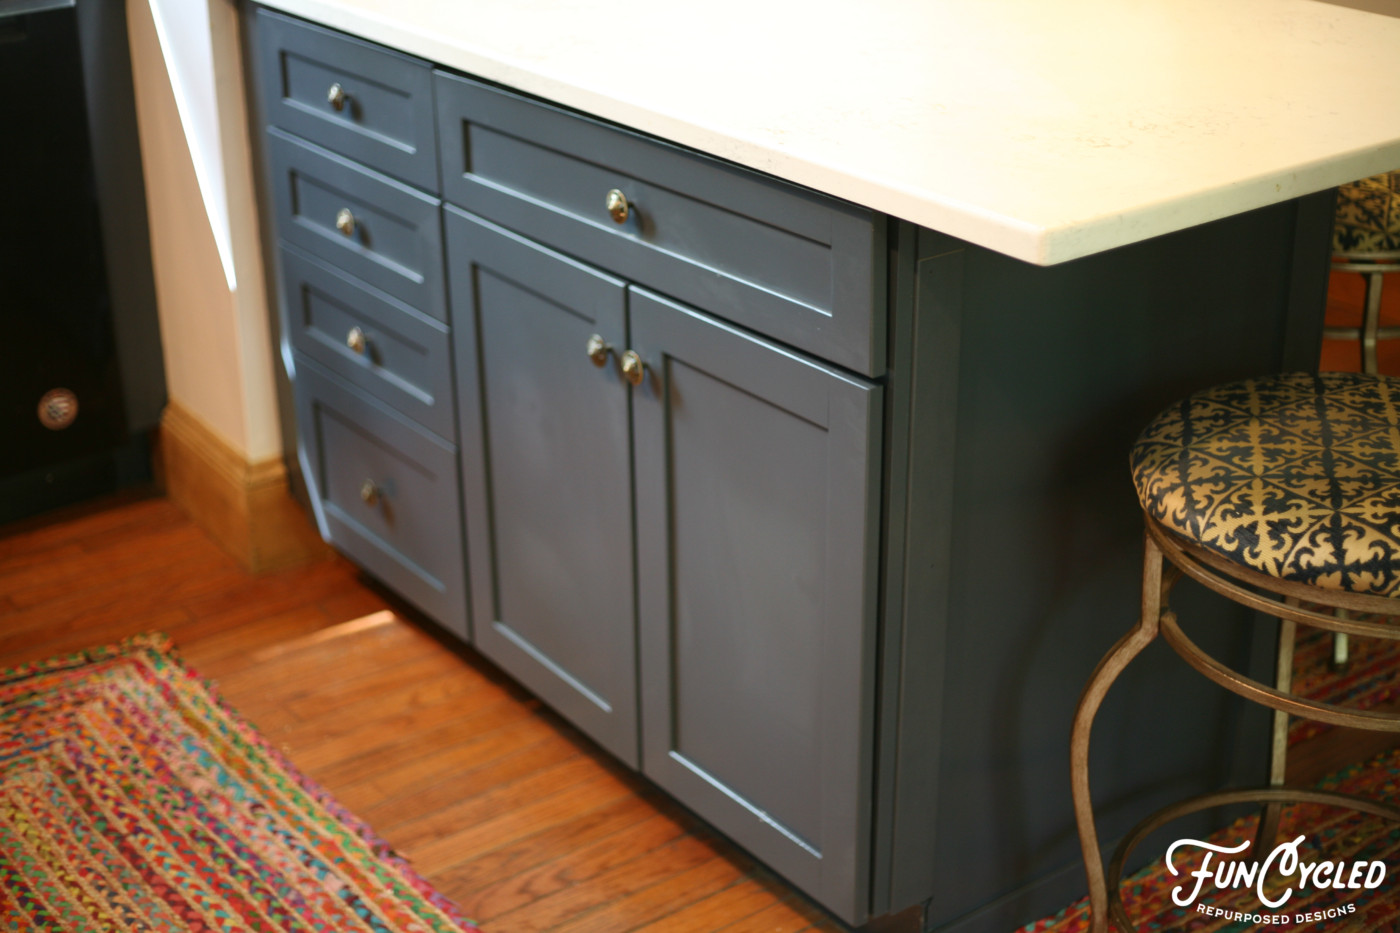
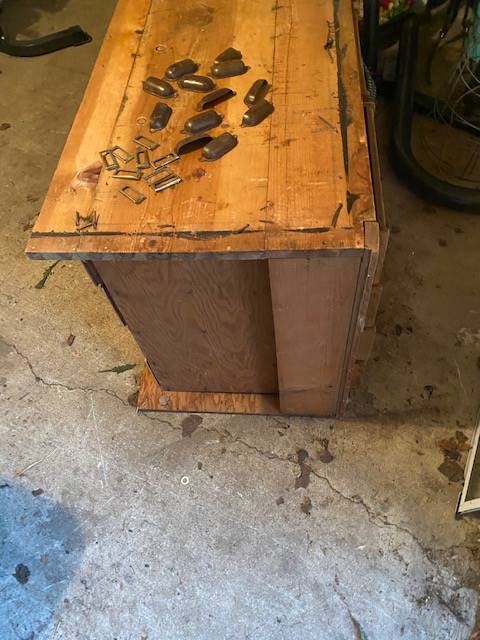
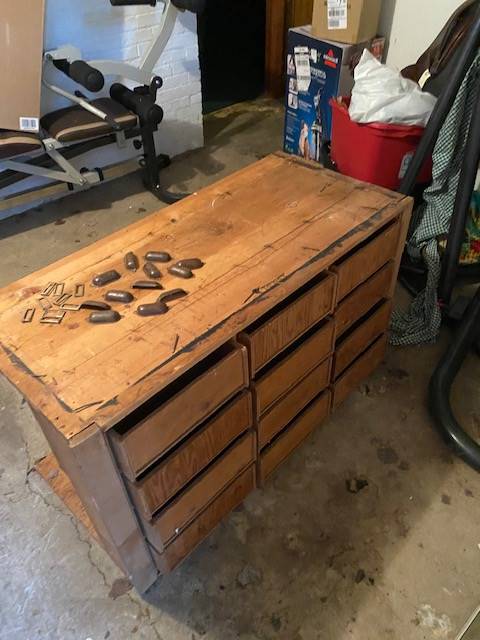
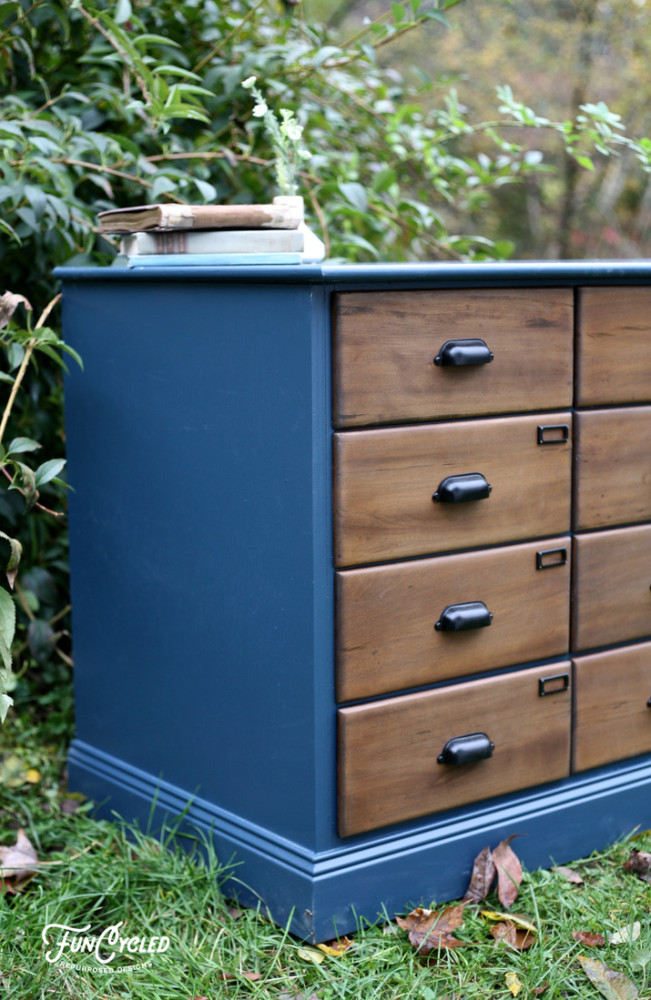
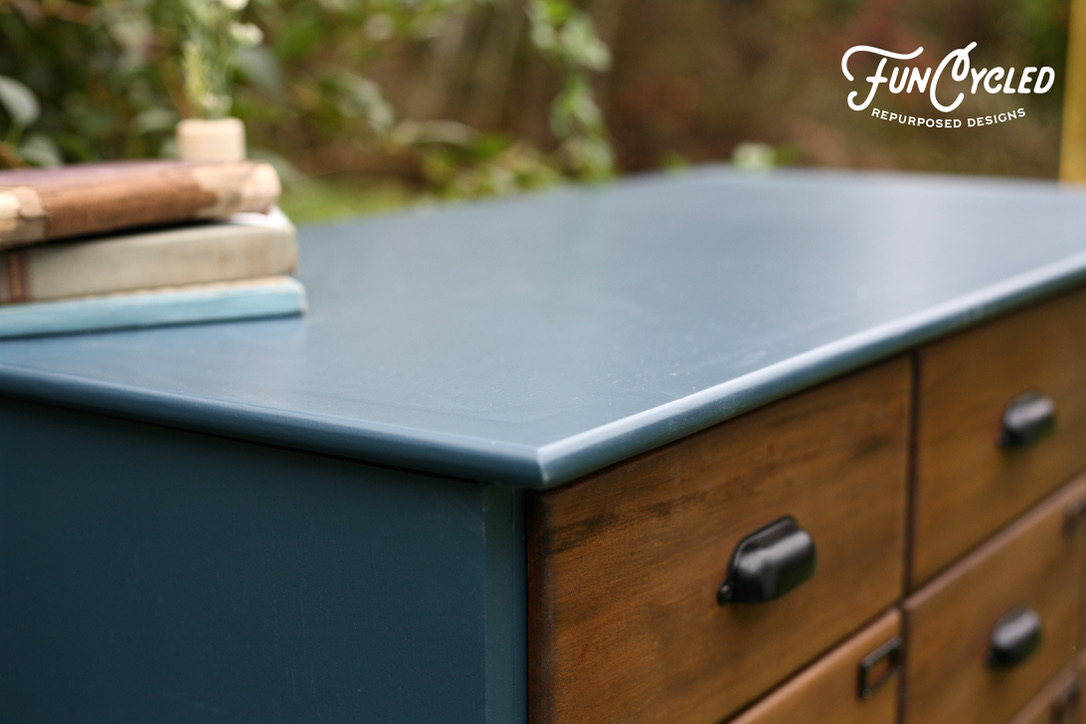
For this week’s furniture makeover, I can’t WAIT to show you the before and after. When Christy reached out to me about doing this makeover for them, I was a little shocked by the condition of the dresser. It was basically a box surrounding dresser drawers. The box didn’t even fit the drawers into it. So we had to disassemble the outside and basically build a new exterior entirely for the dresser.
Check out the before:
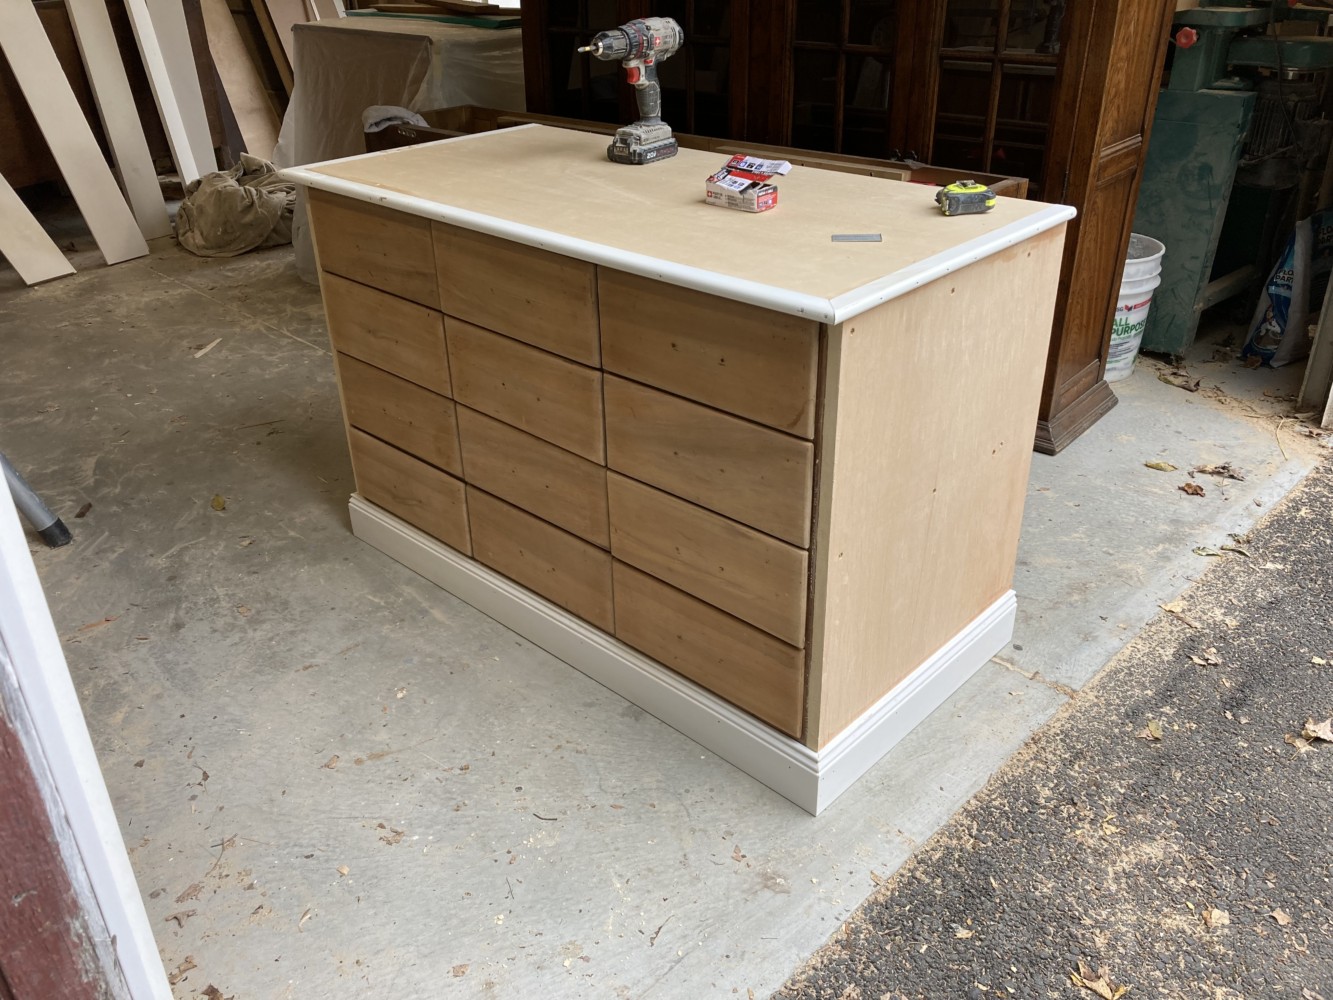
Here’s what it looked like once John built a new box for it:
We painted the boxes with Benjamin Moore’s Gentleman’s Gray then we sanded down and stained the drawer fronts with Minwax Dark Walnut and put a protective clear coat over it. We also added all new hardware! If you want to see how we paint furniture, check out our How to Paint Furniture post.
Ready for the after photos?
This dresser set was done as a custom order! Head to our Shop Page to check out what other new pieces we have for sale in person or online now!
Thank you all for following along! If you’d like to get this blog in your email once a week, please sign up for our weekly newsletter by adding your email in the little box below my picture.
If you’ve enjoyed this post, please like FunCycled on Facebook, Instagram and Pinterest if you don’t already. Keep up to date on the newest finds, vote on colors and give your input on our creativity. We share fun tutorials, great before and after, and new design inspirations.
We offer interior design, kitchen cabinet painting, and custom built tables, barn doors, and repurposed furniture. Thank you, again, for working with us and for taking the time to spread the word about what we do.
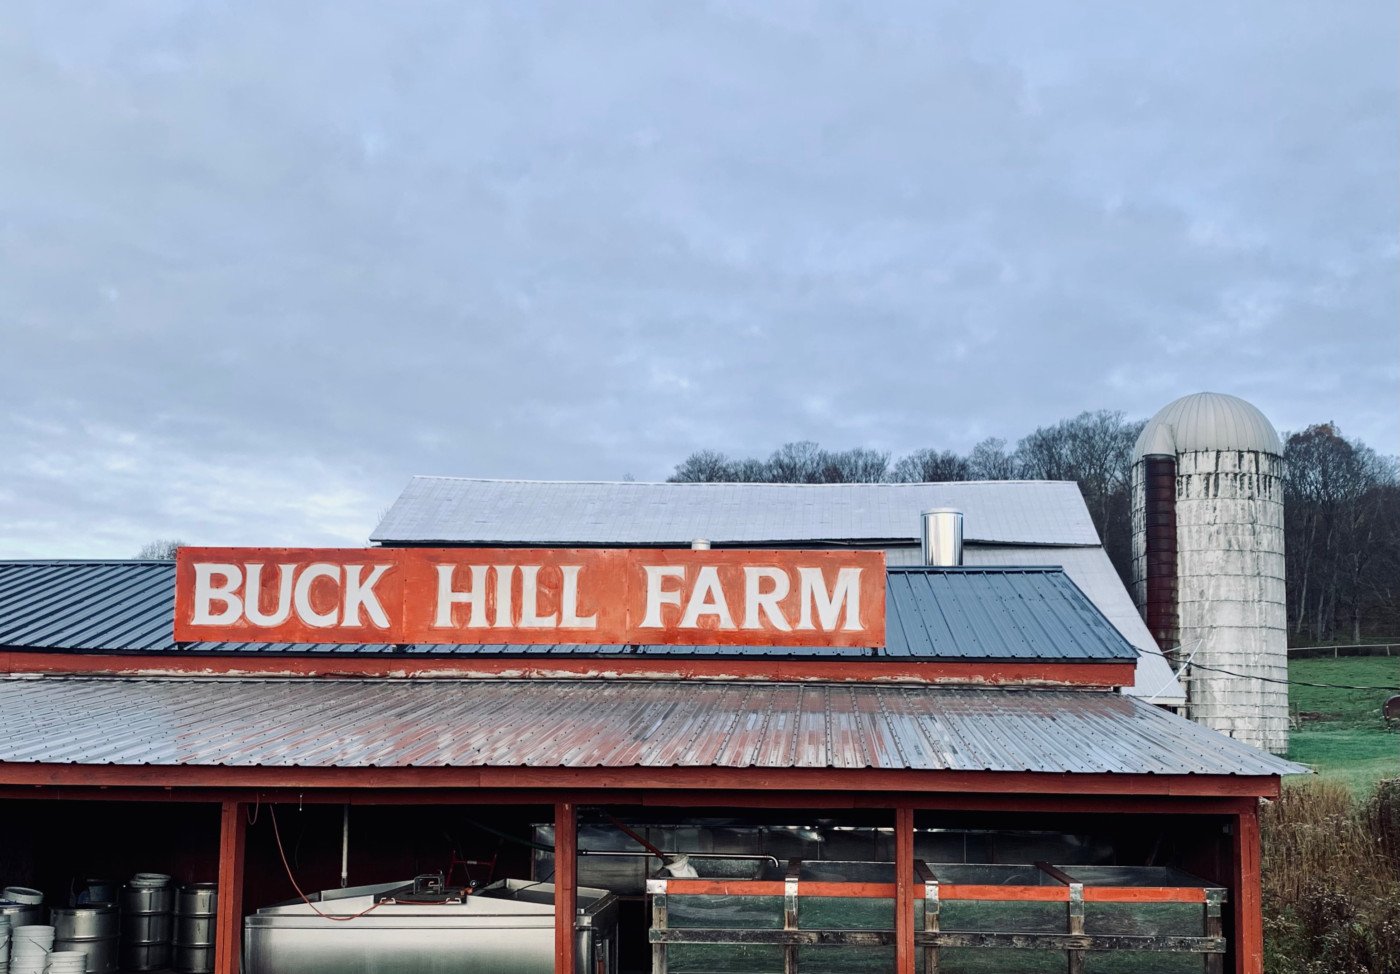
How are you? I hope you had a nice weekend! We had a lovely weekend – not overly jam packed which was nice. We set our alarms for 6am on Saturday morning to get ready and make an hour drive to meet our friends at Buck Hill Farm for breakfast. We’ve been wanting to go for about a year and finally were able to set a date with friends that work for both of us.
On Buck Hill farm, they raise pigs, chickens, and make maple maple syrup and honey. They serve breakfast only on Saturday or Sunday and most things on the menu are from their very own farm. I tried my first ever glass of maple milk. The sausage was so delicious. I had blackberry pancakes and sausage, John and Josh had sausage and gravy over biscuits , and they even had gluten free pancakes for Harmony. Win for all of us! If you’re up for a morning drive, I definitely recommend giving this a try.
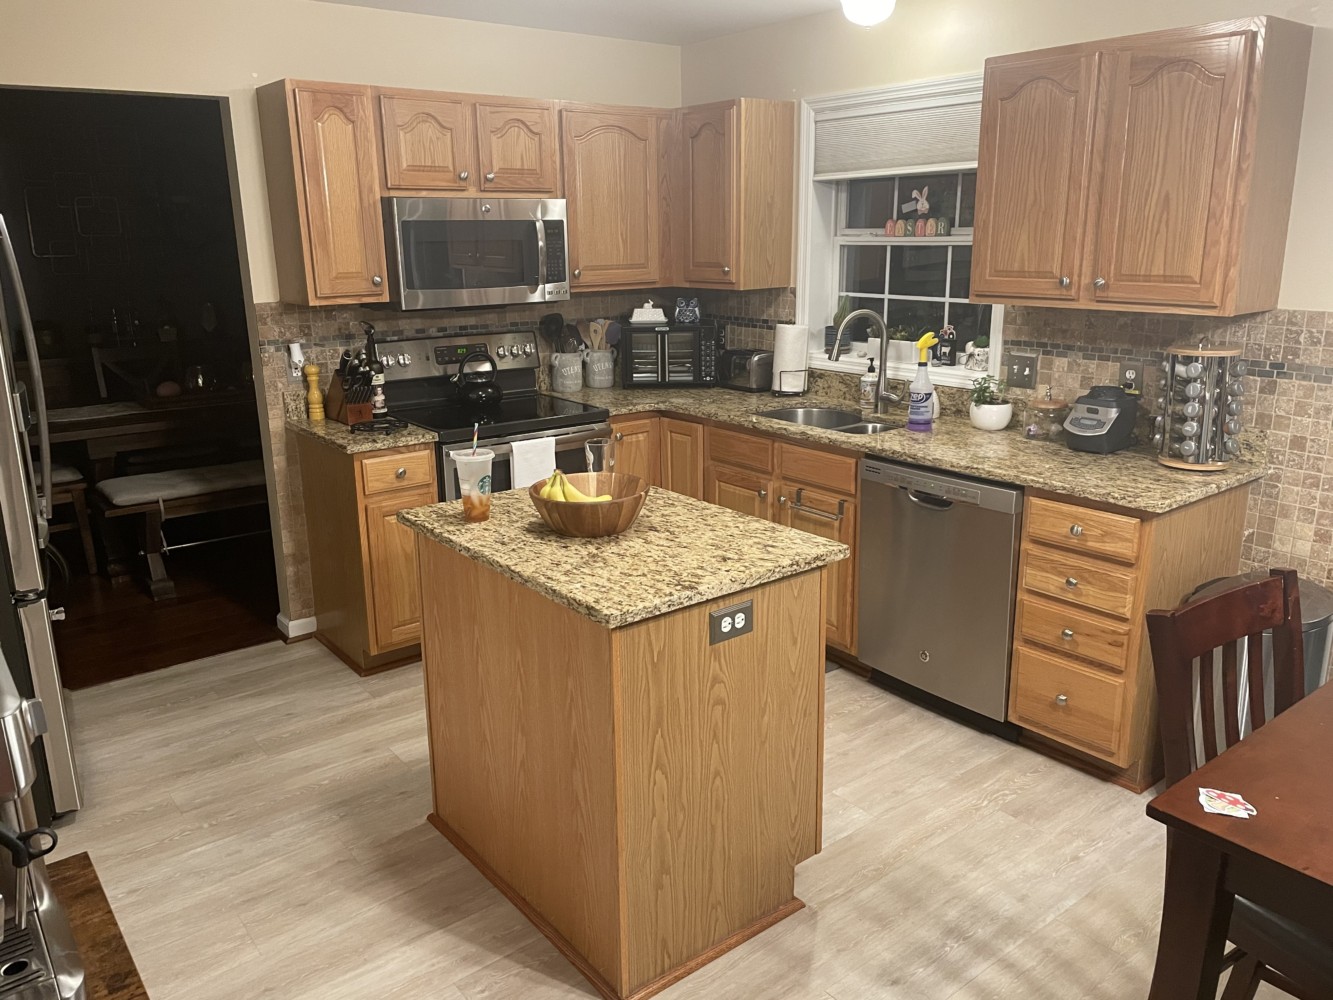
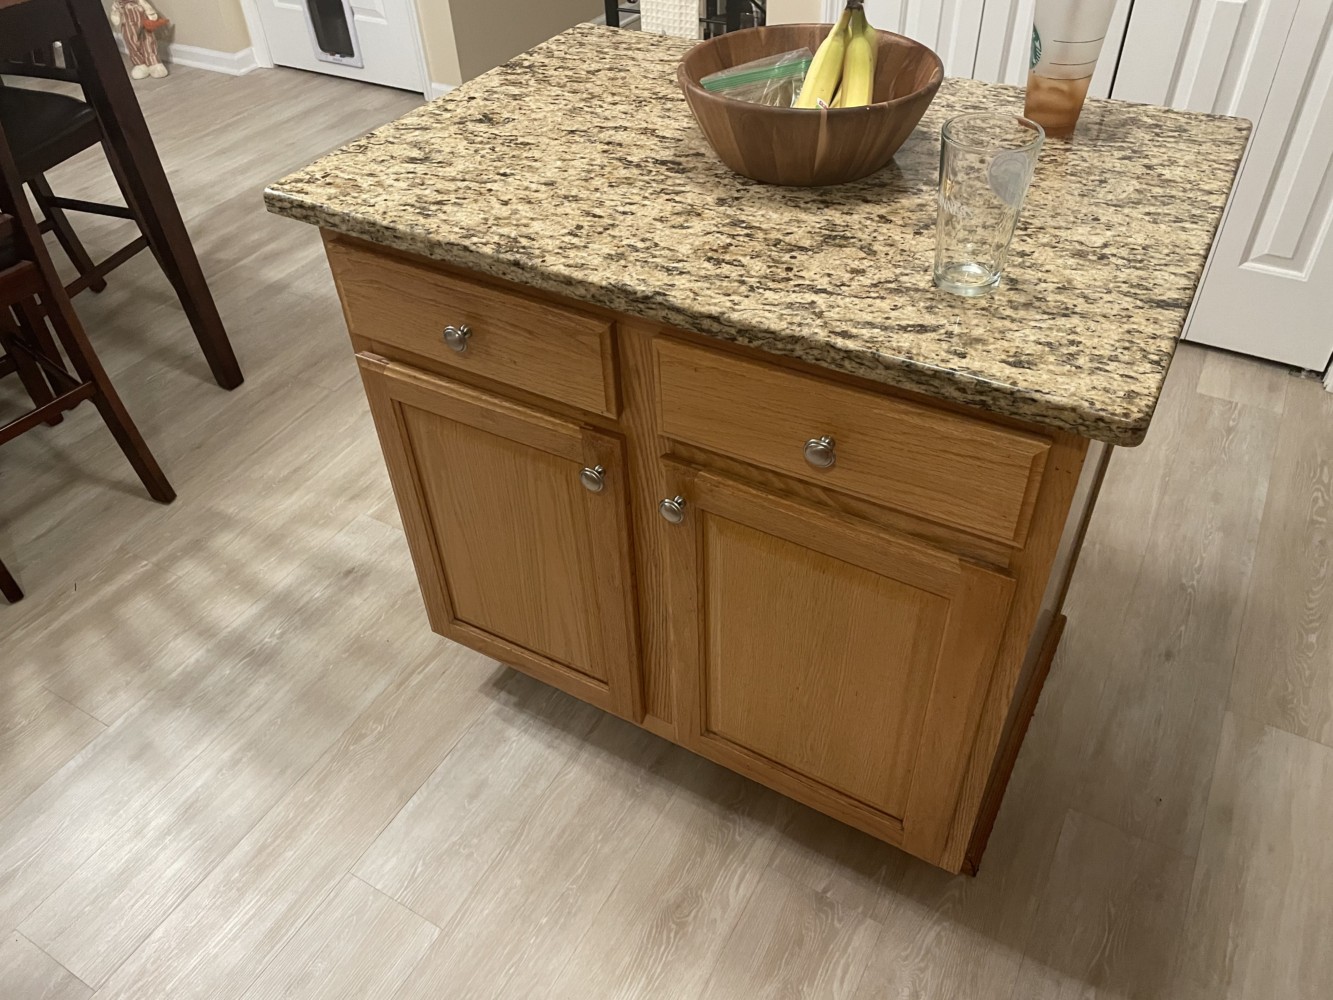
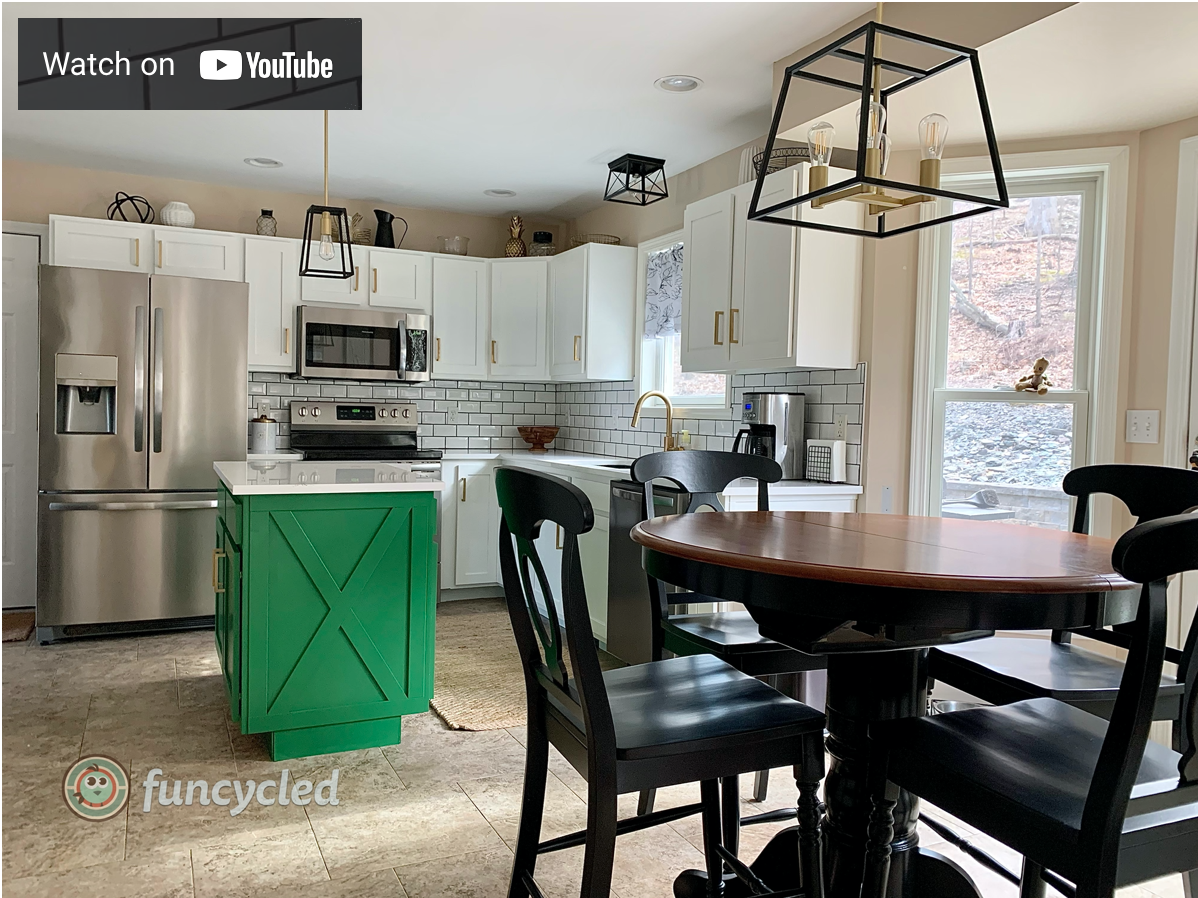
For this week’s makeover, I wanted to share a kitchen makeover from this past summer. This oak kitchen cabinet style is pretty common in this area. Check out how you can make a huge transformation by painting the cabinets a medium gray color.
Here’s the kitchen before:
We painted the kitchen cabinets Delray Gray by Benjamin Moore, sprayed them with a protective clear coat, and added new hardware.
If you’d like to see how we paint Kitchen Cabinets, click here to check out our video on YouTube.
Ready for the after photos?
Could your kitchen use an update? We’d love to help!! We can help pick out colors, finishes, product and do the cabinet painting, tiling, add new hardware. You can use our Contact Us form to request our design services or a quote for painting your kitchen. Please check out other kitchen projects on our For Sale page. We’ll need to see a picture of your kitchen, a list of how many doors and drawers there are, and where you are located to email you an estimate. This change ups the value of your home and gives you a whole new look at a fraction of the cost of new kitchen cabinets!
Thank you all for following along! If you’d like to get this blog in your email once a week, please sign up for our weekly newsletter by adding your email in the little box below my picture.
If you’ve enjoyed this post, please like FunCycled on Facebook, Instagram and Pinterest if you don’t already. Keep up to date on the newest finds, vote on colors and give your input on our creativity. We share fun tutorials, great before and after, and new design inspirations.
We offer interior design, kitchen cabinet painting, and custom built tables, barn doors, and repurposed furniture. Thank you, again, for working with us and for taking the time to spread the word about what we do.
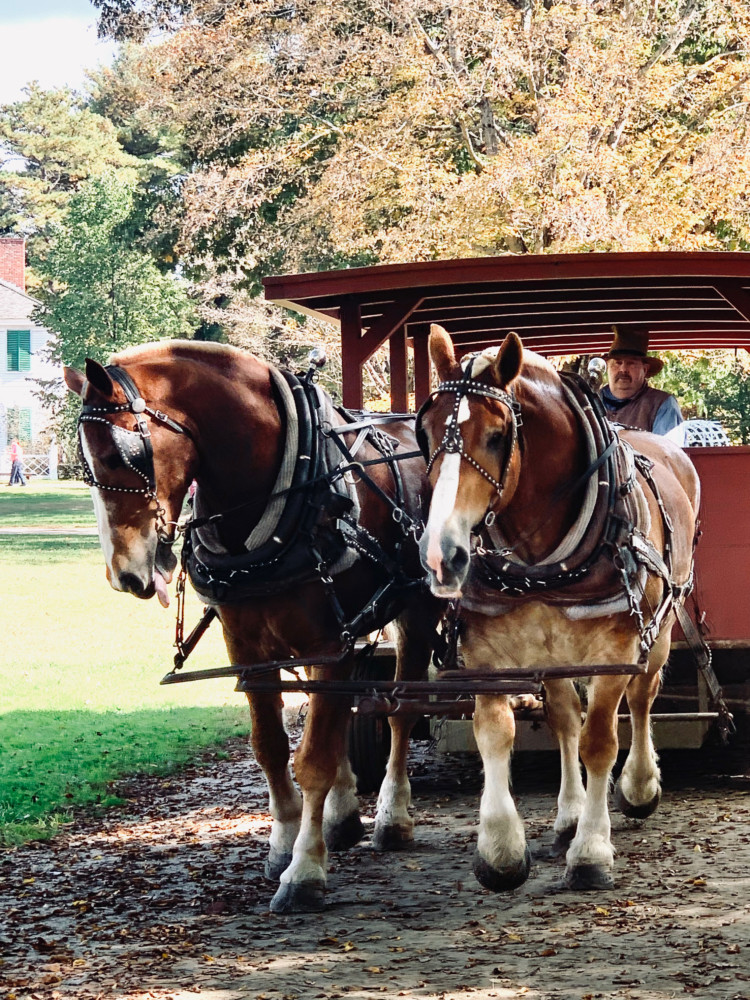
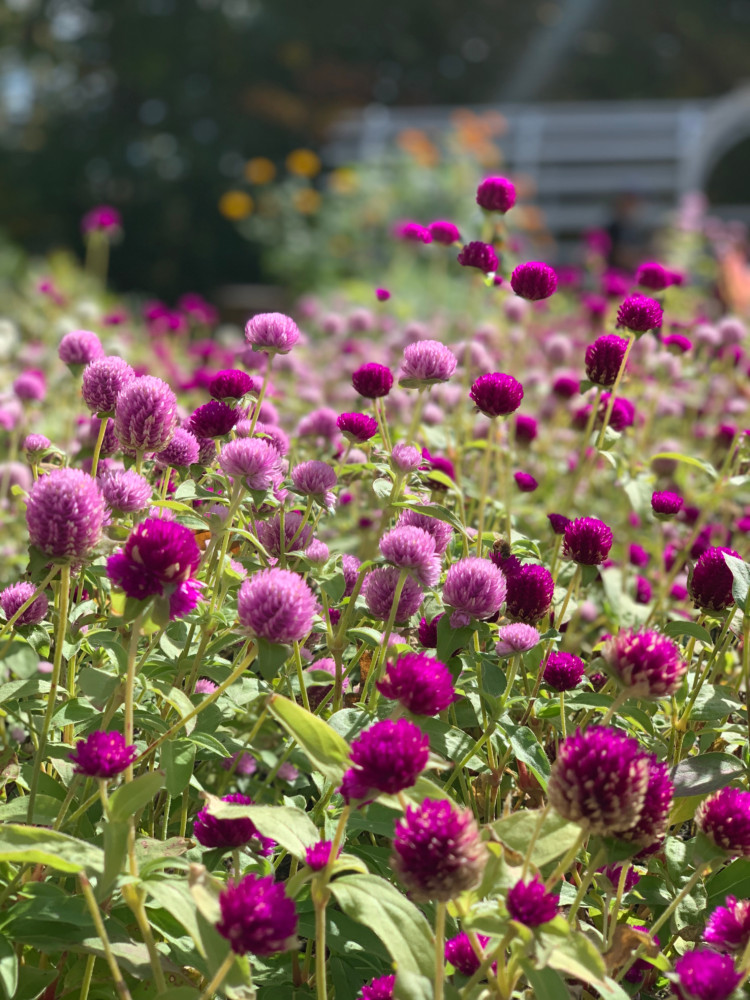
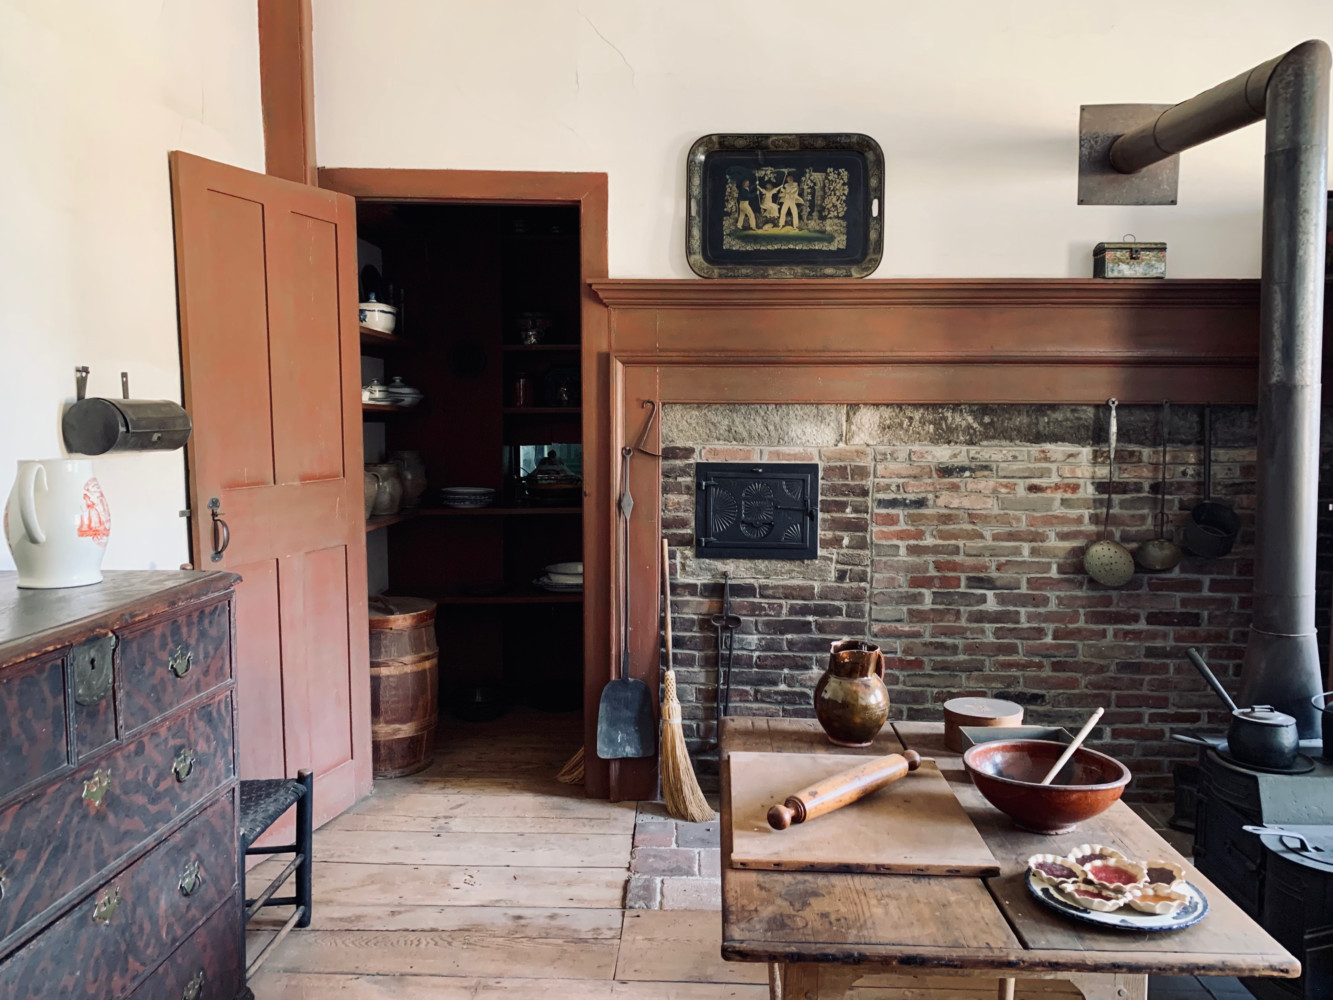
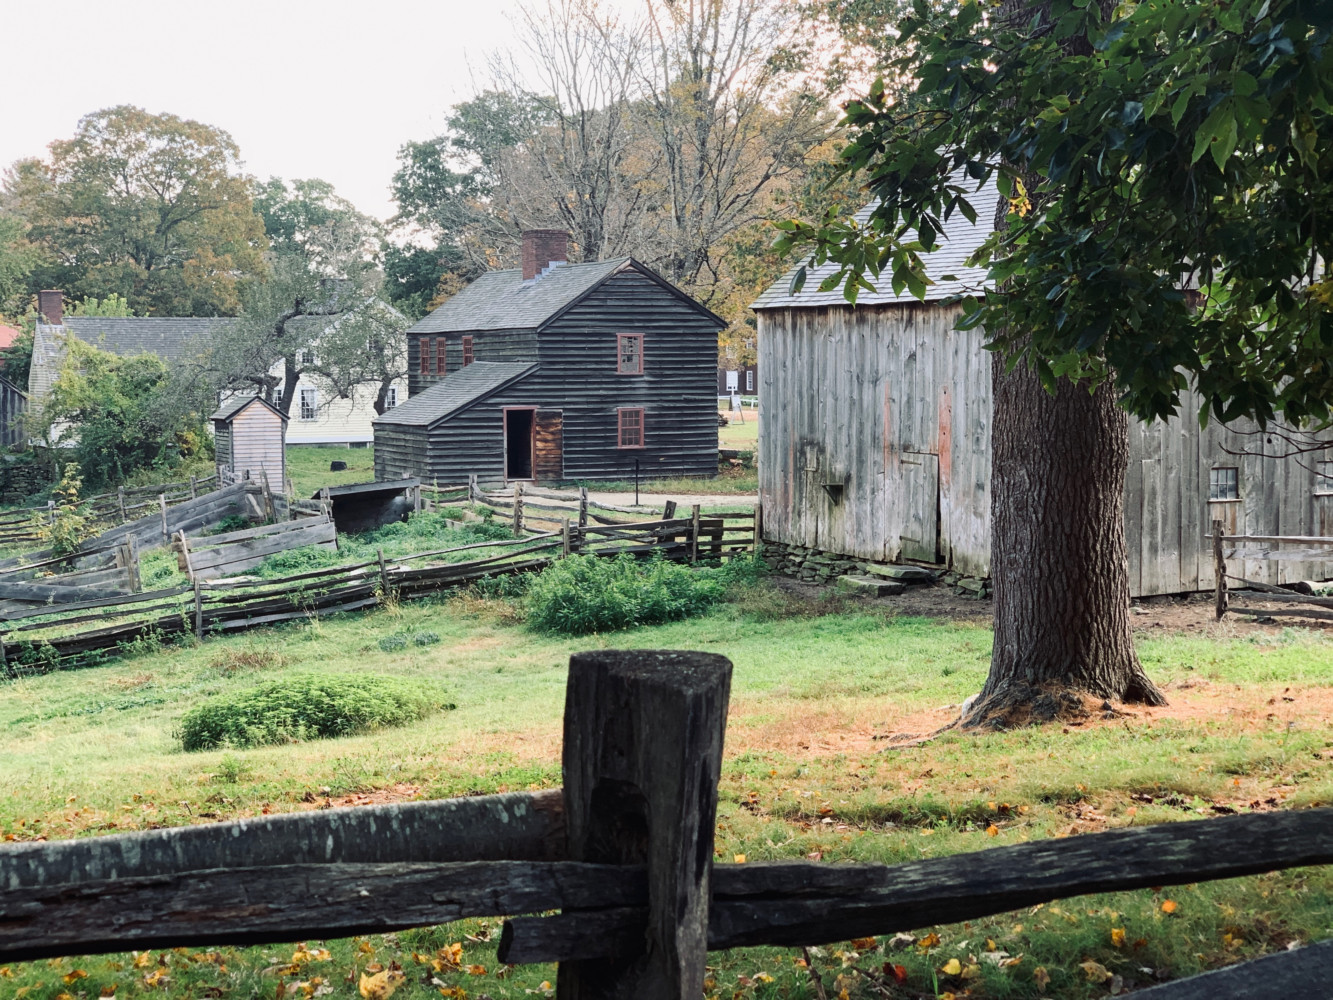
How are you? I’ve had a busy week so I’m a little behind on writing up this week’s blog post. Thanks for being patient with me. :) Last week, we went on a homeschool field trip to Old Sturbridge Village. It was the perfect fall day and we had the BEST time! Here are some of my favorite pictures from the trip.
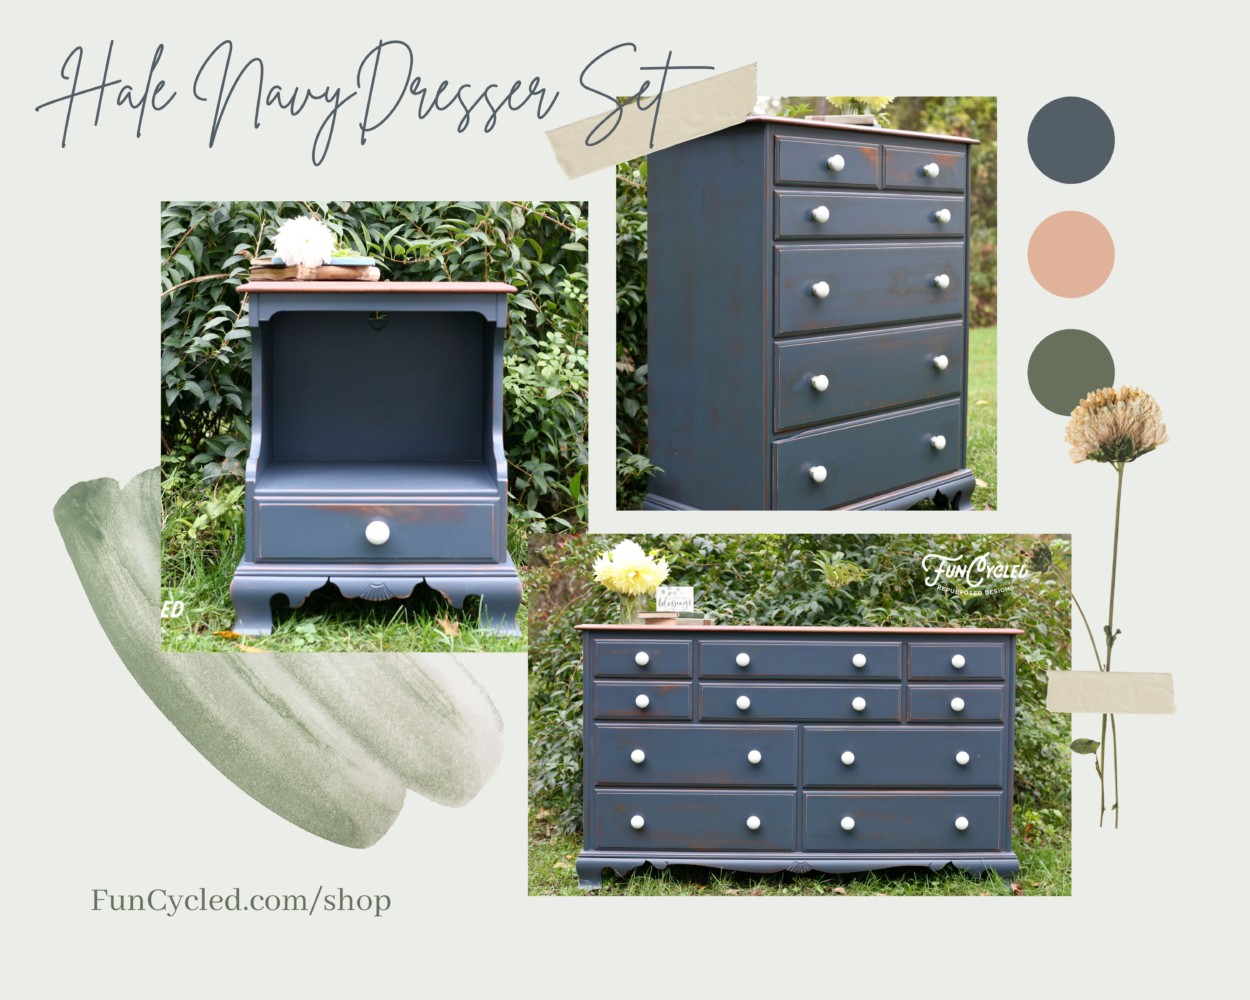
This week, I want to share a transformation for a bedroom set that I love!
Here it was before:
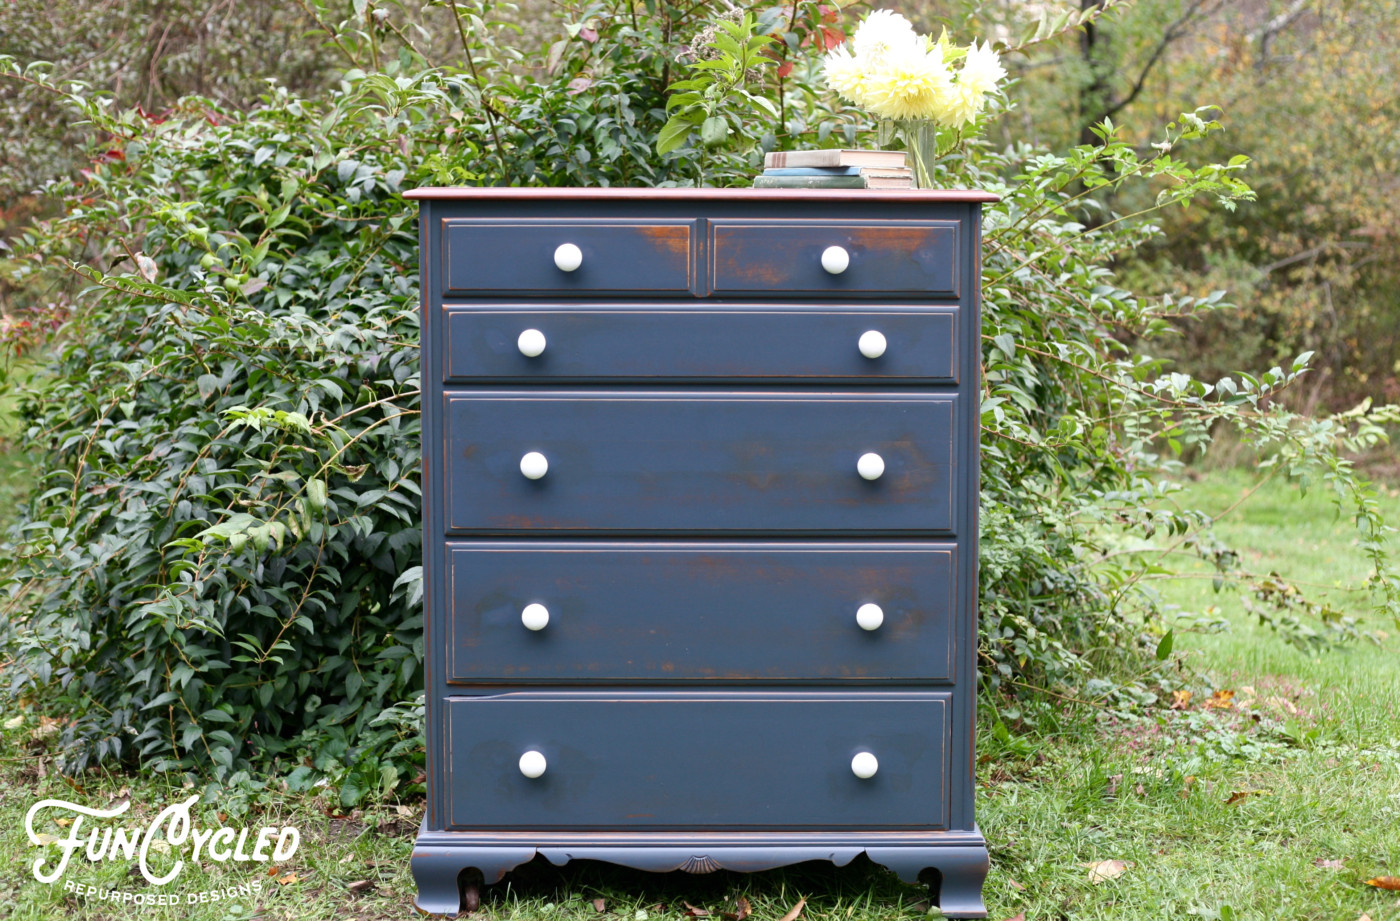
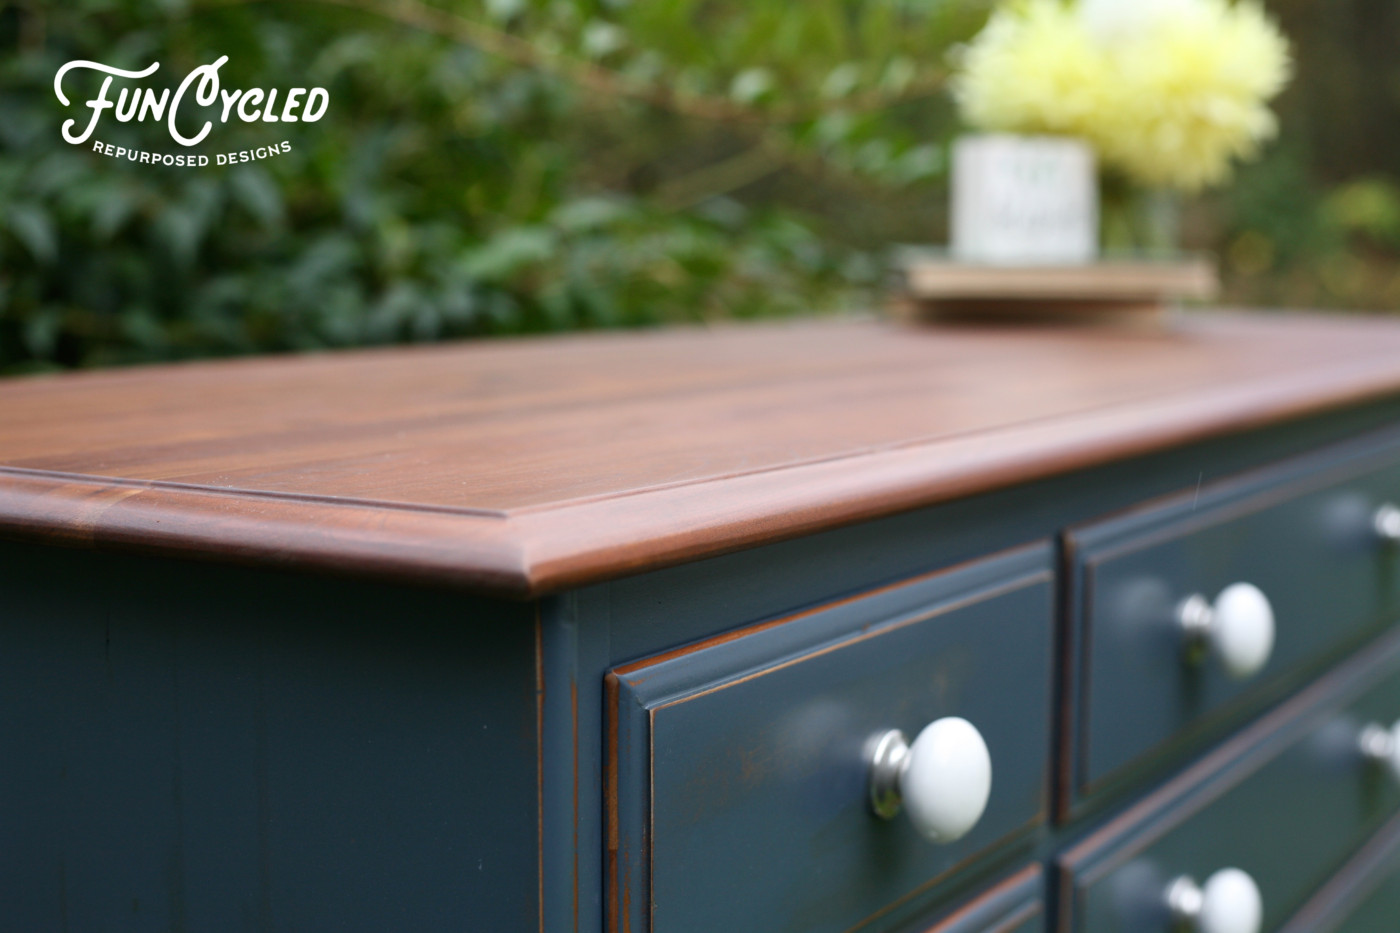
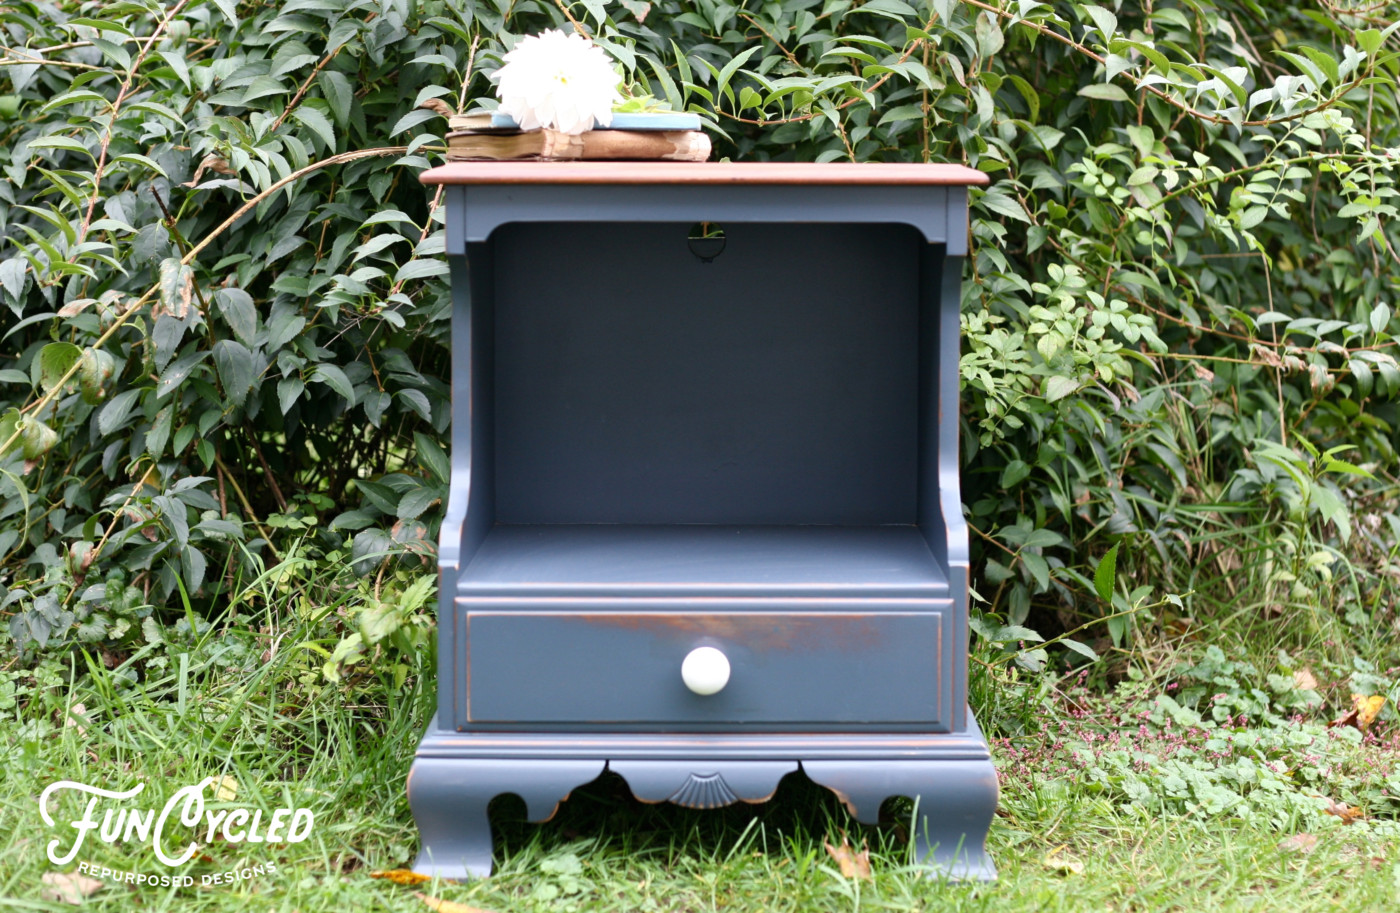
We painted the boxes with Benjamin Moore’s Hale Navy and then heavily distressed them. Then we sanded down the top and put a protective clear coat over it. I loved how the wood looked naturally with no stain. We also added all new hardware! If you want to see how we paint furniture, check out our How to Paint Furniture post.
Ready for the after photos?
This dresser set is available now to purchase! Head to our Shop Page to check them out!
Thank you all for following along! If you’d like to get this blog in your email once a week, please sign up for our weekly newsletter by adding your email in the little box below my picture.
If you’ve enjoyed this post, please like FunCycled on Facebook, Instagram and Pinterest if you don’t already. Keep up to date on the newest finds, vote on colors and give your input on our creativity. We share fun tutorials, great before and after, and new design inspirations.
We offer interior design, kitchen cabinet painting, and custom built tables, barn doors, and repurposed furniture. Thank you, again, for working with us and for taking the time to spread the word about what we do.
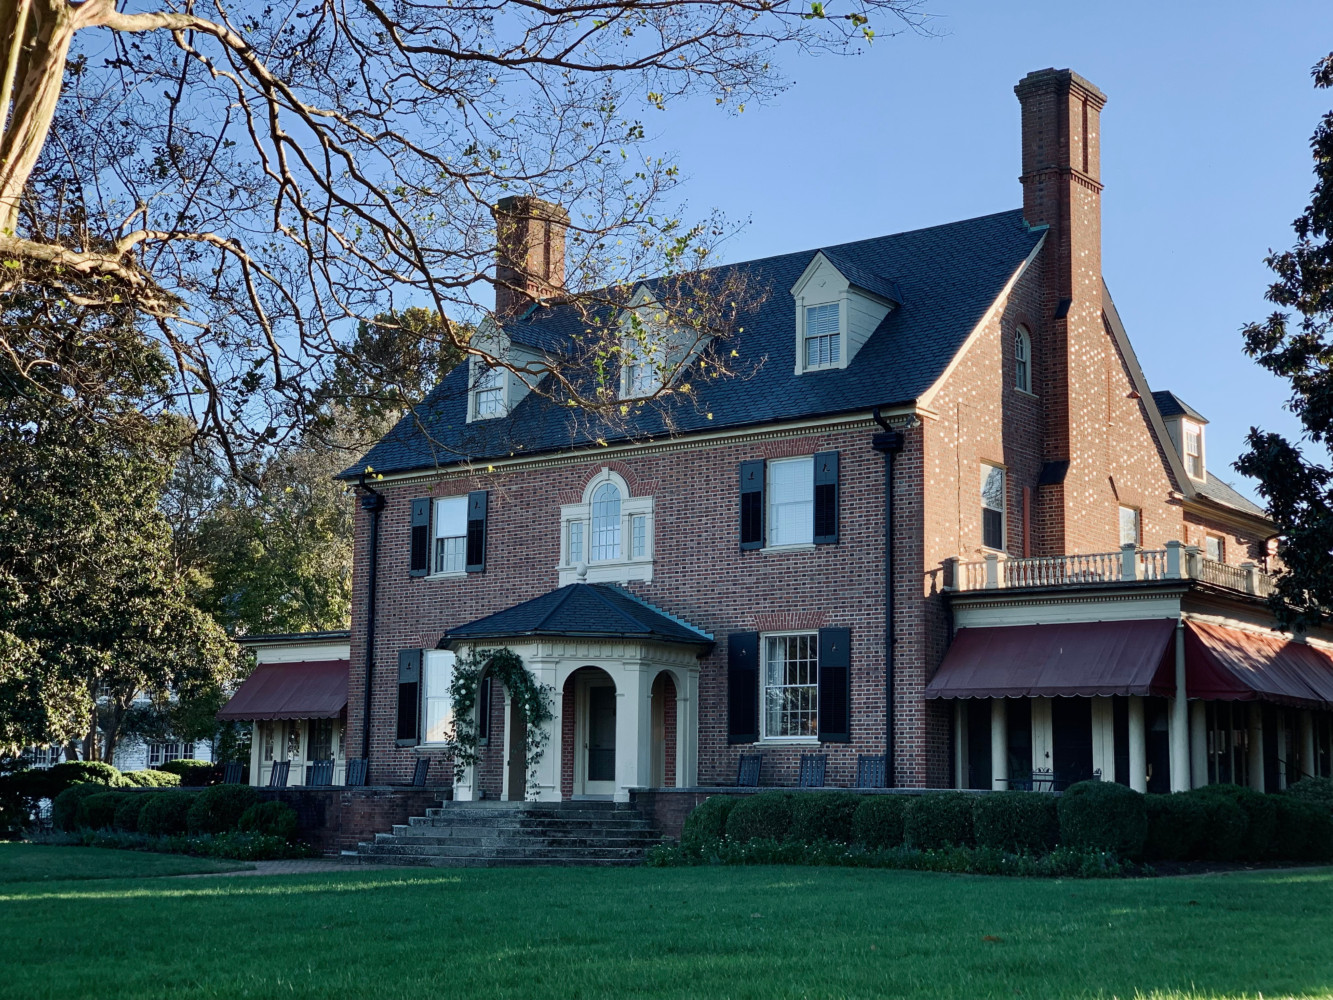
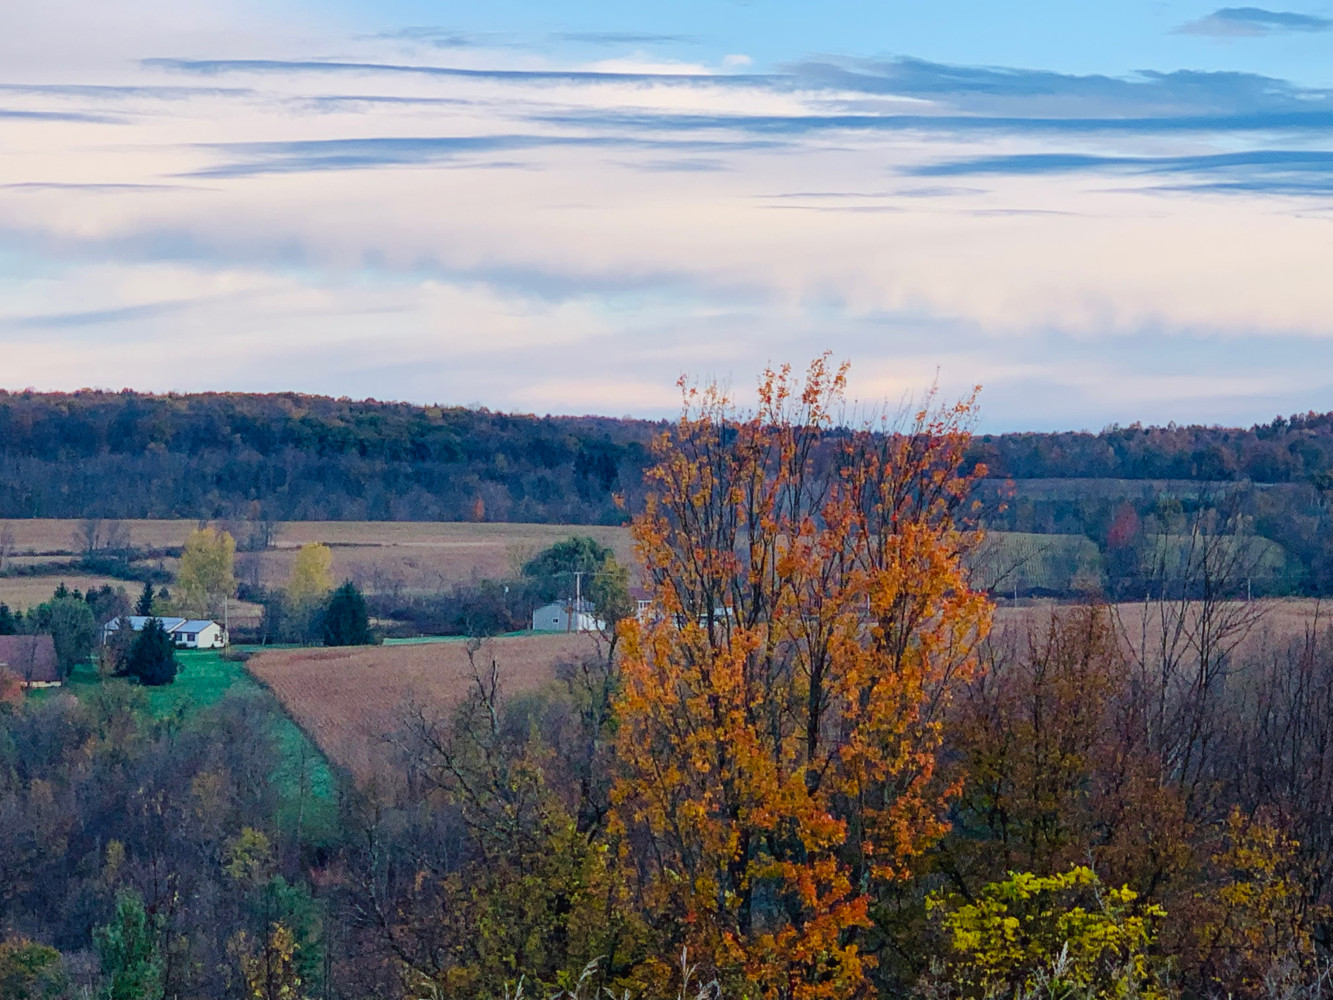
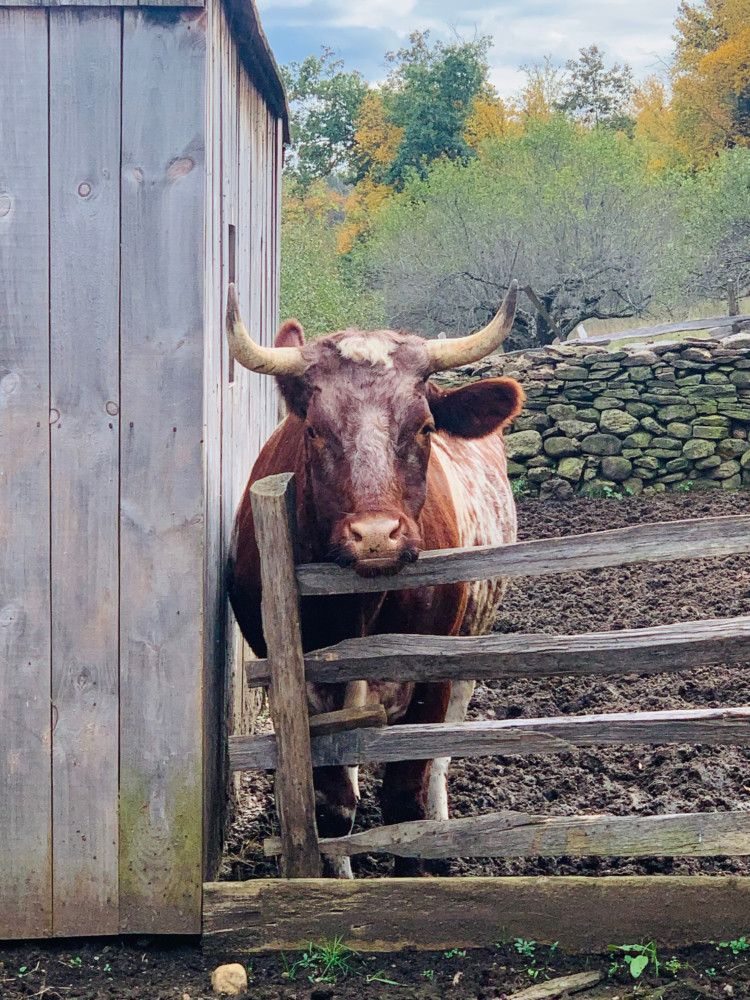
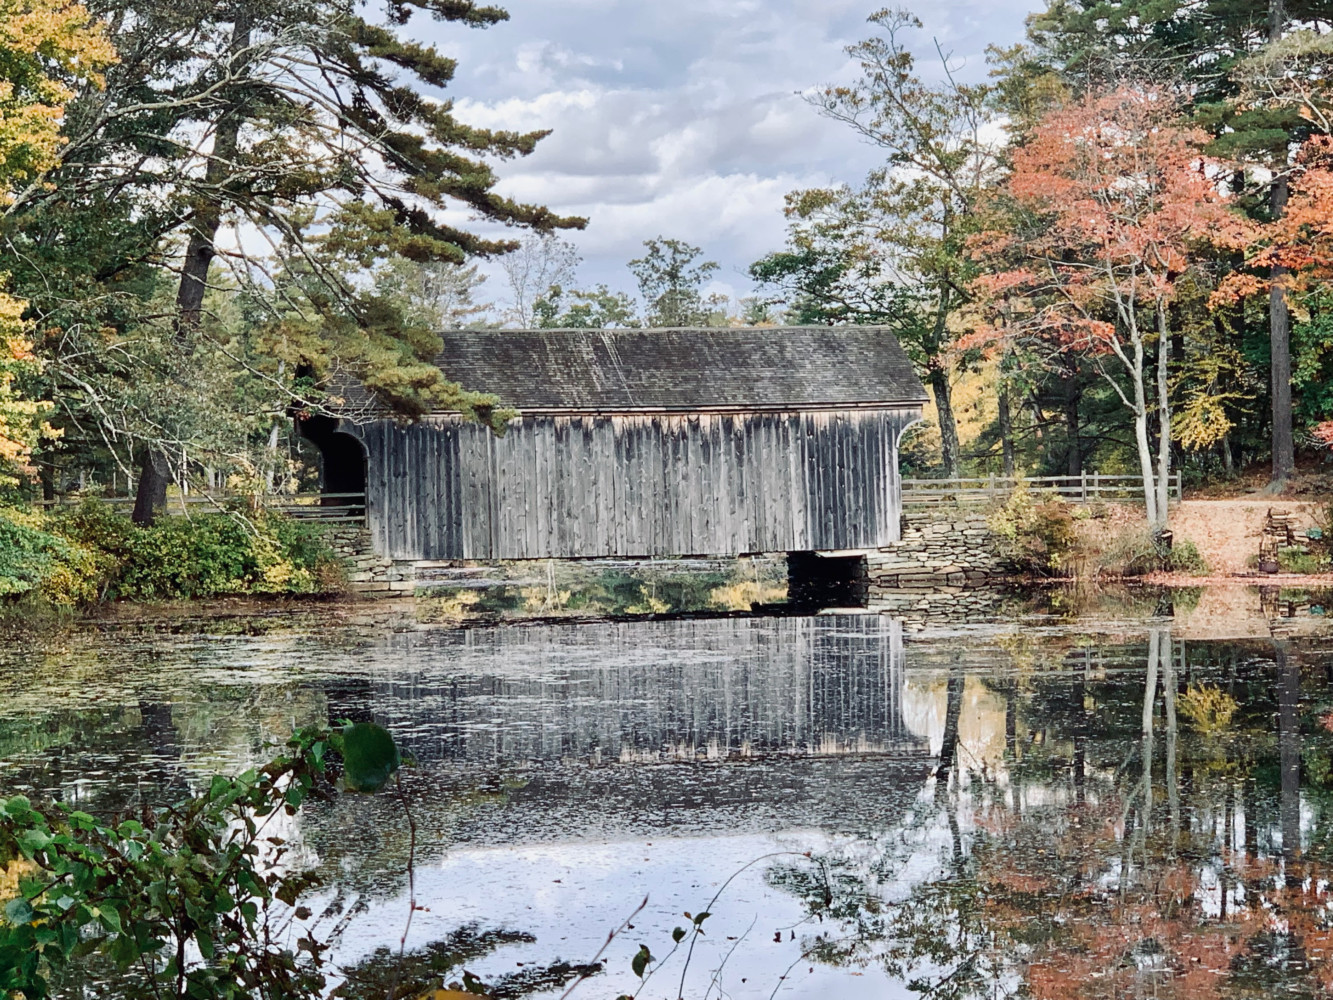
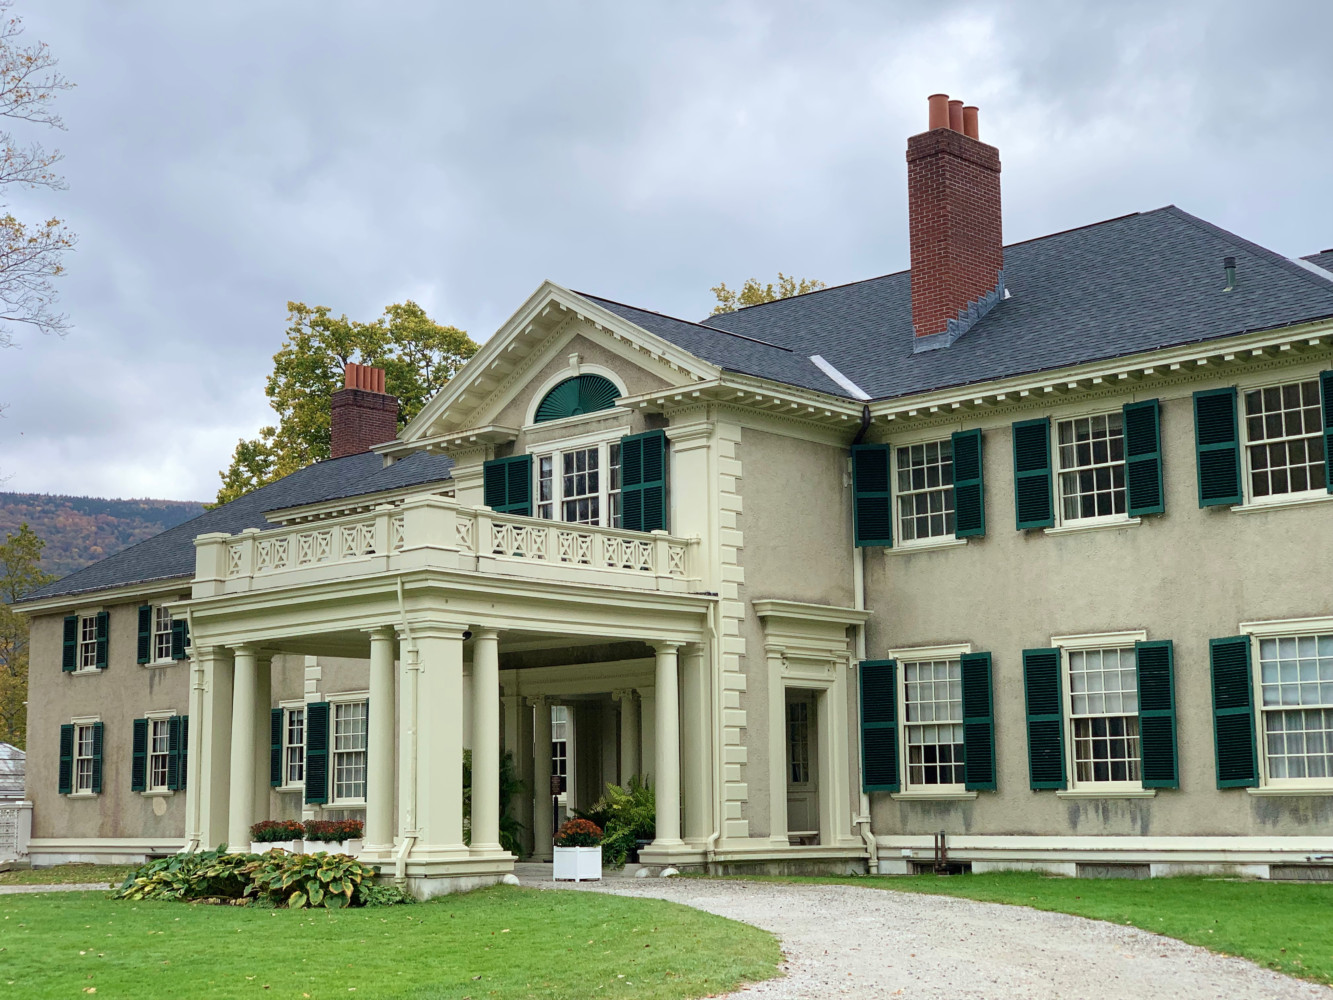
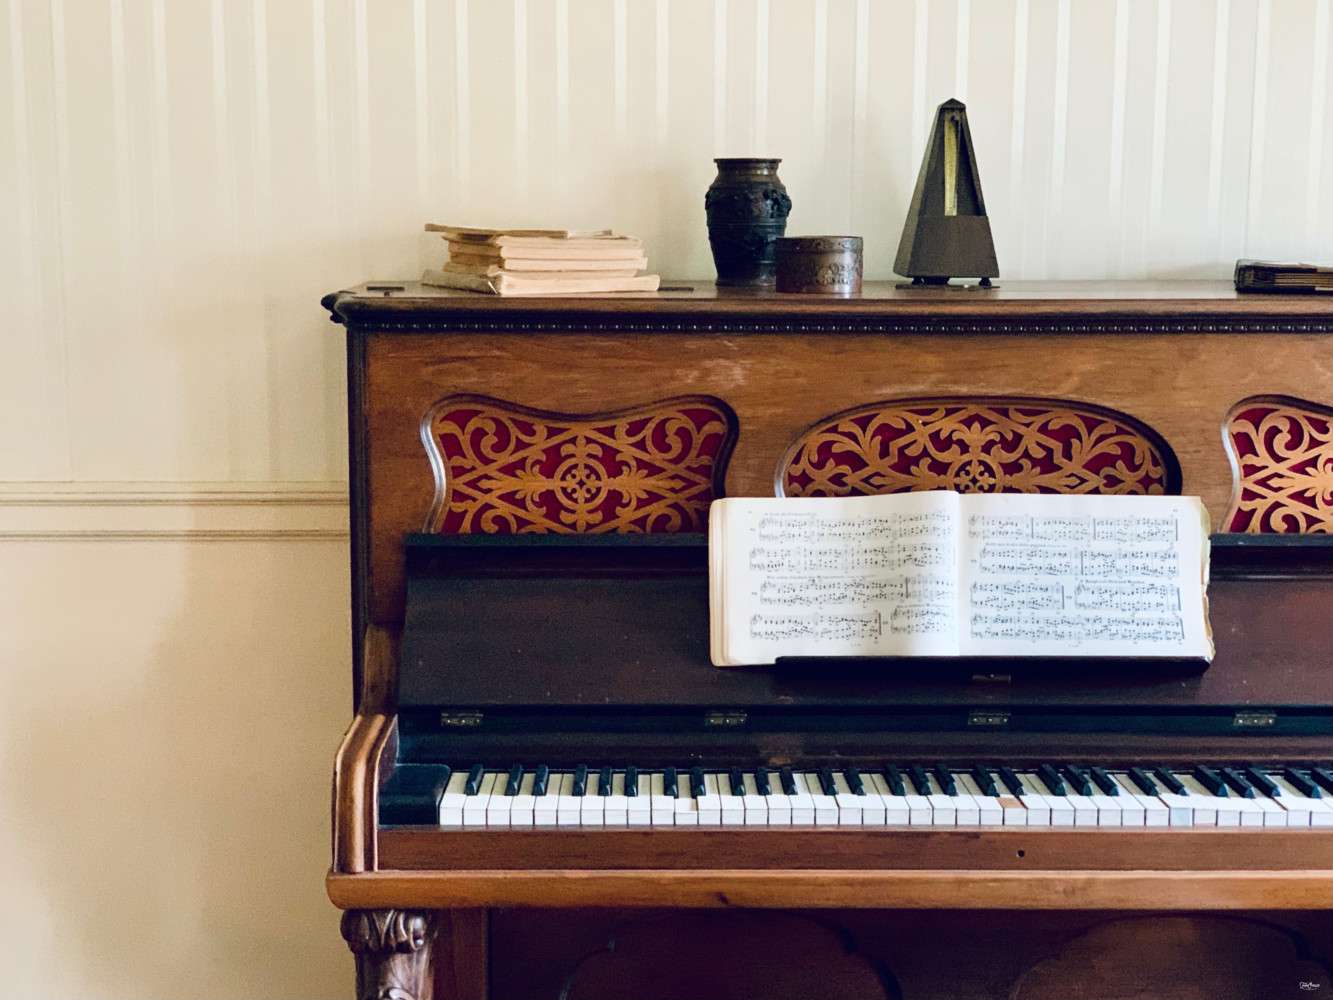
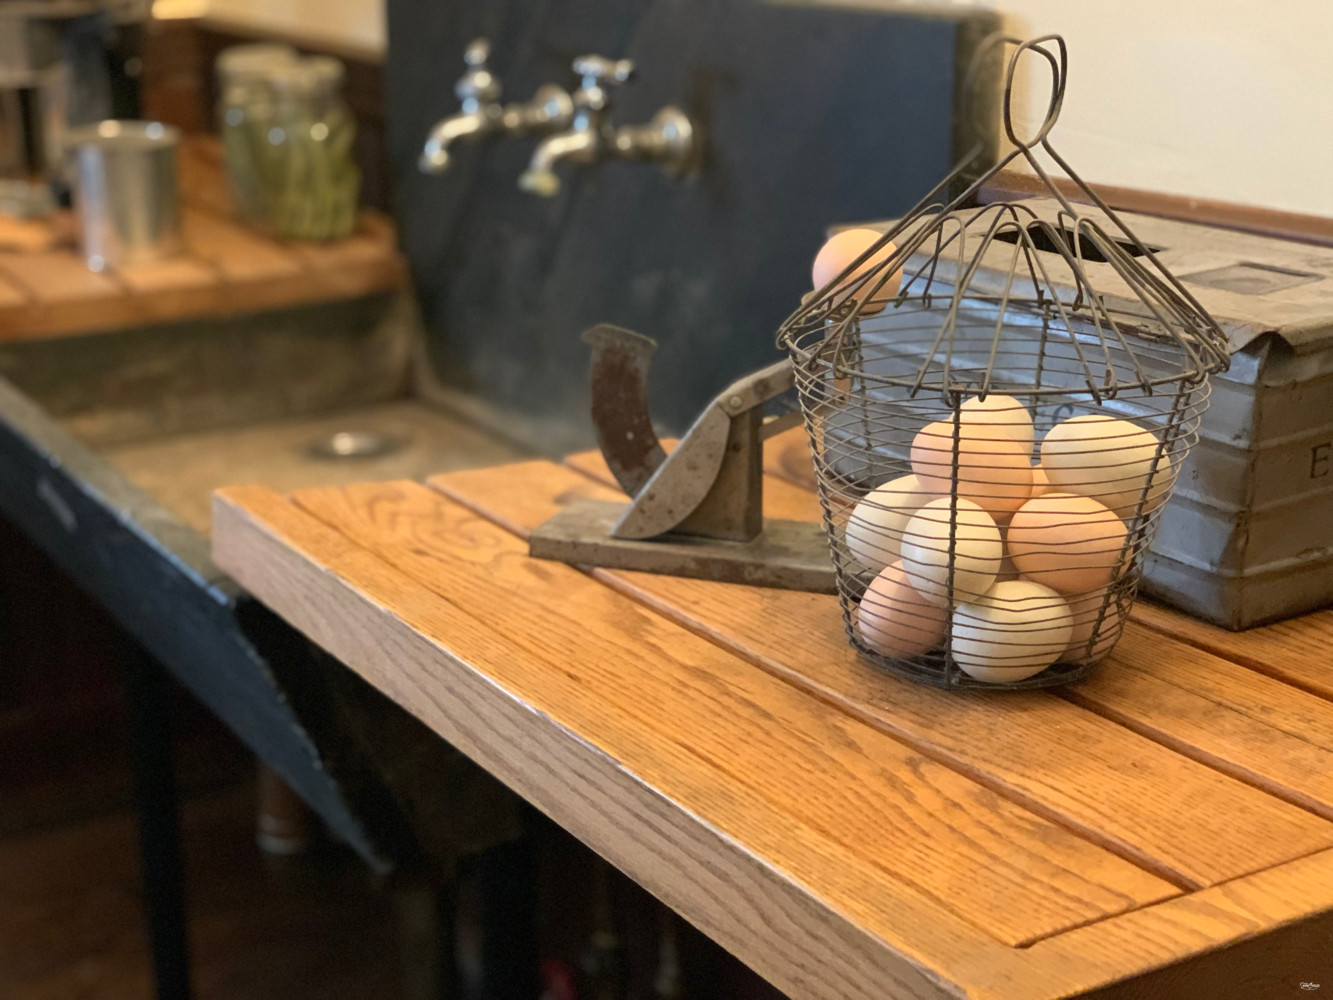
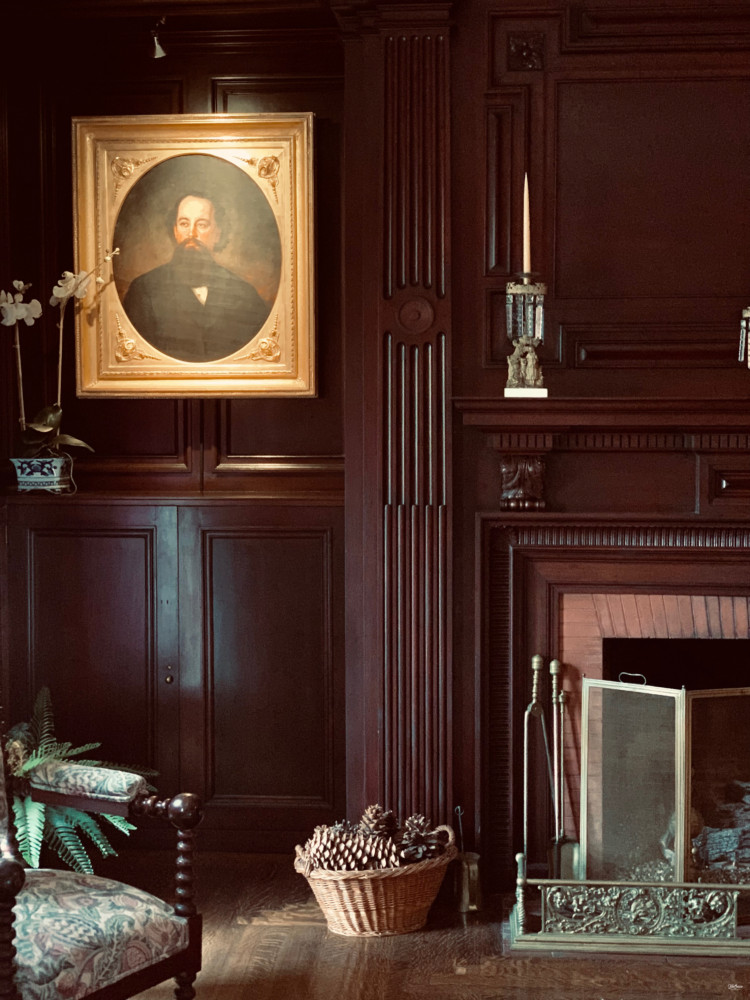
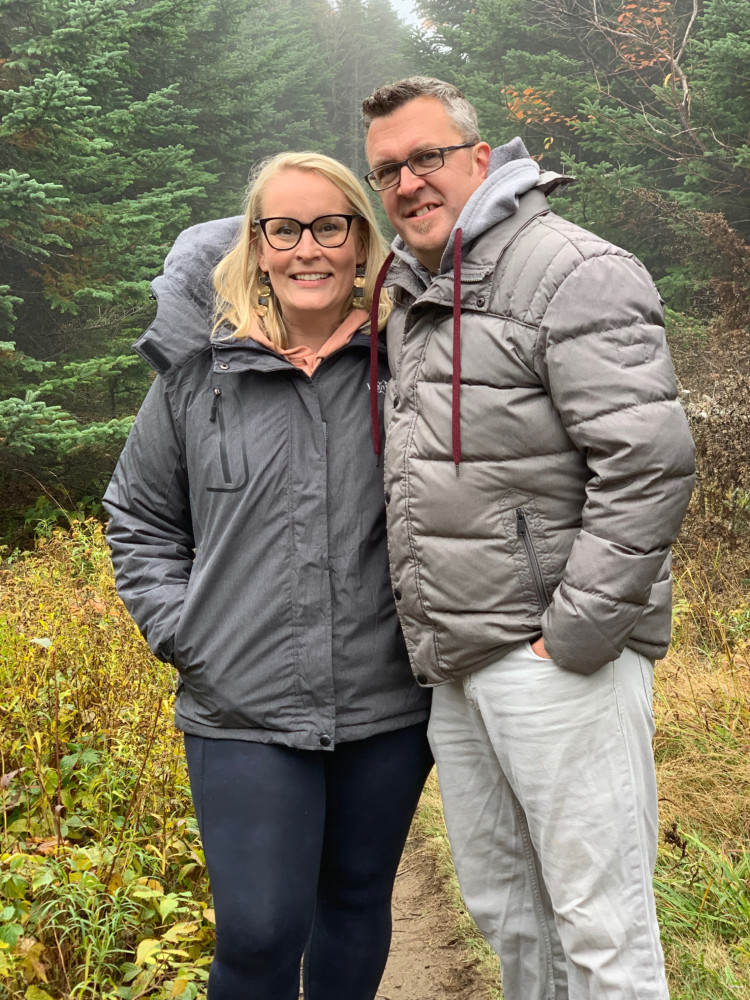
How are you? I hope your weekend was beautiful! Remember my blog post last week about travel? Well, last weekend, we were able to travel to Stratton Mountain Resort to enjoy a little getaway with our friends Mark and MaryGrace. MaryGrace and I both had birthday’s in the last couple of weeks so we decided to get away to enjoy time together for our birthdays. We went to the Hildene, shopped and ate our way through Manchester, VT, and enjoyed all of the fall foliage!! Here are some of my favorite photos from the trip:
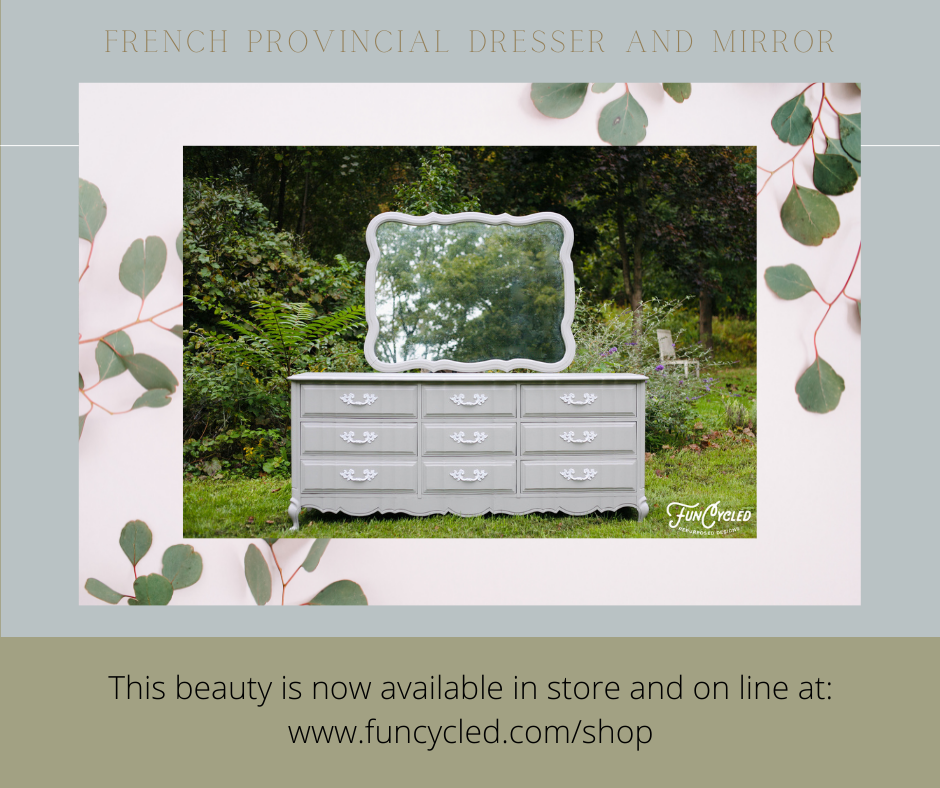
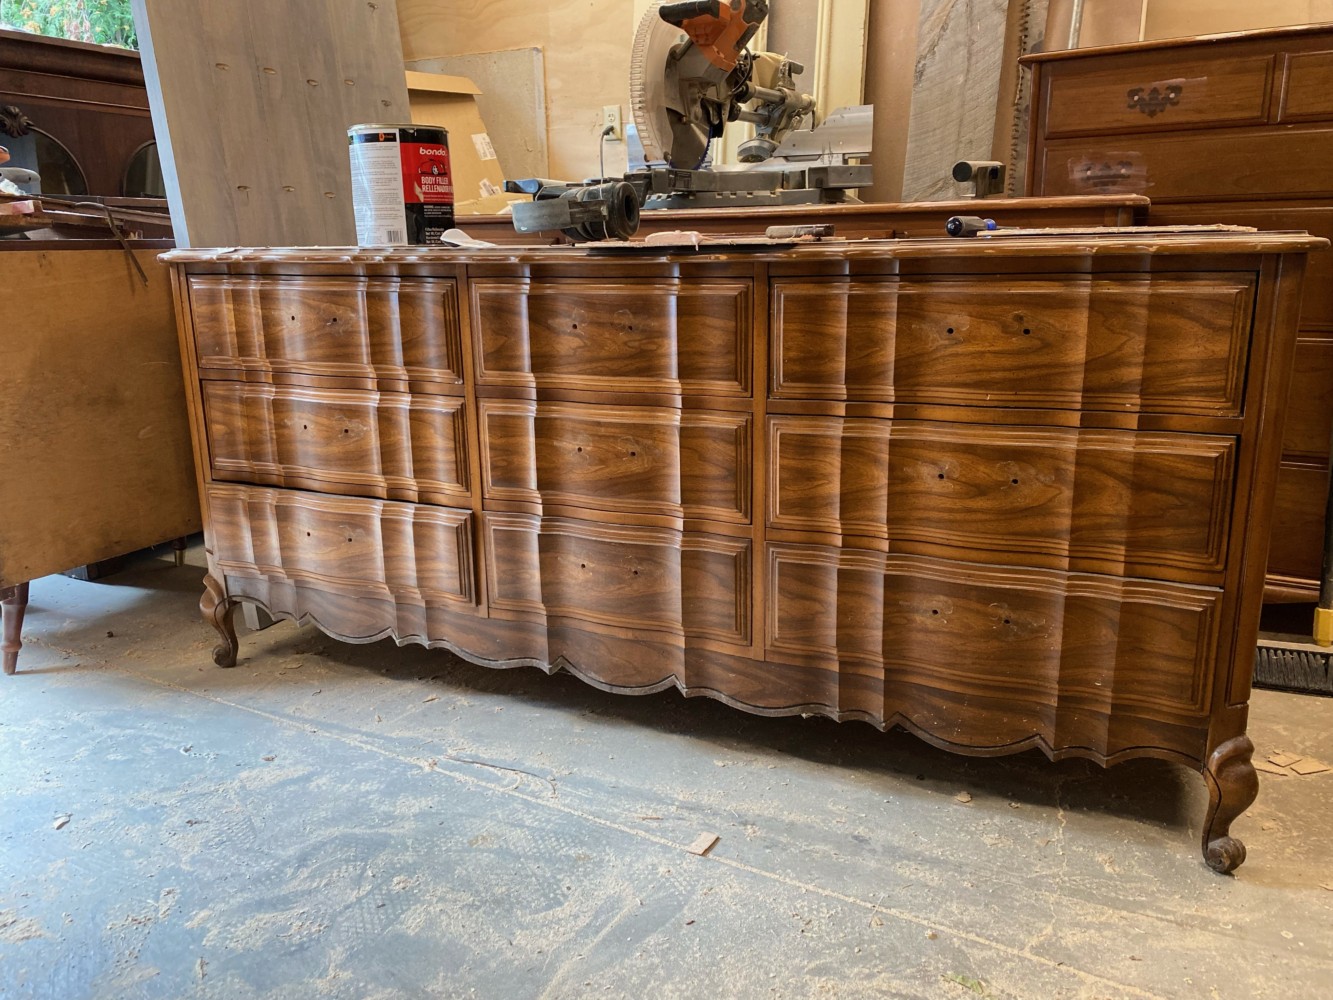
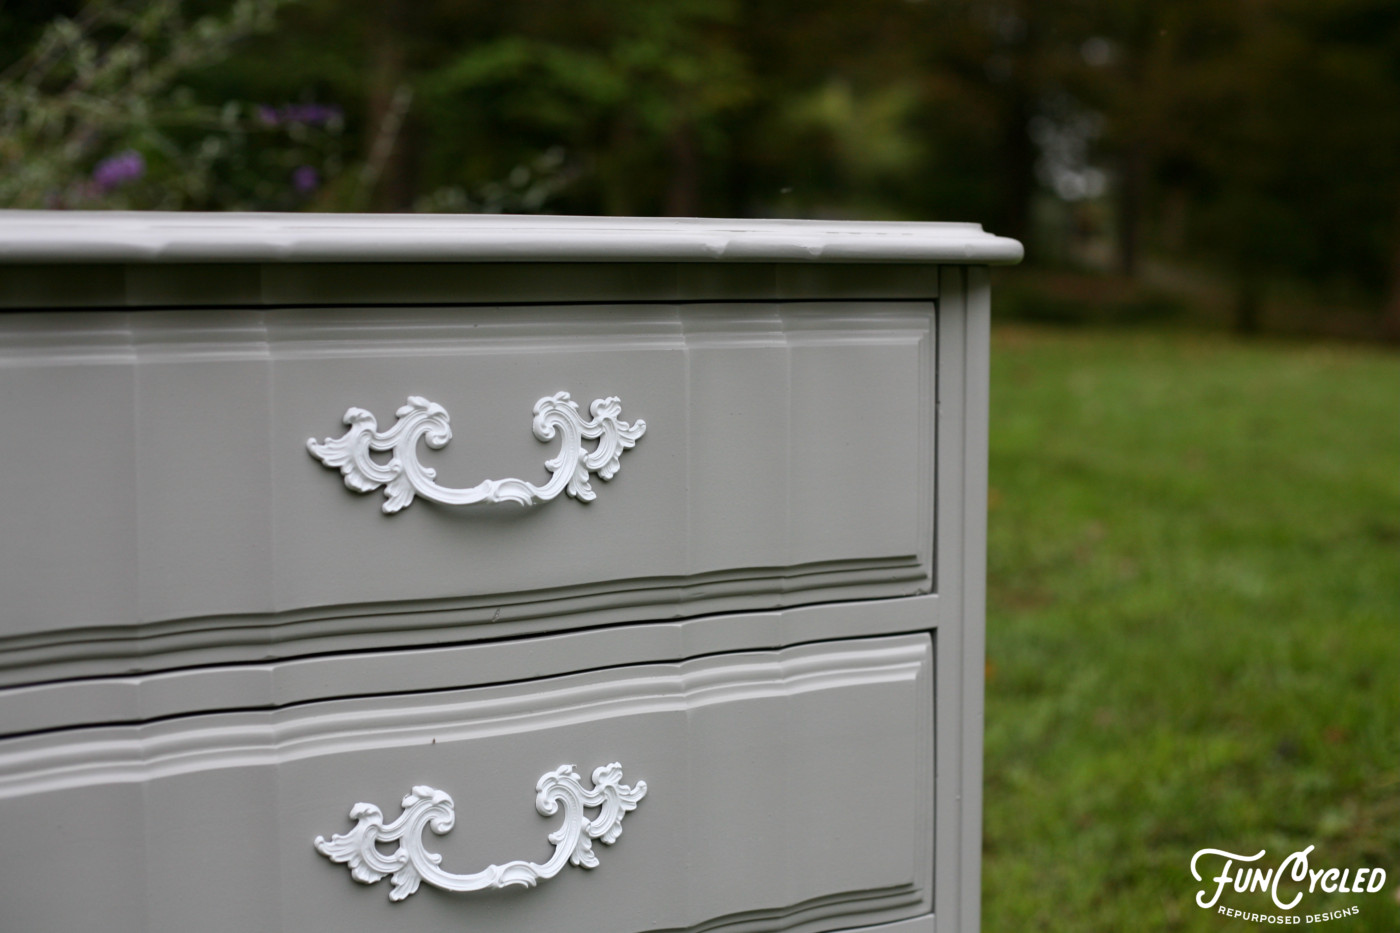
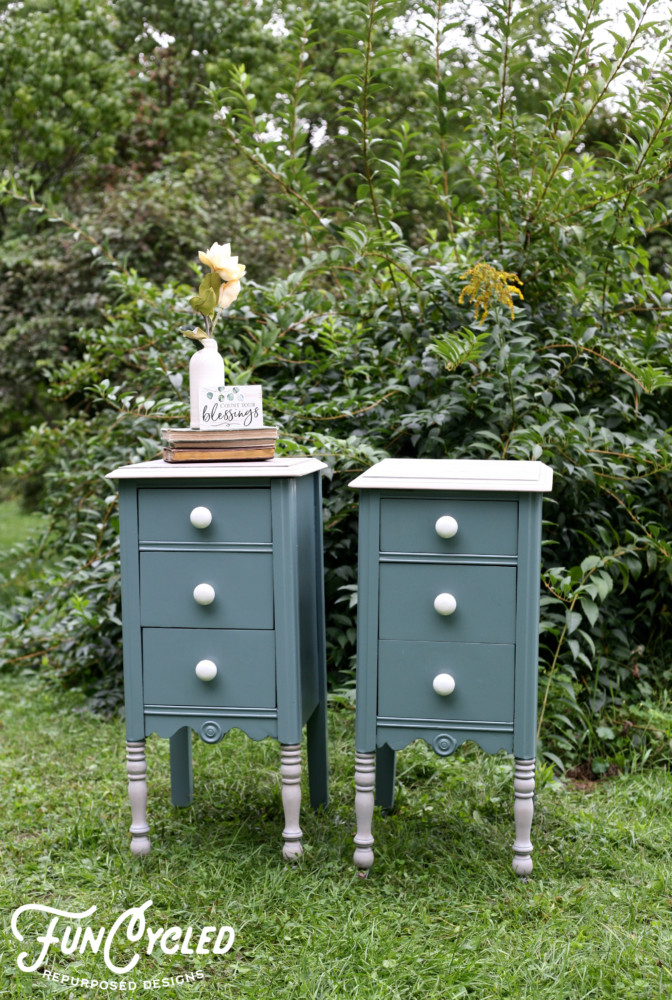
For this week’s furniture makeover, I wanted to share this French Provincial Dresser that we recently redid for our store. Here it is before:
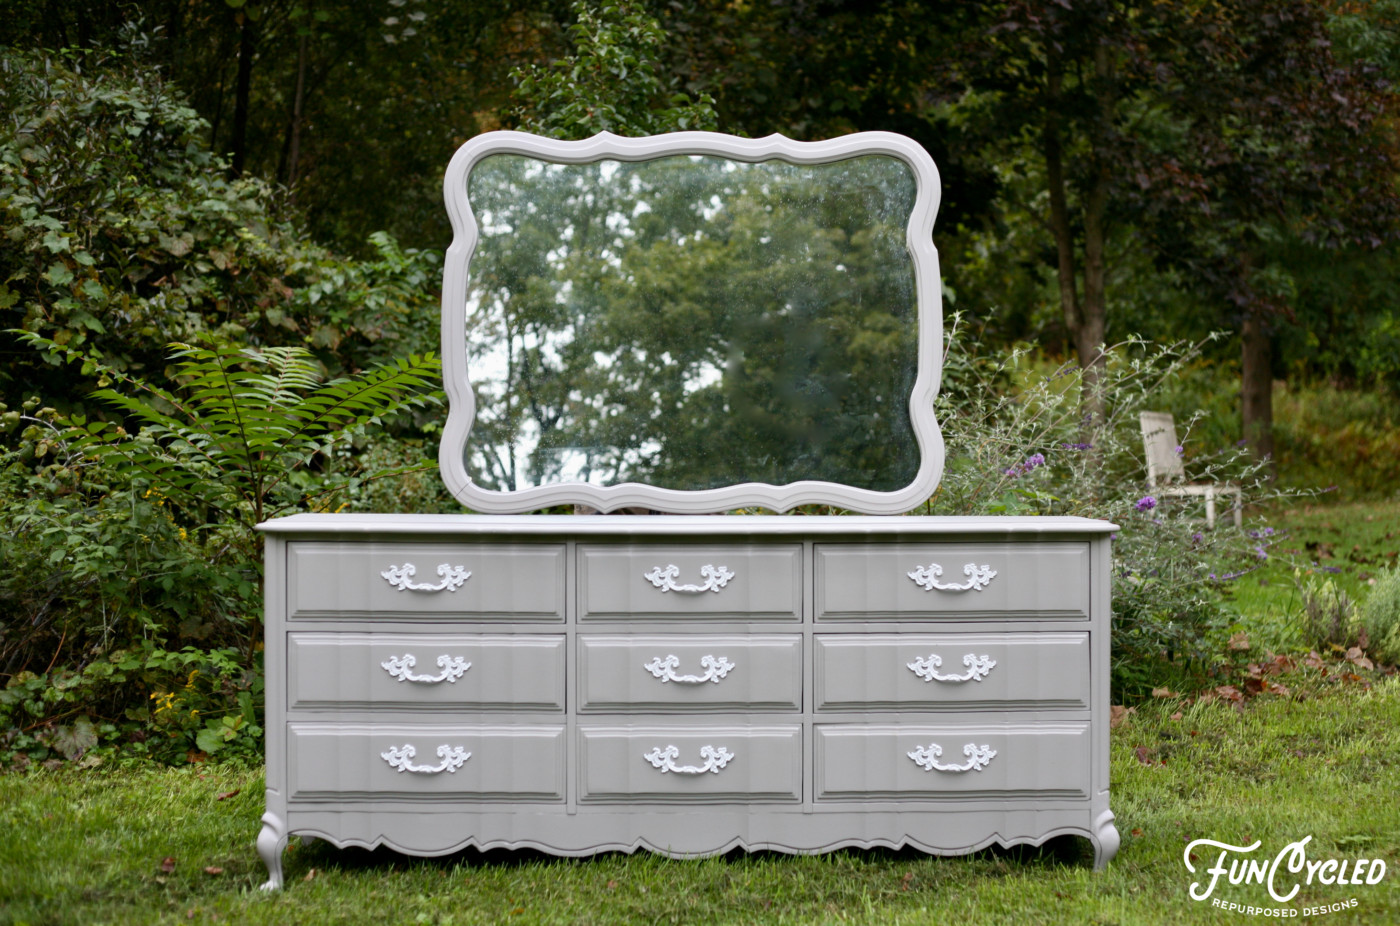
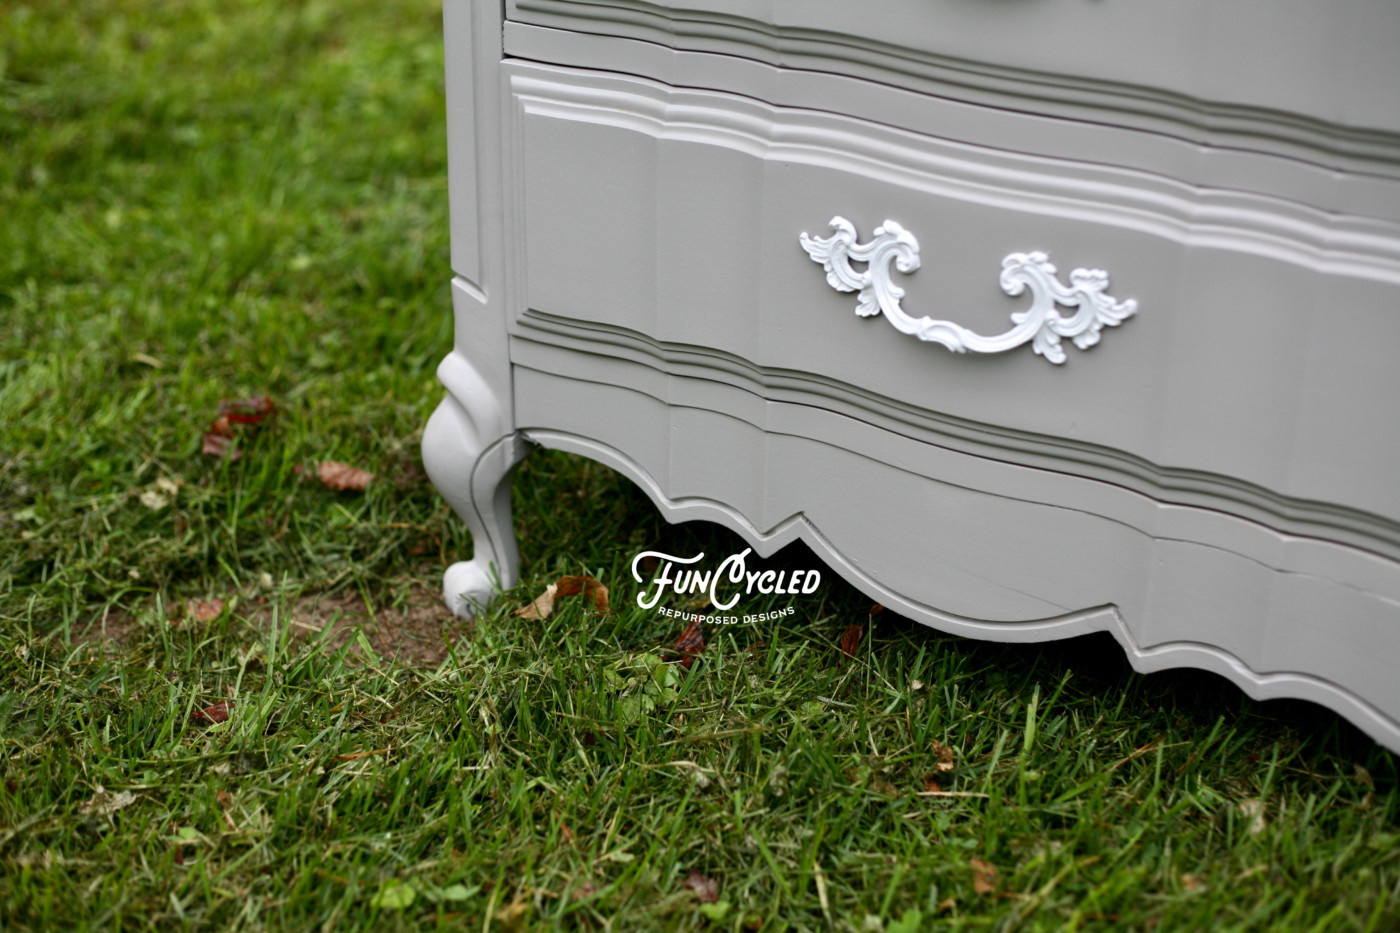
We painted the hardware white and painted the boxes Stone Gray by Benjamin Moore. If you want to see how we paint furniture, check out our How to Paint Furniture post. Ready for the after photos?
This dresser is available now to purchase! Head to our Shop Page to check them out!
Thank you all for following along! If you’d like to get this blog in your email once a week, please sign up for our weekly newsletter by adding your email in the little box below my picture.
If you’ve enjoyed this post, please like FunCycled on Facebook, Instagram and Pinterest if you don’t already. Keep up to date on the newest finds, vote on colors and give your input on our creativity. We share fun tutorials, great before and after, and new design inspirations.
We offer interior design, kitchen cabinet painting, and custom built tables, barn doors, and repurposed furniture. Thank you, again, for working with us and for taking the time to spread the word about what we do.
Wanna have a little chat about small business stuff? Most of the time I talk about pretty makeovers and I rarely talk about being a small business owner. Well, since we’re hitting the 10 years in business mark in just a couple months, I thought maybe it would be helpful to talk about some helpful tips that have kept us sane over the last 10 years.
I was at a food walking tour in Atlanta this weekend when a stranger (Tara) asked me what the hardest thing about owning my own business is. Even though I wouldn’t change it for the world, there are quite a few challenges in owning your own business. Especially a family run business where both spouses work together.
So after (probably a longer than I’d like awkward pause), I said two of the hardest things.
Home feels like work not a resting place. Many people (until the pandemic perhaps) have had home feel like a resting place. Well, for an entrepreneur who works from home, it’s the exact opposite. I WANT home to feel restful and calm, but it simply doesn’t. There are projects staring me in the face, piles of paperwork, and my laptop begging for my time. Because if I don’t do it today, it just makes for a busier tomorrow.
It’s hard on friendships. Being the extrovert that I am, I had to go from being the initiator with friends to waiting for most friends to plan getting together. Because I’m too busy to coordinate it all. Which means… I’ve lost friends because I’m so busy, but it also means I’ve found more intentional friendships. Often they are the hardest working, busiest women I know, but we work hard to be intentional and make time DESPITE the busy.
I’l save the friendship post for another day, but for today we’ll talk about travel.
People have said to me in the past that they think sometimes travel is way for people to escape life. For me, that’s just not it. I love being a designer; I love helping people make their homes beautiful. I love painting, creating, repurposing. It’s just not what I love MOST. I love my people most. My family, my friends, my own soul. To keep those things healthy, for me, I need to get the heck out of my house so I can truly unplug, soak up those beautiful people in my life, and enjoy new adventures with them.
You may be thinking that you just started your business and you’re broke; there’s no way you can afford to travel. Trust me. I get it. We really lived one sale at a time at the beginning with nothing in savings at all. So how did we do it? We went to visit friends quite a bit. A good friend would love for you to visit and that’s free. We’d grab groceries on the way so we didn’t have to eat out much. It’s about unplugging from work. We also went camping, shared a house with family to make it more doable for all of us. We never flew; we always drove to save money. We did what it took!
If you can’t get away for the weekend, plan a day trip away from work/home. You can pack a picnic or go on a hike. Go on a photo adventure where you just look for pretty scenery and take photos while driving the day away. Best photo gets an icecream. We chase sunsets. So many free options that can be impactful and memorable for you or your family.
You know what now? I have kids who would pick an adventure over a present any day for their birthdays. They love doing fun things. We have all these memories/moments in time where we stopped to enjoy our beautiful earth, our friends, our family.
In small business, you’ll need to set aside time for getting away from home. Budget it in as best you can. If you are in business and have creative ways that you’ve traveled without spending a lot, please share those in the comments.
So as I soaked up Atlanta this past weekend with my dear friend, Nicolle, (who also owns a retail shop). Check her amazing store out Blue Bird Home Decor. We both talked about how traveling helps us rest, fills us up, and brings us back to doing what we love with new creativity, energy, and joy.
If you’re headed to Atlanta anytime soon, I highly recommend these fun stops:
We both LOVED Atlanta for its delicious food, beautiful old homes, the tours, and all the trees throughout the city. It’s so beautiful!!!
Thank you all for following along! If you’d like to get this blog in your email once a week, please sign up for our weekly newsletter by adding your email in the little box below my picture.
If you’ve enjoyed this post, please like FunCycled on Facebook, Instagram and Pinterest if you don’t already. Keep up to date on the newest finds, vote on colors and give your input on our creativity. We share fun tutorials, great before and after, and new design inspirations.
We offer interior design, kitchen cabinet painting, and custom built tables, barn doors, and repurposed furniture. Thank you, again, for working with us and for taking the time to spread the word about what we do.
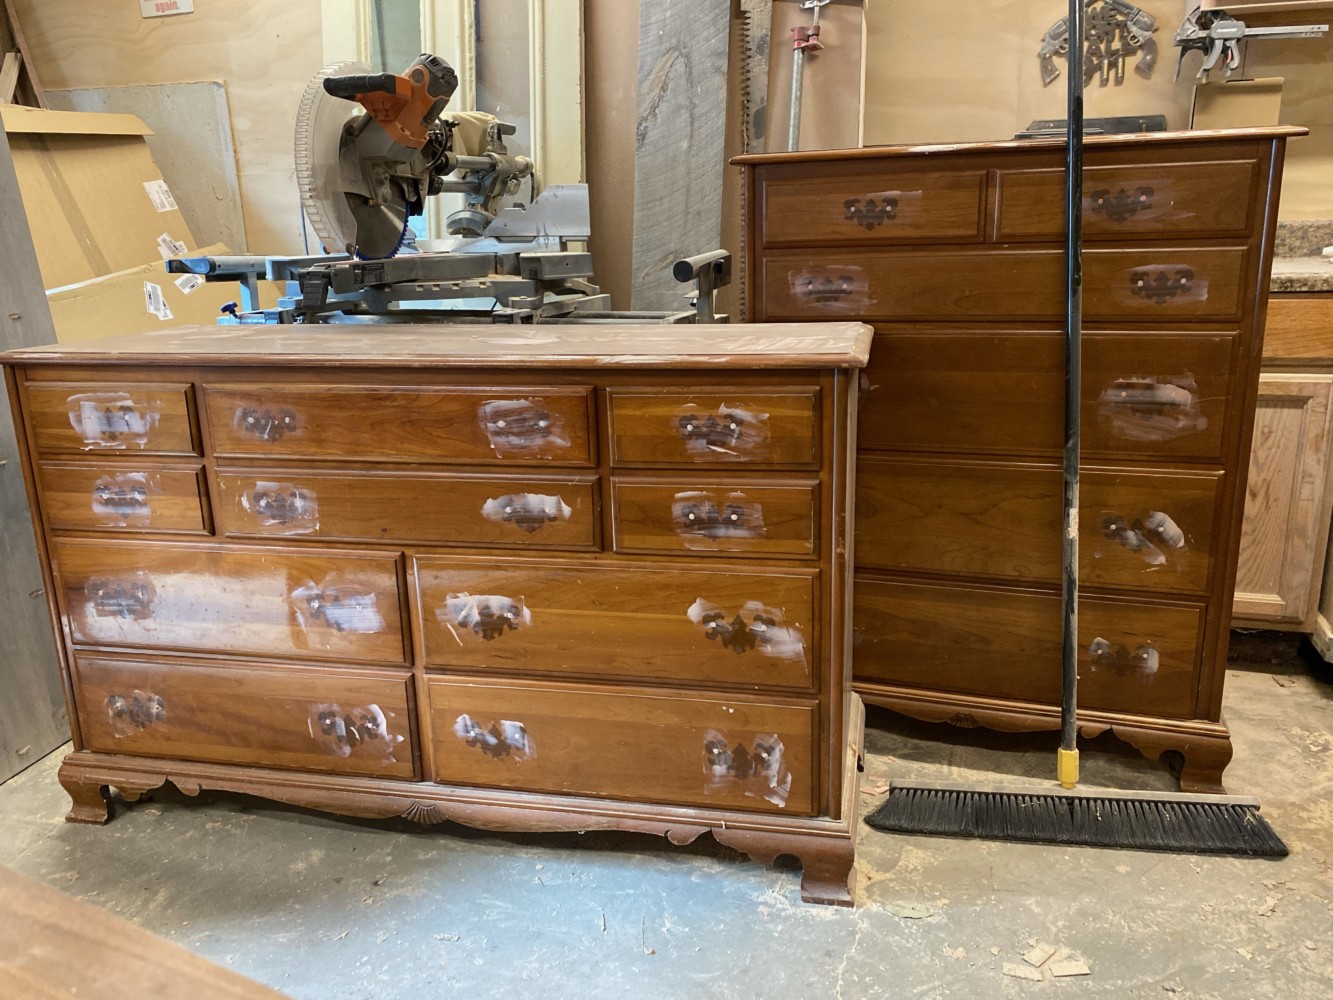
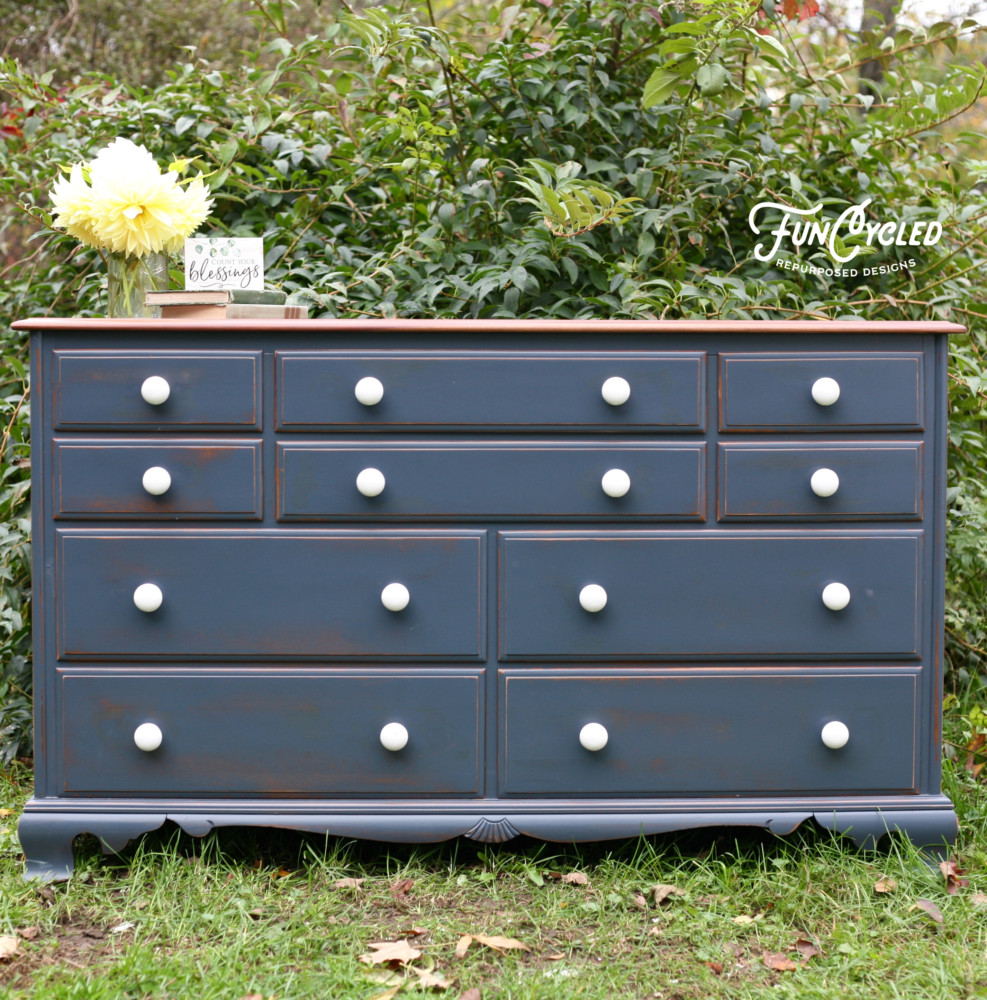
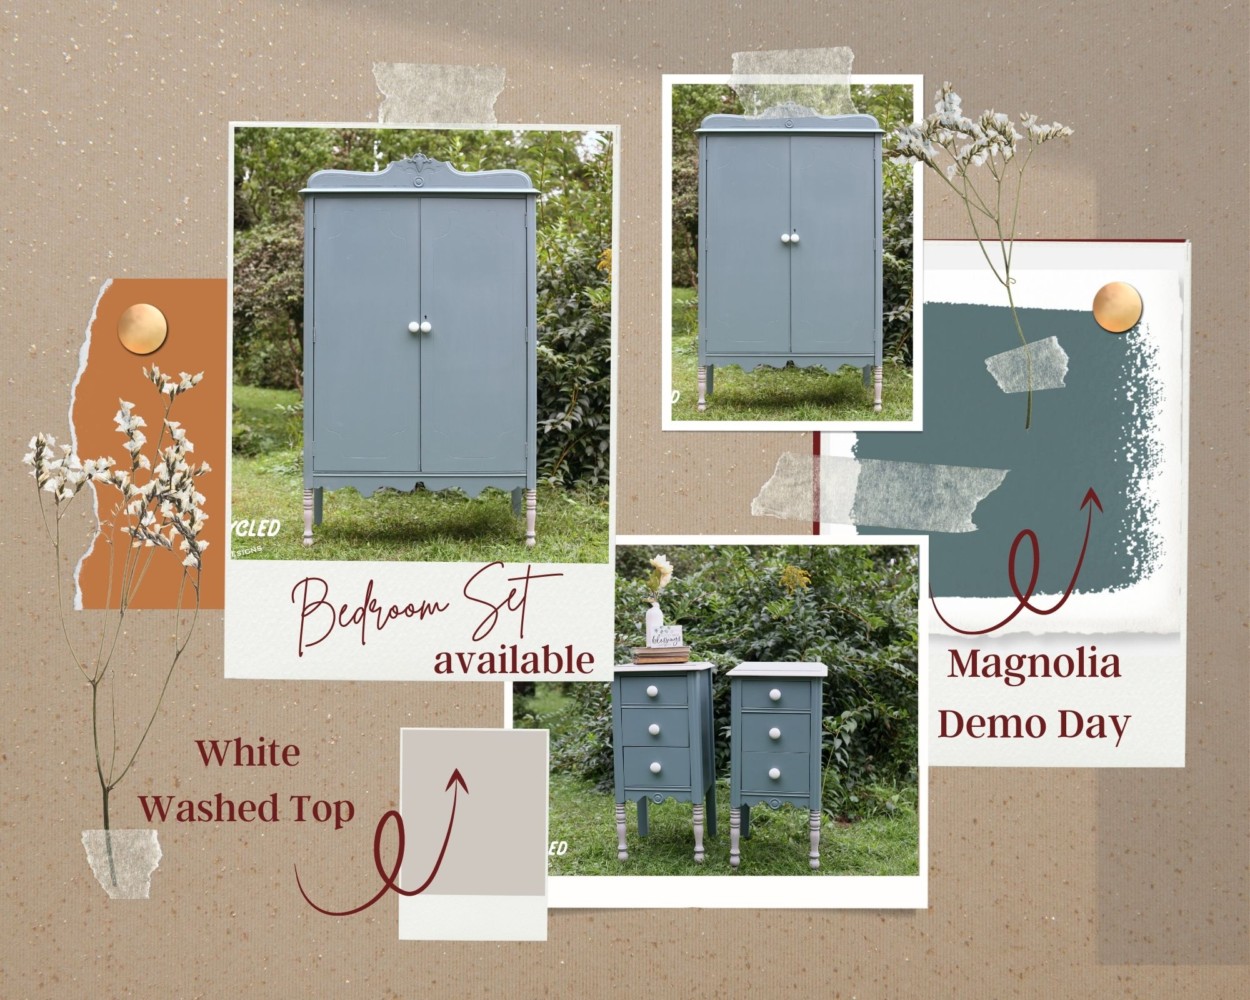
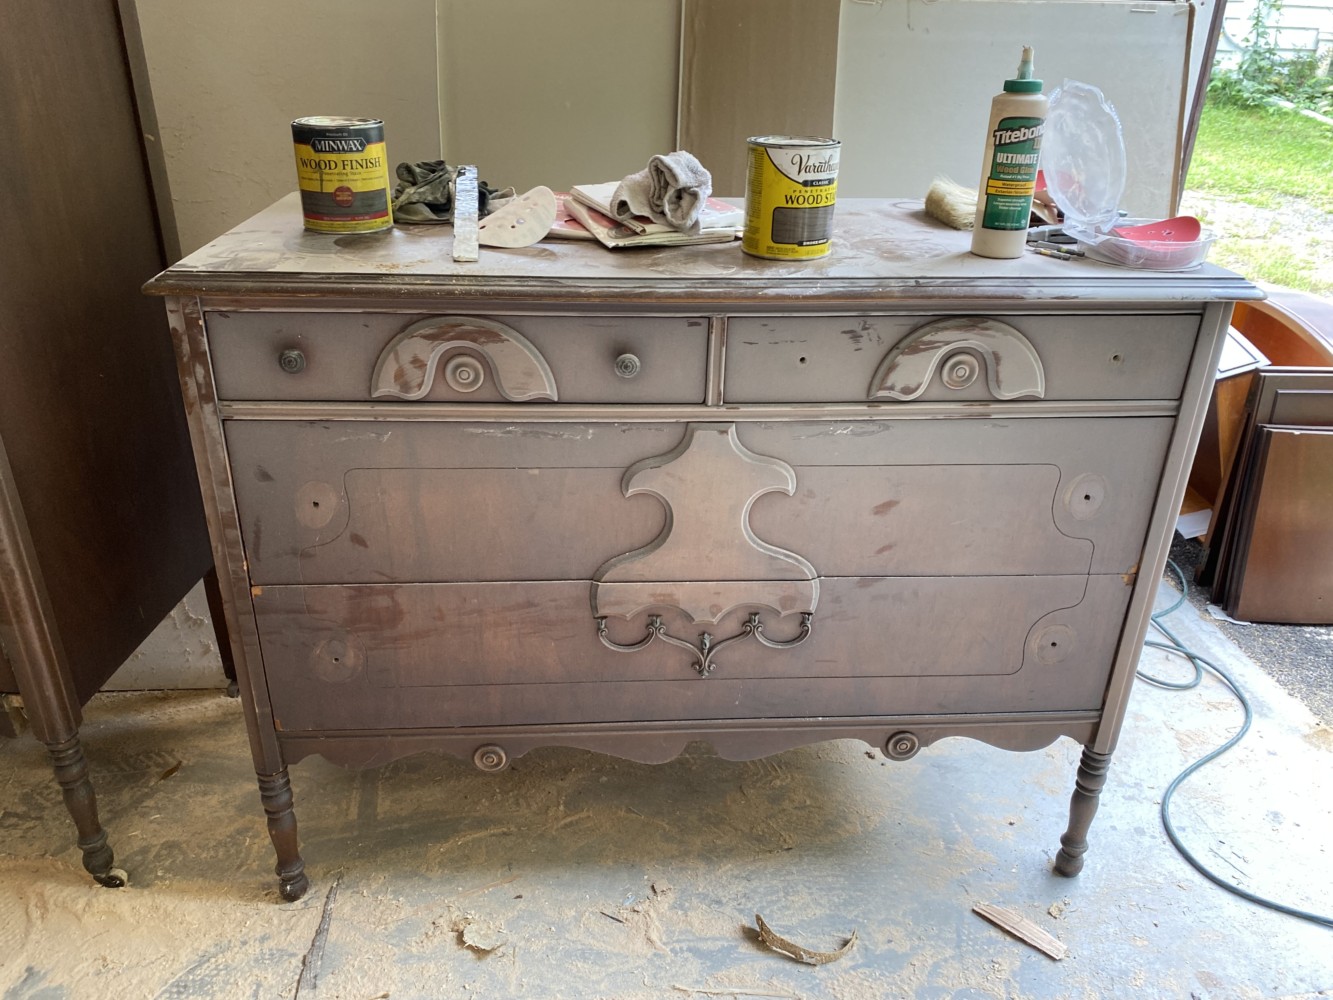
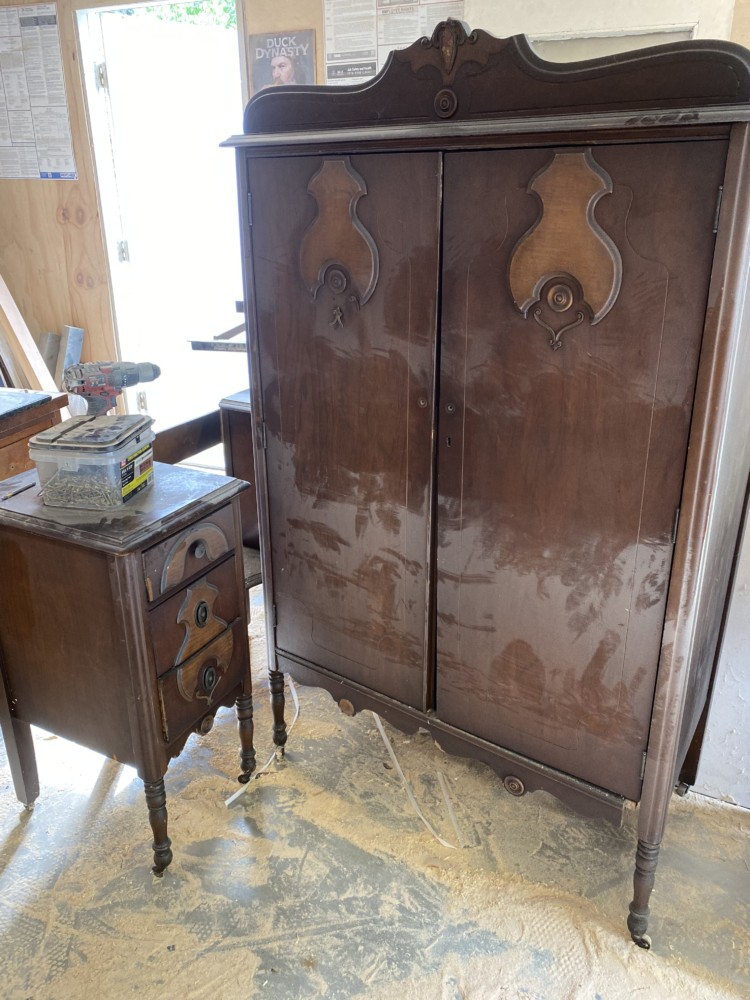
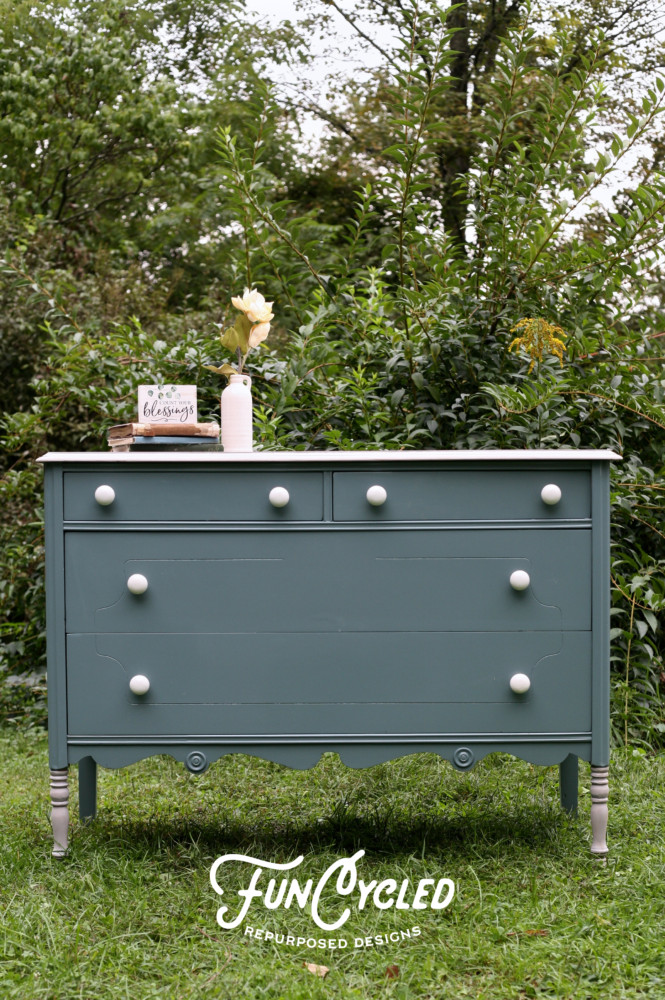
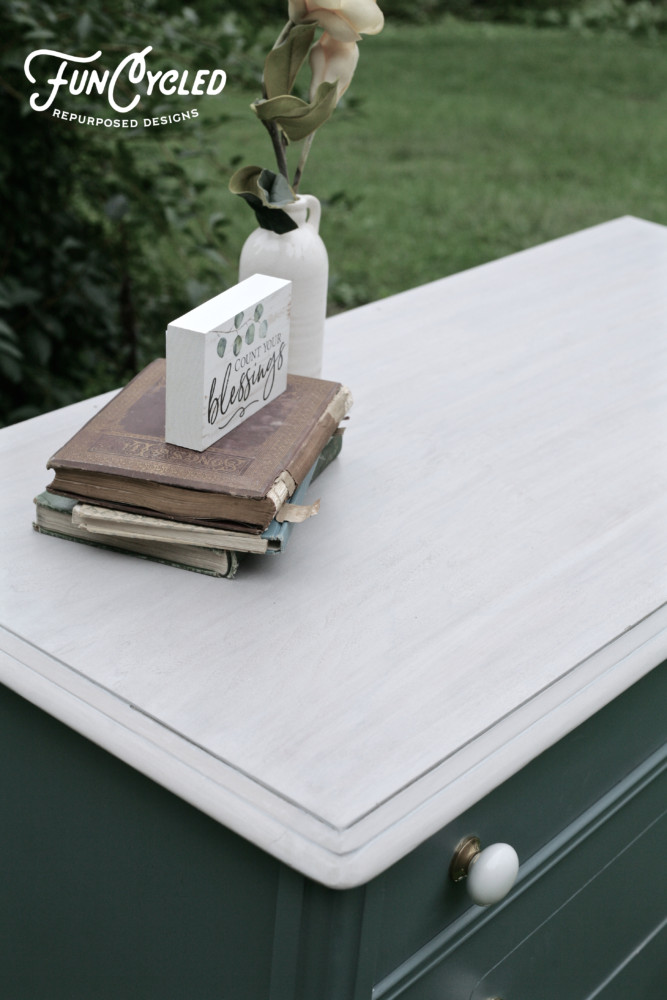
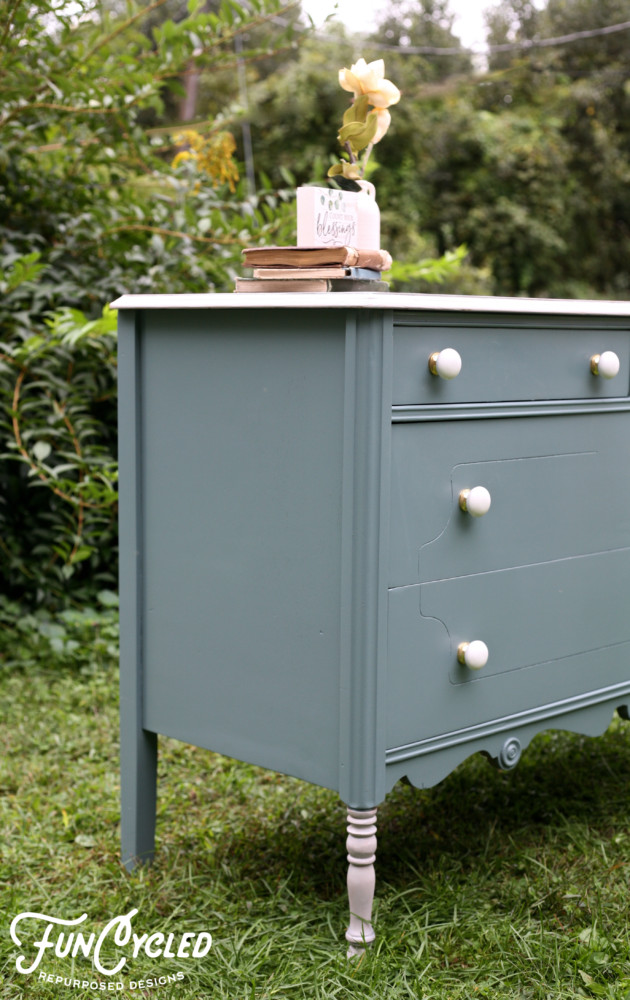
This week, I wanted to share a bedroom set makeover that I really love. We took this set:
The dresser and armoire both looked like giant faces to me. I just couldn’t take it. Hahha So we removed what looked like the nose and eyebrows on the dresser and the eyebrows on the armoire.
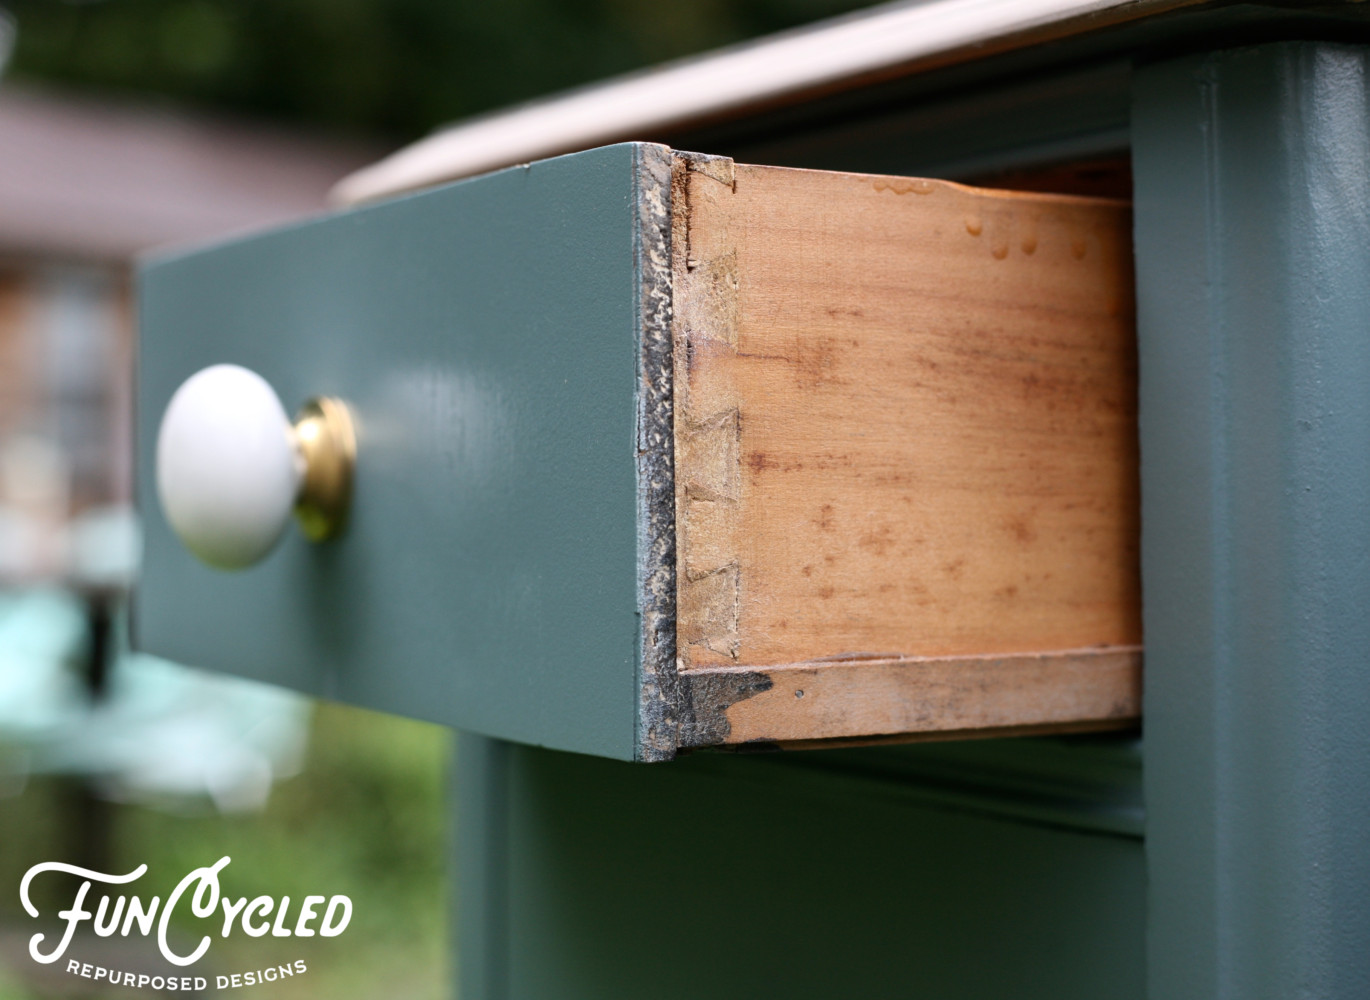
Then we painted each piece with Magnolia’s Demo Day, sanded and stained the tops and the front of the legs with a white wash, and added new hardware.
If you want to see how we paint furniture, check out our How to Paint Furniture post. Ready for the after photos?
This bedroom set is available now to purchase! Head to our Shop Page to check them out!
Thank you all for following along! If you’d like to get this blog in your email once a week, please sign up for our weekly newsletter by adding your email in the little box below my picture.
If you’ve enjoyed this post, please like FunCycled on Facebook, Instagram and Pinterest if you don’t already. Keep up to date on the newest finds, vote on colors and give your input on our creativity. We share fun tutorials, great before and after, and new design inspirations.
We offer interior design, kitchen cabinet painting, and custom built tables, barn doors, and repurposed furniture. Thank you, again, for working with us and for taking the time to spread the word about what we do.