Posted on 8 Comments

Tuesday’s Treasures – Cedar Chest Turned Into a Coffee Table

Hope you all had a great weekend! This week’s redesign was a lot of fun! It was one of those project where everything went RIGHT for once. :) Gotta love those! My friend Jo Ann and I went shopping at our Habitat for Humanity local shop in hopes to find a trunk to make into a coffee table.

Jo Ann has been obsessed with this idea since she saw a trunk that she liked at Pottery Barn.  Fortunately it was on a couple of months back order so I convinced her that we could find something to make over and for a cheaper price. Nothing had been right – Jo Anne is a “I am not sure, what do you think, will it work ….?” type of person (she told me to write that). Idea after idea had been shot down, but  today we were in luck!  We came across this Lane Cedar chest and it was the perfect size… but not the perfect look for her house. It wasn’t a cheap find, but I in this case we thought the quality was worth the price. ($150 to be exact) So she grabbed it, and here’s what we started with.

I don’t have many pictures of the process because I was in the middle of a million project during this time. Forgive me friends! :) First things first… that hideous top. We simply had to do something about it. Do we recover it, do we replace it?? Well, we went with replacing it with a wood top. Home Depot has solid wood boards already fit together for around $15. It was awesome in this case because it fit EXACTLY the way we wanted. We didn’t have to cut it down at all. Just deep enough and a little wider than the base which was perfect. It was easy to remove the cushion top, just unscrew 8 screws and it popped right off.

John sanded the new pine top down and had an allergic reaction to the pine. Did I say nothing went wrong with this project? Opps, I forgot about that part. His hand almost doubled in size for about a day. Note to self – remind John to wear gloves next time he sands pine boards. Or be nice and just do it for him… nah, just remind him to wear gloves.

We painted this one a little differently. I primed it like normal, but then I used Benjamin Moore Aura Satin paint and painted it with a Purdy brush. I was so impressed by how well it covered. The first coat was almost enough, but I did a second coat to be safe. She’s almost done… one more coat of paint and stain.

Here she is nestled nicely into Jo Ann’s living room. (Sorry the pictures aren’t that great, it was night time and the lighting was a bit rough)

How do you like it??

Happy Redesigns,

Sarah

PS- If you like what we’re doing, please like us on Facebook at: www.facebook.com/funcycled or share this on Pinterest! Also, you can now get each of our new projects emailed to you when you enter your email address in the box at the top right side of this page.


Posted on 10 Comments

Tuesday’s Treasures – Antique Aqua Desk

Hello to our new fans and to all those we met at the Troy River Street Festival this past weekend. I hope you had a great time at the festival, I know we did! It was so much fun working next to Tim from Mr. Doodles, meeting our previous Mayor Harry Tutunjian, getting to know some of you for the first time, and seeing friends from the past (including my old art teacher’s son).

On to this week’s Tuesday’s Treasures… our beautiful Aqua and Milk Chocolate Antique Desk. (click on any photo to enlarge)

Are you ready for what she USED to look like?

We had to completely rebuild the front of the bottom two drawers using Bondo. This may sound like no big deal, but it takes a long time. John sanded for about an hour one night and I sanding for about 1 1/2 hours the next day to get them the way they needed to be. I sanded with gloves on, even so my fingers were raw when I was done. Note to self… don’t sand for that long at once again. :) I am the pianist at our church so playing the piano with raw fingers is no fun. What was I thinking??

After repairing and sanding, we did all the typical painting steps. To see how we paint furniture, check out How to Paint Furniture.

We used Benjamin Moore brown paint and wood enamel for the top. It worked great and gave the exact finish I was looking for. The bottom was a mixture of teal and white that I had on hand, which was great because I wanted it to be a soft teal and I love when I can use paint that I have left over from other projects.

This desk has amazing detailing in the woodwork so it simply HAD to be glazed. That took quite a bit of time, but it really paid off. I am planning to do a step by step post on how to glaze furniture because I keep getting questions about it. Stay posted! I wanted to use as much of the original hardware that I could, but I also added a few new knobs that I thought might work. It definitely needed some crystal and I didn’t want them all to match. So, I bought similar styles and spray painted them all using  Rustoleum hammered bronze. Oh, and while I was at Home Depot buying the spray paint, my 2 year old sweetie decided it would be a good idea to grab the can of paint and when mommy wasn’t looking, spray it IN her mouth. She screamed like a maniac,  while I was on on the phone with poison control, yup the whole nine yards. Just keeping it real! Thankfully, she was just fine and we are alive and well –  ready to conquer another day in the land of furniture repurposing.  Man oh man! Enough about that! Here she is with an antique chair that is almost complete.

A huge thanks to Lindsey over at Better After for featuring this desk on her site. Check it out, won’t you!

Happy Redesigns,
Sarah

PS- If you like what we’re doing, please like us on Facebook at: www.facebook.com/funcycled or share this on Pinterest! Also, you can now get each of our new projects emailed to you when you enter your email address in the box at the top right side of this page.

Posted on 4 Comments

Tuesday’s Treasures – Distressed Sage Green Dresser

If you aren’t a fan of our Facebook page, you may not know yet that I quit my job. I officially finished last week and I’m nervous, but really excited about having the extra time to devote to FunCycled and custom furniture for you. I had worked at this job for almost nine years so I have to admit, it’s a bit of an adjustment, but life is ever changing and I’m excited and humbled to have this opportunity. As part of the new changes, I would like to introduce Tuesday’s Treasures! Each Tuesday, I will post one of our new creations! I may add others during the week, but I’m planning, at the very least, to show you a new piece each Tuesday. To start of our Tuesday’s Treasures list, here is a beautiful, pale sage green oak dresser and matching night stand that we just finished.

Some close up (click to enlarge):


I did a totally different technique on this dresser using Benjamin Moore paint and primer in one. I applied it using a dry brush onto wood that was old and ready to soak up the paint. It wouldn’t work well with anything that has a poly or high gloss finish. This piece was asking me to try the new technique and I LOVE how it turned out. I watched a few videos on it to make sure my idea was going to work. I always like when someone else has done something that I thought might work. Lol! If only I was the first one to think of it.

Here’s what it looked like before:

It needed knobs, repair, and plain old paint lovin’! :) Let me know what you think and thanks again for all the encouragement from our readers this week. You guys are the best!!

Blessings,
Sarah

If you like what we’re doing, please like us on Facebook at: www.facebook.com/funcycled or share this on Pinterest! Also, you can now get each of our new projects emailed to you when you enter your email address in the box at the top right side of this page.


Posted on

Why does Polycrylic yellow?

Have you spent hours and hours working on a piece of furniture, got to the final step of sealing the piece, and the Polycrilic turned your piece yellow in spots? I’ve read so much about the fact that you shouldn’t use polyurethane on anything light in color because it will turn yellow (or ember) over time. Well, I just did 4 different pieces in four different styles and paint types and then had the polycrilic yellow. Everything I have read online says it should never yellow! I took the gallon of Minwax polycrylic back and was told that it says right on the back of gallon that it can ember. I couldn’t believe it, so the nice guy actually read it to me. I haven’t been able to find much online about this problem so I thought I would share my frustration, find out if any of my readers have have had this problem and found a solution,  as well as offer a couple of ideas that have worked for me since then.

The guy at Home  Depot recommended that I try Minwax Lacquer instead. Here’s what that looks like next to the polycrylic that I bought to replace the gallon that I believed to be bad.
a

He said lacquer will never ember. I didn’t really like this solution because it isn’t water based so it stinks, ruins my brushes and really should be done outside. I can’t always do that here in the Northeast –  thanks to winter or rainy weather, which we’ve had a lot of lately!

So, stubborn me used the Polycrylic again on another furniture piece (why didn’t I learn my lesson already?). This piece was BEAUTIFUL and I was so excited about it. I used the carefully stirred (don’t shake it) polycrylic and started applying it to the dresser. It started turning yellow again. I could NOT believe it. I walked away before I lost my cool. I searched online again thinking I could find a way to fix this problem, to no avail. (Maybe you all have found a good article or tips on polycrylic – if so, please share!).  Once I recovered from my angst,  I stopped and thought about the fact that God cares about the little things in our life. So, I prayed about what to do. I really believe He gave me the wisdom to try this. I just grabbed a spray bottle and did a 1 part white vinegar to 10 part water mixture. While the polycrylic was just a little tacky (mostly dry) I sprayed it lightly with the mixture and wiped  it down with a clean clothe. It took the yellow right off and it has never returned. And- it still left a protected layer over the paint. This technique has worked for me about 4 times since so I feel comfortable sharing it.

For surfaces that don’t get much wear and tear, I’ve started using spray Polycrylic. It’s much more expensive, but I’ve found it goes for a long time. I have covered about 6 pieces and I’m still on the same can.

It dries much faster, too!  I just wanted to share one of my mistakes that has happened along the way to hopefully save you some time and frustration. I would love to get your feedback on this problem!

Blessings!
Sarah

If you like what we’re doing, please like us on Facebook at: www.facebook.com/funcycled or share this on Pinterest! Also, you can now get each of our new projects emailed to you when you enter your email address in the box at the top right side of this page.


Posted on 3 Comments

How to Paint a Chevron Dresser

I’ve been wanting to do something with a chevron design for what feels like a bazillion years. OK – maybe 4-5 months and here it was, finally – this dresser screamed “give me chevron!”. My mom called me because she was at a yard sale and found this dresser.  She said it was a high boy and I asked how tall it was, she said it came to her chin… and since my mom and I are about the same height, I got the idea of the size.  I went to pick it up and stood next to it only to find that it came about 7-8 inches below my chin. I think in pictures so I could only imagine my mom’s chin drooping 7-8 inches. John commented,”wow, I didn’t know your mom’s chin went that low”.  I couldn’t stop laughing.

So, here she is to begin with. This one didn’t need any work as far as the wood goes, but it definitely needed  an updated color and style.

I did all the typical steps and painted it a medium grey using Behr paint. To see the step by step instructions on how to paint furniture see my post on How to Repaint Furniture.

Here it is after two coats of a warm grey satin finish paint.

I read up on all different ways to paint Chevron. I tend to be impatient and really didn’t want to measure all of the angels and draw the lines of each zig zag. I found this pattern, cut out the grey larger sections and used it to trace my lines along the dresser drawers.

I then hand painted staying in the lines using a satin white paint. Looking back, I think it would have been better to use painters tape because the lines would have been much  crisper.

Here’s one drawer after the first coat.

I also didn’t like the handles that were originally on it so I bought matching glass knobs and pulls.

Here’s the finished product (click on any picture to make it larger)!

Oh, and here’s a teaser of some of the other retro dressers I will be posting tutorials for in the next few weeks.

Happy Redesigns,
Sarah

PS- If you like what we’re doing, please like us on Facebook at: www.facebook.com/funcycled or share this on Pinterest! Also, you can now get each of our new projects emailed to you when you enter your email address in the box at the top right side of this page.

Posted on 5 Comments

1970’s Console TV Makeover

As you know, we’ve been busy here and I’m not complaining!! I’m loving the custom jobs and new creations! It’s just that I haven’t had a ton of time to post all of the fun things. I simply MUST make time for this one. ;)

This 1970’s console TV came from a wonderful lady right in my neck of the woods in Troy. She even showed me the inside of the house she was selling. When we walked in, it was like stepping into the 1970’s. All original wood work, carpets, even a coal stove and old washing machine. We fell in love! Then we had to lug this RIDICULOUSLY heavy TV down a flight of stairs… and I was in a dress. What was I thinking? Anyway, a HUGE thank you for this piece!

Here’s the before:

It was so girly that it screamed “paint me pink”. I kept second guessing myself… or maybe I should say John was second guessing me. So, I took a vote on our Facebook page. The voters were definitely not in any type of agreement. Then my friend Lara posted, “Whatever your first instict was my dear…” so I went with pink. John was still picking on me, but he knows he likes it deep down in his manly heart. :)

We pulled out the tube, but wanted to keep the metal section of the TV. We removed the metal as well so I could paint all of the wood sections with the air sprayer. We then removed the speaker. The inside of old TV’s are pretty cool and  our son enjoyed taking all of the pieces apart like he was a scientist. If you want to see how to paint this piece, check out How to Repaint Furniture.

We went with a pale pink and I was going to glaze it with silver because of the sliver part around the TV that we were keeping. Once we put the metal section in it looked more green than silver. So, I ended up using watered down military green paint to glaze the piece and finished it off with a light silver glazing. After that was all set, John made a custom book shelf to install in the back and then I painted it a metallic silver.

Sorry I don’t have the best after picture. We finished it the day we went to the Waterford Canal Festival and it sold that day so I didn’t have much time to get a good shot. I’m just thankful I remembered to take a picture at all. :)

Oh, and this piece went to an awesome couple! Thank you Frannie and Jimmy! Most of the 1st floor of their home was destroyed by the flooding we recently experienced so I was thrilled to have one of our pieces be part of their new remodel!

Happy Redesigns,
Sarah

If you like what we’re doing, please like us on Facebook at: www.facebook.com/funcycled or share this on Pinterest! Also, you can now get each of our new projects emailed to you when you enter your email address in the box at the top right side of this page.


Posted on

End Table Makeovers

We’ve been busy here redoing a few different end tables. Instead of doing a post about each one, I thought I would show you the before and after of them. To see how we painted each one, visit our post How To Repaint Furniture.

All of the end tables are currently for sale so shoot me an email at sarah@funcycled.com if you’re interested.

This small table had a crack in the bottom section that needed to be repaired and some of the joints were coming apart. We mended it and then painted it a light, light blue. We then distressed it and sealed it for quality.

This antique pie shape table was painted teal, glazed using a chocolate coffee color and lightly distressed.

I love the shape of this end table! I painted it a sage green and used black glazing to antique it.

This retro orange table was a mix of John and I. We both worked together to come up with it… hence the more manly look. ;) It was given to me by a lady who was like a 2nd mom to me growing up. Thanks Mr. Irish!!

This table was completely designed for the knob! I fell in love with the knob at Hobby Lobby and couldn’t resist.

Happy Redesigns,
Sarah

PS- If you like what we’re doing, please like us on Facebook at: www.facebook.com/funcycled or share this on Pinterest! Also, you can now get each of our new projects emailed to you when you enter your email address in the box at the top right side of this page.


Posted on

Retro Dresser

Ok, please don’t hate me, but I forgot to take a before picture of this next piece. How could I do that?? I’m sorry!

So, it was all wood and it was in good shape, but just looked outdated. I have been wanted to do a retro dresser and this one was just asking for it.

To see the steps on how to repaint a dresser, see our post How to Repaint Furniture

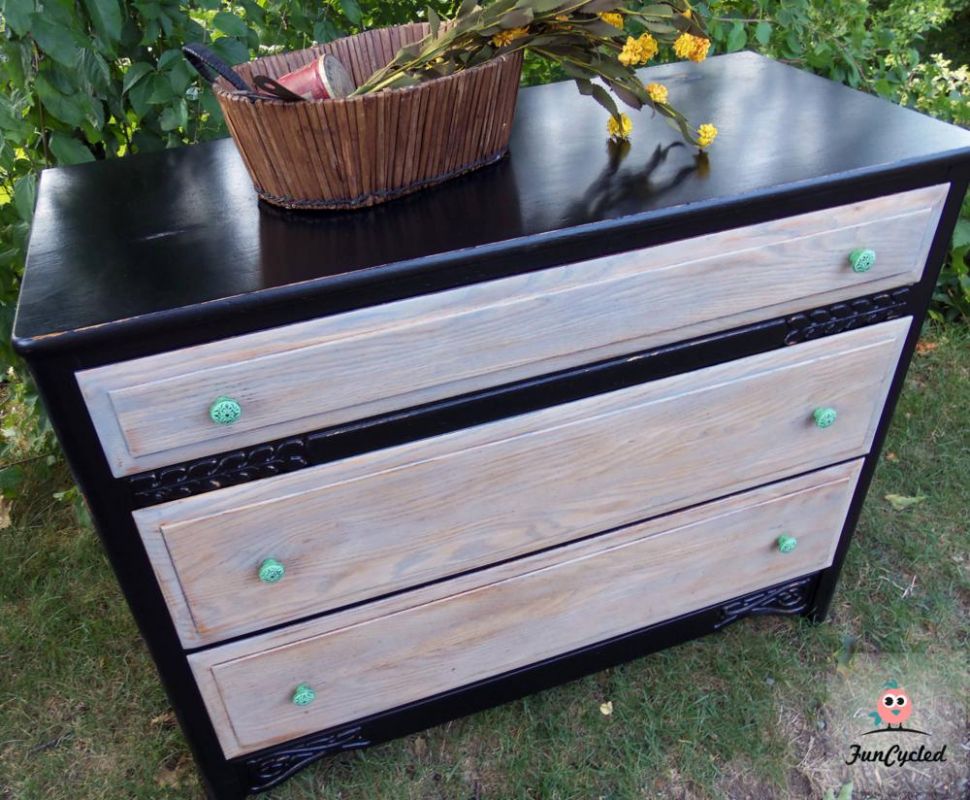
For this piece, I used Benjamin Moore Low Luster Wood and Metal Black paint for the top and the top drawer. Then I used a metallic silver specialty paint for the bottom two drawers. I was inspired for the colors by the knobs I found at Hobby Lobby.

I wanted to leave some of the original wood on the mirror and the top of the drawer. I ended up taping off the section of wood on the drawer and just painting it twice. Then pulled the tape off after both coats had dried. I love having some of the original wood exposed.

Here he is all done!

If you are interested in purchasing this piece, please email me with any questions at sarah@funcycled.com.

Happy Redesigns,
Sarah

PS- If you like what we’re doing, please like us on Facebook at: www.facebook.com/funcycled or share this on Pinterest! Also, you can now get each of our new projects emailed to you when you enter your email address in the box at the top right side of this page.


Posted on 4 Comments

Elegant Black Dresser

This dresser was in really good shape to start with so it made for an easy makeover. To see the steps on how to paint furniture so our post How To Paint Furniture

We used Benjamin Moore Low Luster Wood and Metal Black paint.

This is the best black paint I’ve used so far and it gives the dresser a very elegant finish. When I sprayed it in my air sprayer, it came out in chunks (I think it wasn’t watered down enough). Because of that I had to go ahead and use a paint brush to paint the whole thing.

I liked the looks of the knobs, but I am not a brass lover. We spray painted each knob using Rustoleum’s hammered bronze spray paint on all of them. Then I lightly distressed the edges using 120 grit sand paper. Last step, I sealed it with Polycrylic .

Here are the after pictures for you!

Happy Redesigns,
Sarah

PS- If you like what we’re doing, please like us on Facebook at: www.facebook.com/funcycled or share this on Pinterest! Also, you can now get each of our new projects emailed to you when you enter your email address in the box at the top right side of this page.


Posted on

Revitalizing an Antique Dining Room Set- Part 3

Some projects that we work on go quickly, some are tedious and some are just a huge pain in my booty! This dining room table was redone so many times, but it also shows that you shouldn’t settle for less than what you love. We could have stopped the first time we refinished it, but it just wasn’t the look we wanted.
I completely forgot to take a good before picture of this table. It was actually in really good shape, just didn’t have the look we were going for. Here’s a picture of it after the first sanding:

After sanding once using our electric sander and 120 grit paper, we wiped it down really well to remove all the dust particles. Next, we primed it and painted it three times with Behr Swiss Coffee satin paint. Then, I used a polyacrilic for the whole piece. Since a dining table gets a lot of wear and tear, I wanted to make sure it was well protected. When I did the first layer of polyacrilic, little dust particles and dirt kept dropping on top and every little thing showed! I tried to sand it and repaint it twice, but it would NOT sand down right. It was such a pain.

After looking at it and coming up with new design ideas, I decided that I wanted to keep the top wood and leave the legs white. So, we stripped the whole top down. Which took about 5-6 steps!

I used CitrusStrip and it worked really well, but we had painted it so many times it took alot of elbow grease. :) Here’s the first step of stripping. You have to let it set for 30 minutes at least, but I found the longer I left it, the easier the paint came off. Here’s the table after the first stripping.

Once we had it all stripped, we had to lightly sand it to make sure it was all ready to be stained. I wanted a dark stain to bring out the black in the Chair’s fabric.We went with Minwax Dark Ebony and then polyacrylic over it four more times to seal the top really well. You’ll want to use a very fine sanding block (320 grit) and hand sand between layers to ensure that it grips well. Then, let is set for a least a week before using it.

I also distressed the white to match the chair’s and give it more of an antiqued look.

See how the we did the rest of this set: Dining Room Chairs and Matching Red Hutch 

Happy Redesigns,
Sarah

PS- If you like what we’re doing, please like us on Facebook at: www.facebook.com/funcycled or share this on Pinterest! Also, you can now get each of our new projects emailed to you when you enter your email address in the box at the top right side of this page.