Posted on

Calvin’s Robot Dresser

Hi All! Happy Thanksgiving a few days early! I hope you all have a wonderful week, take time to thank God for the many blessing He has given to you, and enjoy laughing until it hurts with your family. If you’re like me, you’ll be out in the craziness of Black Friday. Not necessarily to buy much, but DEFINITELY to enjoy the experience.

Say a prayer for us today, we’re headed in to have tubes put in Josh’s ears. He has hearing loss and we have been working with the ENT for 6 months. Now it’s time to try tubes to see if they do the trick. I know it’s a very minor surgery, but it makes a mommy nervous. :)

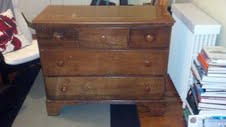
On to the furniture… I know, I know. You all know how I like to chat with you though. ;) So, my pal Mo… or should I call her “that girl!” hooked me up and told my friend Petra about her family’s yard sale. Petra said “hold all the furniture for Sarah” and off I went. This was one of the pieces we picked up that day. I think you’ll be happy with the results. My sister Sarah… yes, I have a sister named Sarah. It’s not a joke; she came to live with us when she was 4 so mom and dad couldn’t really change her name at that point. ;) She asked me to make a robot dresser for her son, Calvin. Um… yes please!!! The best part was… she gave me free reign to do whatever I wanted. Yippee Skip-pee!

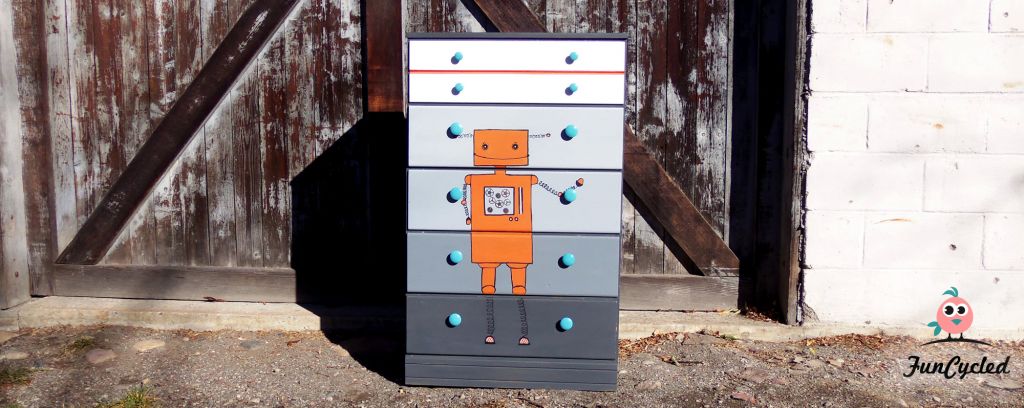
I bought Annie Sloan’s graphite grey chalk paint and tried it on this dresser. It’s the first paint that I’ve bought from her. To be honest, I didn’t think it covered as well as I anticipated. With all the rave reviews out there, I just expected a bit more. I started by removing all the knobs, lightly sanding the whole piece and then hand painted the dark grey. I then did a gradient or “ombre” from white to grey. I have seen this done, but it didn’t go that easily for me. This is definitely the longest dresser project so far. After redoing the ombre twice because the gradient wasn’t gradual enough for me the first time, I was happy with it.

Please forgive the no in-between pictures. I took them on my iPhone and some how they are lost now. Grrr! So, I went to Home Depot and bought a sample of a orange that I liked. I made this little guy up from different ideas online. Nothing was like exactly what I wanted, I thought most of the robots looked too “adultish” or had round heads. So I kind of made this design up. I hand drew it and then used painters tape to make the body and head square. After I did all of that, I (and my kiddos) painted the body three times. Then I used a black painters marker to draw the black lines.

It still needed something so I went and bought some fun gears to put in his chest. I really feel like that topped the cuteness chart on this piece. After everything had dried for a few days, I waxed it all to seal it.

Last but not least?? Teal knobs of course!!! And that makes me love you little robot dresser. Now every time we see a robot in the store, my son asks if we can buy it for Calvin. So cute!

About time for the after pictures? I thought so! Here you are!


Have a great week and happy redesigns,
Sarah

PS- If you want to stay “in the know” please like our Facebook page: https://www.facebook.com/funcycled You’ll see designs from the people who inspire me, be the first to know when new pieces are available, and just enjoy life with us! Get each of our new projects emailed to you when you enter your email address in the box at the top right side of this page.

“Trust in the LORD with all your heart, And lean not on your own understanding; In all your ways acknowledge Him, And He shall direct your paths.” (Proverbs 3:5-6)

Posted on

Pretty in Prelude! Antique Dresser with Mirror Tuesday’s Treasures

Did you all feel like this week flew by?? I sure feel that way! Didn’t I just write a Tuesday’s Treasures post?? We were able to get away this weekend to go see my brother and his family. We had a great time going into Philadelphia! One of my favorite parts about the weekend was being able to play piano as part of the worship team at my brother’s church and sing a solo. Then, I heard an amazing preacher (cough, cough, my brother Jesse)!

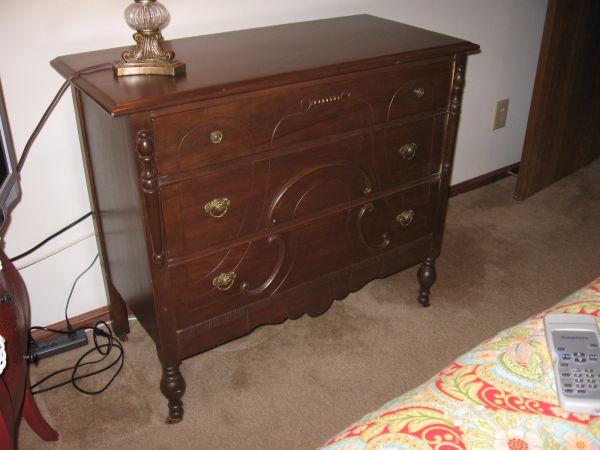
I get questioned quite a bit about whether we can find pieces for people and redo them. And the answer is YES! It’s one of my favorite things to do. :)  Nicole came to us liking the look of our Aqua Dresser with the mirror, but wasn’t sure if she could commit to the aqua forever. She saw this dresser and asked me if we could a similar redo. I actually knew the person selling this dresser and had seen it in person so I knew it could be as pretty with a little love.

Continue reading Pretty in Prelude! Antique Dresser with Mirror Tuesday’s Treasures

Posted on

Family Photo Time

We were well over do to get some family photos taken and my friend Chelsea recently moved back to NY so I gave her a call. If you’re looking for family photos or pictures for your Christmas photos, she’s your girl! Check out her other photos on her website: Chelsea Bos Photography or her Facebook page. She is SOOO much fun to work with. I met her at my old job and we worked together for a while. We had so many laughs while at work and I love that every time we spend time together, it’s like we were never apart.

I also have to give her credit for making kids love her. Even the way she talks to them, so cute!!! My kids are in love and I’m sure your kids will be, too. Check her out, ok?

Want to see some of the pictures we’ll be adding to our About Us page?  Continue reading Family Photo Time

Posted on

Chic White Bedroom Set

Happy Tuesday everyone!! This weekend I was able to be a part of a Craft4Love day. A group of 60 ladies came together to craft all day and raise $3,680 for Love146. LOVE146 is a non profit organization that is working to prevent and ABOLISH child sex slavery and exploitation. This cause is a dark, ugly one but something that we can’t turn our heads away from…let’s support Love146, share their info to help make people aware of what’s happening and pray for them to effective! Here’s my table… crafting away. What an amazing day!!!

I’m sooooo in love with this week’s Tuesday’s Treasures. This bedroom set is the next group of items for Nancy and Steve. If you’re keeping track like I know Krista is, here’s a link to their Red Entertainment Center. This dresser set was amazing from the get go. It’s not too often that I get to work the level of craftsmanship that these pieces possessed. For all of you out there that are about to send me notes about how I shouldn’t paint over this mahogany, I’m sorry. It was a custom order and Nancy was sick of the wood so to her it was better to give it a new look than it was to just get rid of them all together. I have to say… I agree with her. I absolutely love the after pictures.

OK, so here’s what they looked like before.

Continue reading Chic White Bedroom Set

Posted on

Tuesday’s Treasures Before and After Photos of Anchor No 5 Pieces

To all of our readers who have experienced the devastation of hurricane Sandy. You are in our prayers today!! We still have power and our house fared very well last night. Thanks to all of the kindness we received through emails and blog posts from the west coast  yesterday!

As promised, I’m here to show you the before and after pictures of pieces that we have on display at Anchor No. 5 boutique. First, let’s start with the elephant dresser. Alana from The Arts Center in Troy had seen our pieces at Anchor No. 5. She sent me an email asking if I wanted to buy a dresser from her. We stopped by and she even showed us her cute apartment. On the way out, I saw her catch a smooch from her boyfriend. To which I quickly interjected as my 4 year old Little Man would say, “That’s biskusting!”. To which they rather too quickly replied, “You’re married, that’s disgusting”. lol! Couldn’t disagree with you more, my friends, but great reply for sure. ;)

So here she was before:

If you want to see how we paint furniture, see this post. I painted it white using a Behr paint. After that, I looked at about 100 different elephant pictures. Yeah, it was a little sad since they were very similar. I mixed some ideas and went with this baby. Then I painted the knobs to blend in with the elephant and the rest yellow to add a fun pop of color.  Continue reading Tuesday’s Treasures Before and After Photos of Anchor No 5 Pieces

Posted on

FunCycled Pieces Featured at Dang, that’s Cherry! Boutique

We’ve got an exciting announcement!! In addition to featuring furniture pieces at Anchor No. 5 boutique we are going to have some pieces also available at the brand new 1950’s shop, Dang, That’s Cherry! Their grand opening is tomorrow night, October 26th for Troy’s Night Out. We delivered our pieces yesterday and Jessica is doing an awesome job making you feel like you’re walking into the 1950’s when you walk into her shop. She has furniture, vintage clothing, kitchen items and home decor. The address is 11 3rd Street, Troy, NY 12180. Hours: Wed-Sat 10am-6pm and Sunday 10-3. They will be open until 9pm every Troy’s Night Out!

Ready to see the pieces we’re featuring??

Continue reading FunCycled Pieces Featured at Dang, that’s Cherry! Boutique

Posted on

November at Anchor No 5

Tomorrow night, October 26th, is the city of Troy’s monthly Troy’s Night Out. Our new pieces are up and looking cute as can be at Anchor No. 5 boutique. We designed this Elephant Dresser to compliment Alisson Clarke’s breathtaking artwork. She has created fun, colorful elephant pieces. One sold before it was even put for sale when I stopped by to drop off our furniture pieces. You’re going to LOVE them! Trust me!  Stop on by anytime this month and purchase any of the pieces we have at Anchor No 5.  Are you ready for the pictures??? I plan to have the before and after pictures for you on next week’s Tuesday’s Treasures.
Continue reading November at Anchor No 5

Posted on

Tuesday’s Treasures Queen Anne’s Lace Dresser Set

Hello All!  Do you remember this boring old bedroom set on our Upcoming Projects page?? You don’t? I don’t see how you could have forgotten about it. ;) Well, my mom and I went to pick this set up and we somehow fit all three pieces, another headboard, and two more nightstands into my van WITH both of my kids. My mom is the miracle worker when it comes to packing lots of things into a small spot. I couldn’t believe it.

I know I’ve been talking about Krista and Keith a lot, but this is another set for their house that I just had to share! In case your keeping track, here are the stories about her Red and Black Buffets and her Cream Living Room Set. Krista saw the bedroom set and we talked about  doing it chevron or with the bird and tree design, but decided on this Queen Anne’s lace design idea. She was a good sport (as usual) and let me give it a try. Have I mentioned how much I love that she lets me give new ideas a go? We started with filling all of the holes for the knobs because I knew those handles had to go! We sanded down the whole piece because it had a really shiny finish. We painted it with a standard Behr white. If you want to see step by step instructions on how we paint furniture, see this page.

Krista’s big request was crystal knobs! She had to have crystal knobs. I don’t know why, but I am super picky about the kinds of crystal knobs that I use. I probably looked at 10 different styles, and these won me over by far. I love how big and glam the dresser’s knobs are and how the night stand’s knobs are just a little smaller but still match. So cute!!

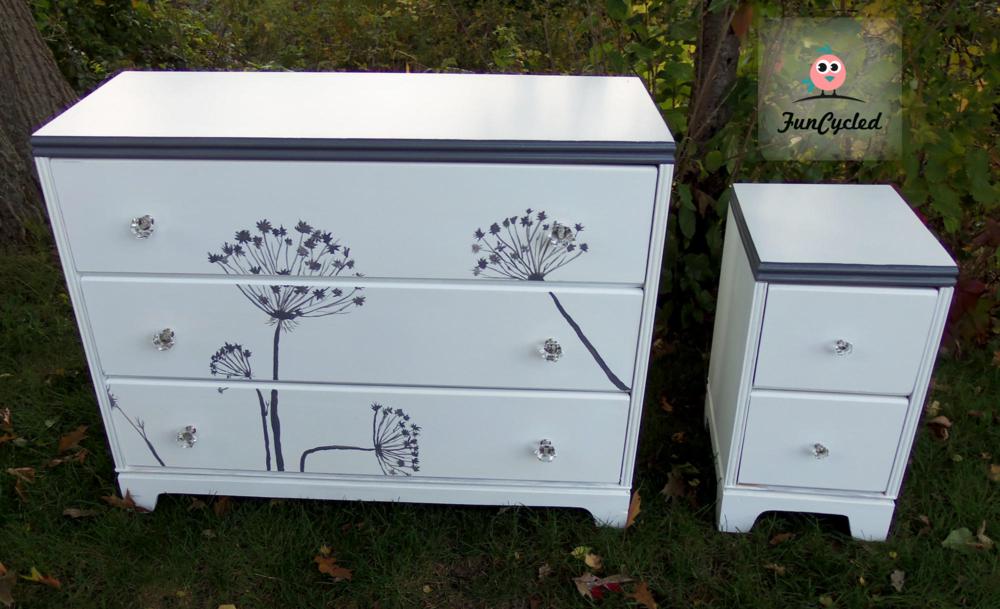
Then, I hand drew out the flowers and painted them using grey paint from Benjamin Moore. It came out nice, but I felt like it needed something more.

I was thinking something grey on top and genius Krista said, how about we try just the trim. I really couldn’t be happier. It was just the right pop of color that each piece needed. I painted the headboard a similar style, too. All white and grey along the top.

Happy Redesigns,
Sarah

PS- Please like our Facebook page: https://www.facebook.com/funcycled You’ll see designs from the people who inspire me, be the first to know when new pieces are available, and just enjoy life with us! Also, you can get each of our new projects emailed to you when you enter your email address in the box at the top right side of this page.

Posted on

Kelly Green Dresser and Red Empire Dresser Turned Entertainment Center

Good morning everyone! On this weeks Tuesday’s Treasures, I wanted to share two pieces that I am totally in love with. No, no, it’s not Christmas in October even though they are red and green pieces, but they both show how much fun you can have with color.

First, this Empire Dresser was a custom order that Nancy and Steve asked me if we could make into an entertainment center for their house. It had been sitting in their basement for years and years and was going to go into the trash when they moved. Then she found our site online and realized how beautiful it could become with a little love.

This dresser was in ROUGH shape!  The veneer was broken all over it, the top left side was broken off (oven though you can’t see that well in this picture). I love working on pieces like this because I feel like it really went from something worthy of the trash to something priceless. Nancy and Steve wanted something that they could put their audio equipment in and make it into a living room entertainment center. We went over a couple ideas and then took some measurements. It ended up working so that all the equipment would fit in the top drawer.

We used the space that was the top drawer to create the box for the equipment. In this case, we were able to pull the front off of the top drawer and use the rest of it to box in that section. Then we drilled holes in the back for all of the cords for the equipment. John did all the repair work… he’s amazing for sure. ;) He repaired the top by reattaching the original nails, using wood glue to give it extra support and then filled any cracks with Bondo. We broke off the rest of the broken veneer and used Bondo for that as well. It took about a week for him to do all the repairs. This is not something you would be able to do quickly or easily. It was well worth the work!! Oh, and we found a newspaper under one of the drawers from the 1940’s. I love when we find hidden treasures in a piece. Here’s a picture to show you some more of the veneer repair.

After all the repair was done and the box was made, I used Behr Antique Red and made my own chalk paint. I painted the piece twice by brushing it on and then glazed it using Valspar dark glaze. To finish it off, I waxed the whole piece. Oh, and replaced the knobs with these beauties!

Love, love, love it. Oh, and they both have been wonderful to work with!! They are Krista and Keith’s competition with how many custom pieces they are ordering. ;) Nancy has been so sweet to us (even though she’ll laugh because when I thanked her for being so nice to work with, she said, “I read your blog, you say that about everyone”). lol! It’s really true though! She has been great.

Up next, we’re on to a little fun project of my own. Every once and a while I need to use my creative energy on something not ordered by someone else. I’ve been wanting to paint something in Kelly green for a long time. I went to Home Depot one day and just had to buy the paint. John thought I was a crazy lunatic for buying that color green. I tried to assure him it would be beautiful… but to no avail. lol

I loved this dresser because of all the detailing and thought it would be perfect for the green.

I used the Kelly  Green paint and made it into my own chalk paint. then I brushed it with two coats. The 2nd step was my favorite part though. I finally was able to get my hands on Annie Sloan’s dark wax.

It was amazing to work with… went on like butter and gave the piece a glazed look while sealing it at the same time. I absolutely love it and the best part is… John likes it, too! Gasp! :)

This piece is for sale and you can see the dimensions on our for sale page: https://funcycled.com/furnitureforsale/

I hope you like these as much as I do!

Have a great week and happy redesigns,
Sarah

PS- If you want to stay “in the know” please like our Facebook page: https://www.facebook.com/funcycled You’ll see designs from the people who inspire me, be the first to know when new pieces are available, and just enjoy life with us! Get each of our new projects emailed to you when you enter your email address in the box at the top right side of this page.

“Trust in the LORD with all your heart, And lean not on your own understanding; In all your ways acknowledge Him, And He shall direct your paths.” (Proverbs 3:5-6)


Posted on

Antique Cream Living Room Set Makeover – Tuesday’s Treasures

Hello friends! Since last week’s Tuesday’s Treasures, I became another year older. I now have only one more year to enjoy the times that I can say, “Yeah, I’m in my 20’s!”.  It was a fun filled weekend with my family. Since it seems to be ingrained in my DNA to reflect on such occasions (thanks Dad!), I have to stop and say how thankful I am for the way God has changed my life over the last year.  God has privileged me to do this art/work full time and I have met so many wonderful people along the way. God has taught me so much about trusting Him – a year without health insurance… you know how stressful that can be and a year when I quit my job… yeah, that can be stressful, too. Through it all, God has blessed and given me peace.

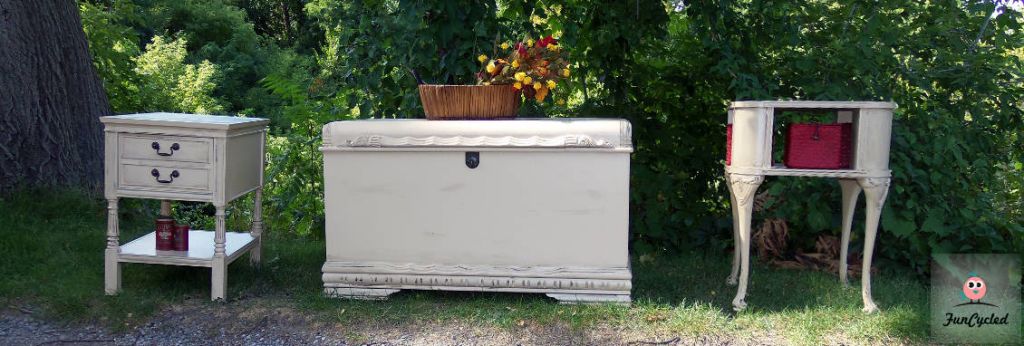
Oh wait… you’re here for furniture, right? Ok. :) On to this week’s Tuesday’s Treasures – you remember Krista’s Antique Red Buffet and Black Buffet, she had more work for me! :) We had the antique leather top table, we found the cedar chest for her, and she brought us  the end stand with a drawer. She wanted me to paint them all the same color to unify them in her living room. I loved that she wanted to go with three different style pieces. It makes the room not so matchy-matchy!

Antique Cedar Chest

Antique Square Leather Top Table

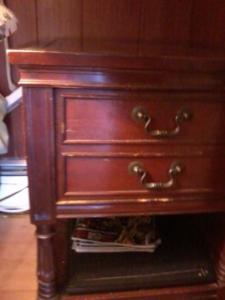
Side Table with a Drawer (sorry I forgot to take a before picture… this is the best I’ve got)

If you want to see step by step instructions on how we paint furniture, please see this post. The only difference with all of these pieces is that I used a spray paint primer first to cover the leather so it didn’t bleed through. Just spray it on and let it dry, then paint as usual. It works really well.

We used a nice dark tan (even though these pictures make them look more grey/tan). After I painted them, I lightly sanded the edges, glazed them using Valspar dark glaze, and sealed everything with furniture wax.

Here are the after pictures for you.

And all three together for their grand finale!

A huge thanks to Krista and Keith for more custom work. That’s what makes staying home with my kiddos and getting health insurance in the new year possible. I am humbled by your kindness!

Sarah

PS- If you want to stay “in the know” please like our Facebook page: https://www.facebook.com/funcycled You’ll see designs from the people who inspire me, be the first to know when new pieces are available, and just enjoy life with us! Get each of our new projects emailed to you when you enter your email address in the box at the top right side of this page.

“But those who hope in the LORD will renew their strength. They will soar on wings like eagles; they will run and not grow weary, they will walk and not be faint.” – Isaiah 40:31