Hi All! If you’re anything like me this week you MAY start thinking about wrapping the presents. Maybe, just maybe… or you may wait until the night before and put everything into bags instead. I highly recommend wrapping your gifts while “watching” Napoleon Dynomite. John and I did that last year and laughed our heads off! The most fun ever!!! In the spirit of gift wrapping, I thought I would share this gift wrapping station makeover.
Before we start… remember. It’s contest time!! Whoever refers the most friends (who have never “liked” our page before) to our Facebook page will win a free antiqued door knob coat/towel hanger to be pick up at our home in Troy. If you are out of state we will ship it to you. Make sure your friends say “you” sent them by writing on our wall! This contest starts NOW and ends on Christmas day. Have fun..and play nice! :)
I’m trying to spare you all the details since it’s the busy holiday season so here’s the armoire before:

We took the doors off the front and filled in the holes from the hinges with wood filler and sanded it down level to the wood. Then, I painted the the piece using white chalk paint. You know how these armoires or TV cabinets have a thin wood back or cardboard back with a hole in it from where the back of the TV went in?? Well, this one had just that! Instead of replacing the back, our client wanted to cut costs so we used some fabric that she already had and covered the entire back with the chevron fabric. John used his handy man skills to build a bottom shelf. We used this:


We took the original shelf and attached a bottom mount drawer slides. We wanted to make sure she had a place to wrap the gifts so she could half the shelf inside until it was ready to wrap and then it would pull out to give her a space to wrap presents. We painted the inside an amazing teal that our client already had. Then, we added wooden dowels for the gift wrap and a thinner dowel for the ribbon.
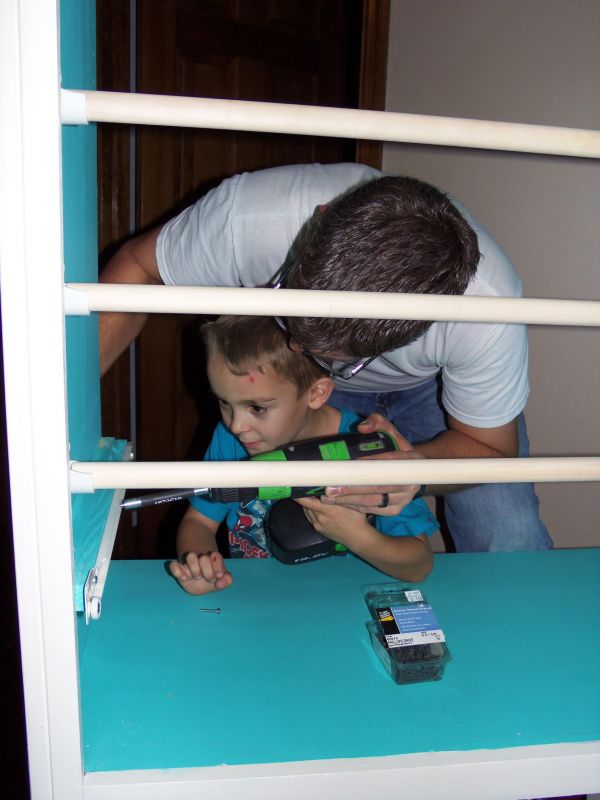
Of course when our little guy saw daddy working on this… he had to be a part of the team!!
Yup, that’s red paint on his head and hand. He was helping me paint just before this project. lol

Super cute, right?? After everything was attached, we put the back on. We simply attached the fabric as we stapled the back on. So we did the top, then one side, then pulled the second side tight and stapled. It definitely takes two people, but it wasn’t hard. Just pop the bottom two front doors on for extra hidden storage space.
Here’s the after picture for you!!

Love, love, right?? Have a great week and I’ll see you again on Christmas morning. I have a very special Tuesday’s Treasures to share next week!! Remember not to so busy that you forget what we’re all celebrating. Our Savior… Christ the Lord.
Blessings,
Sarah
PS- If you want to stay “in the know” please like our Facebook page: https://www.facebook.com/funcycled You’ll see designs from the people who inspire me, be the first to know when new pieces are available, and just enjoy life with us! Get each of our new projects emailed to you when you enter your email address in the box at the top right side of this page.
on this project what did you use to hold the smaller dowel rods in place I have looked all over for something to hold my to do something like this.
Thanks
Love this idea
Laura
We had to use the same size larger holder as the larger dowels, but it still held in place correctly.