Posted on

Client Lounge Design for a Stylish, Functional Law Office

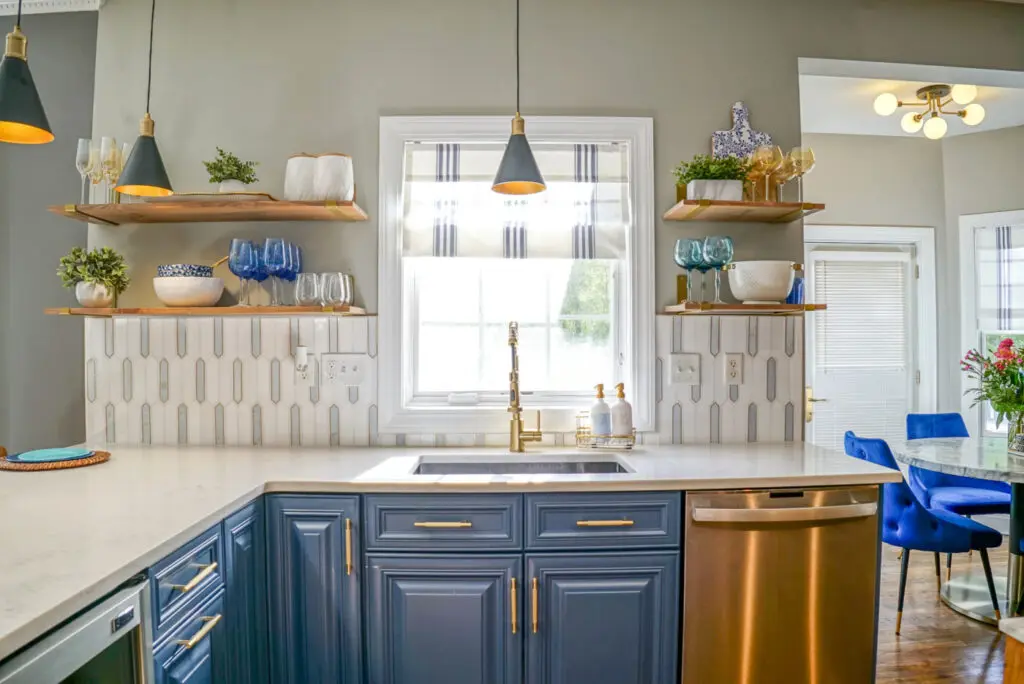
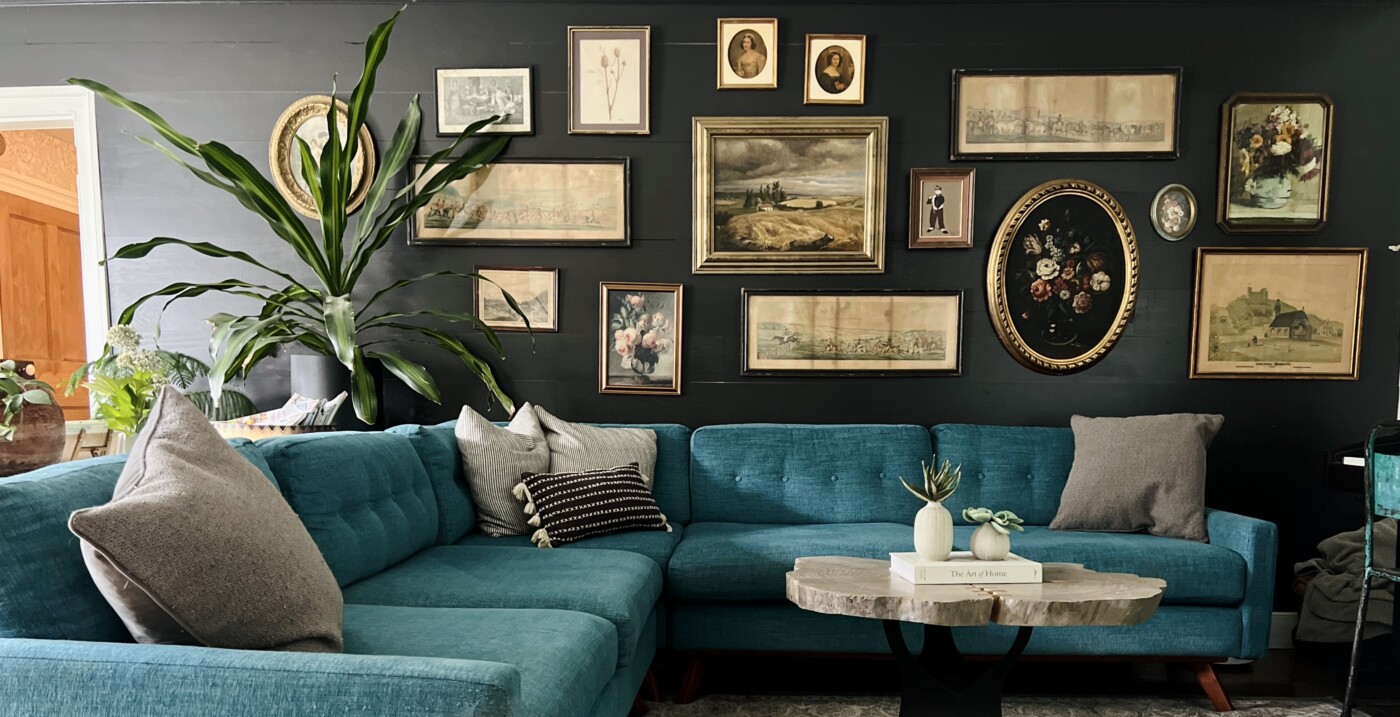
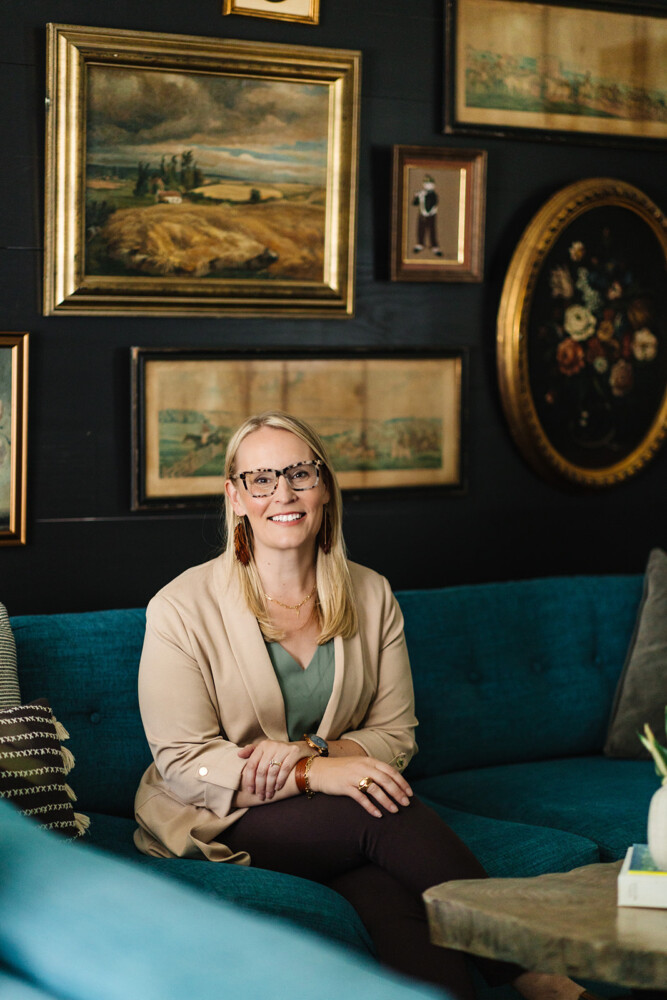
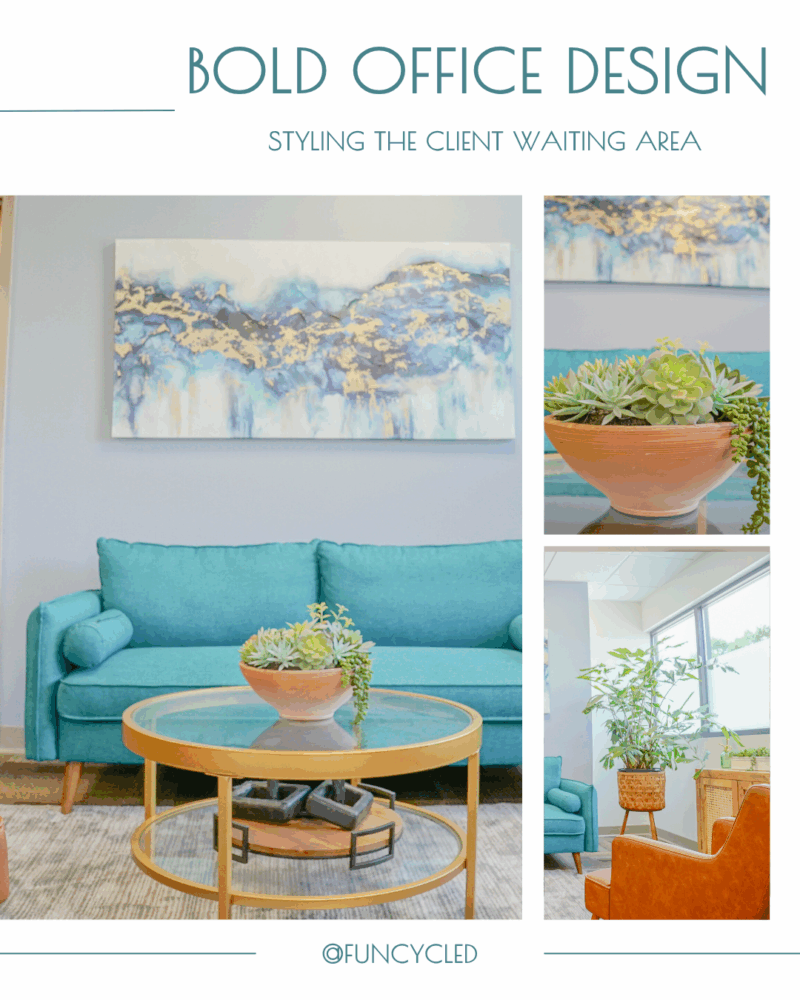
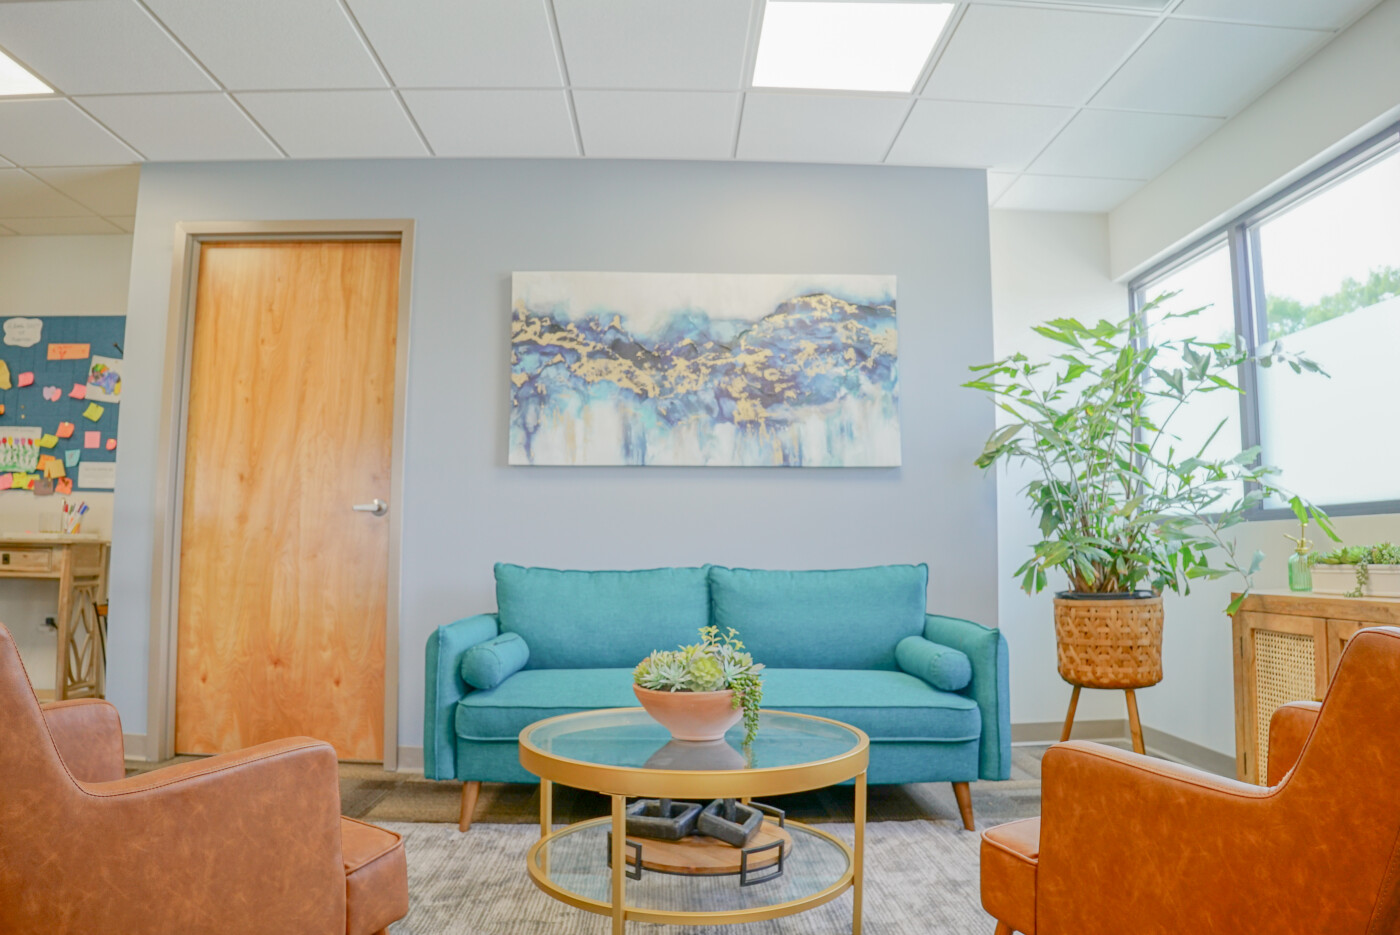
In any professional setting, the client experience begins long before the meeting starts. Along with a welcoming reception area, having a client lounge ready to warmly receive guests is of equal importance. For Lauren Hunt and her law office team, who serve the Capital District, we wanted to create a client lounge that is a stylish and welcoming space that reflects the personality and professionalism of the law office. With bold teal tones, mid-century furnishings, natural light, and layered textures, we created a area that feels both approachable and elevated. It’s proof that even a functional space can leave a lasting impression.

Mid-Century Style Meets Law Office Function

  • Incorporates clean lines and retro-inspired furniture
  • Leather and wood textures bring warmth and structure
  • Designed to feel fresh, not fussy

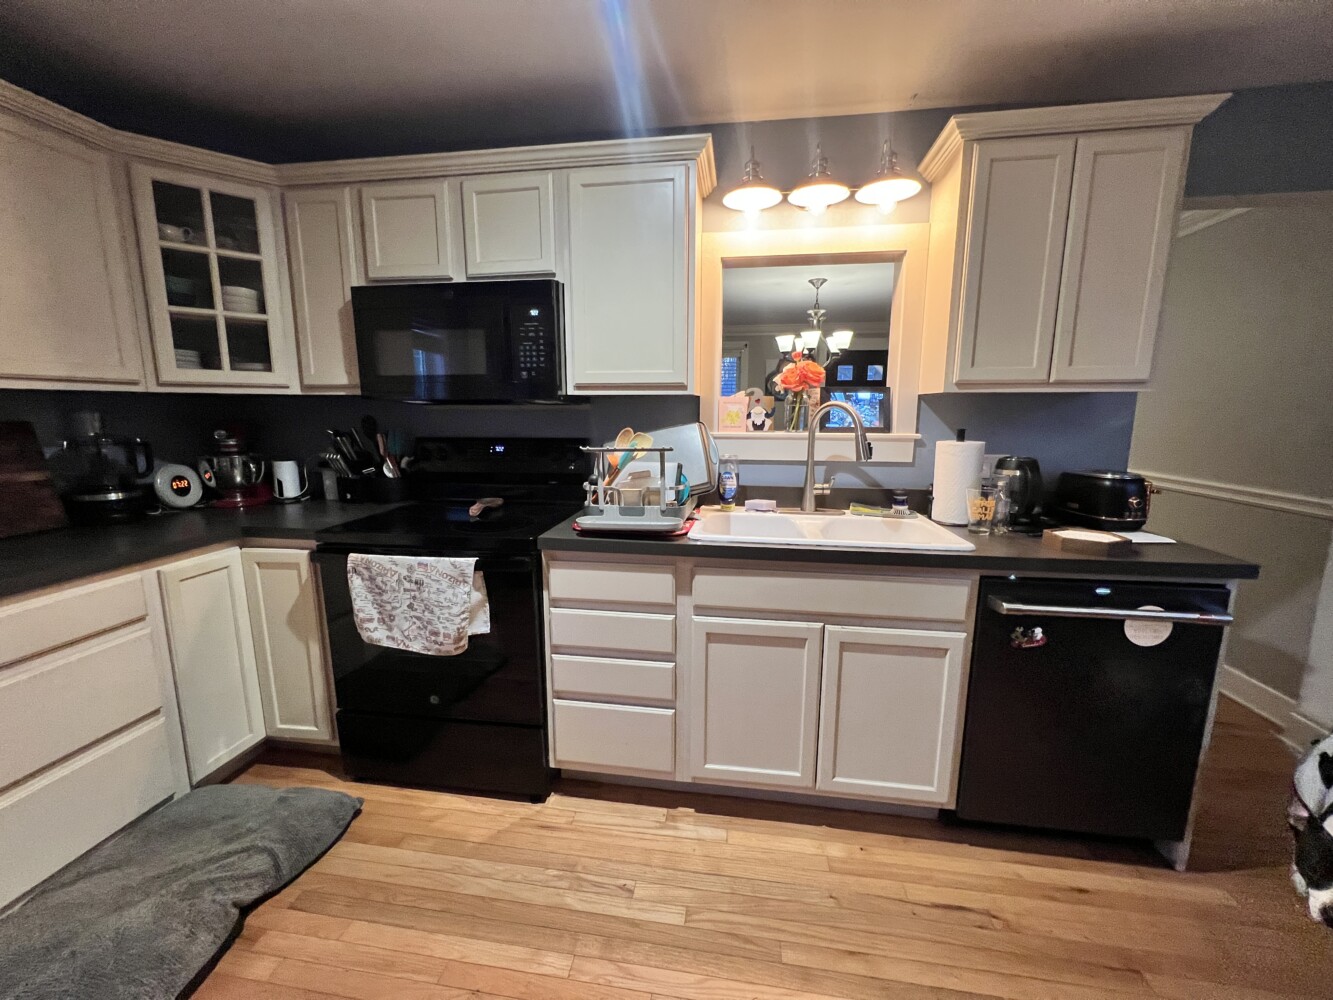
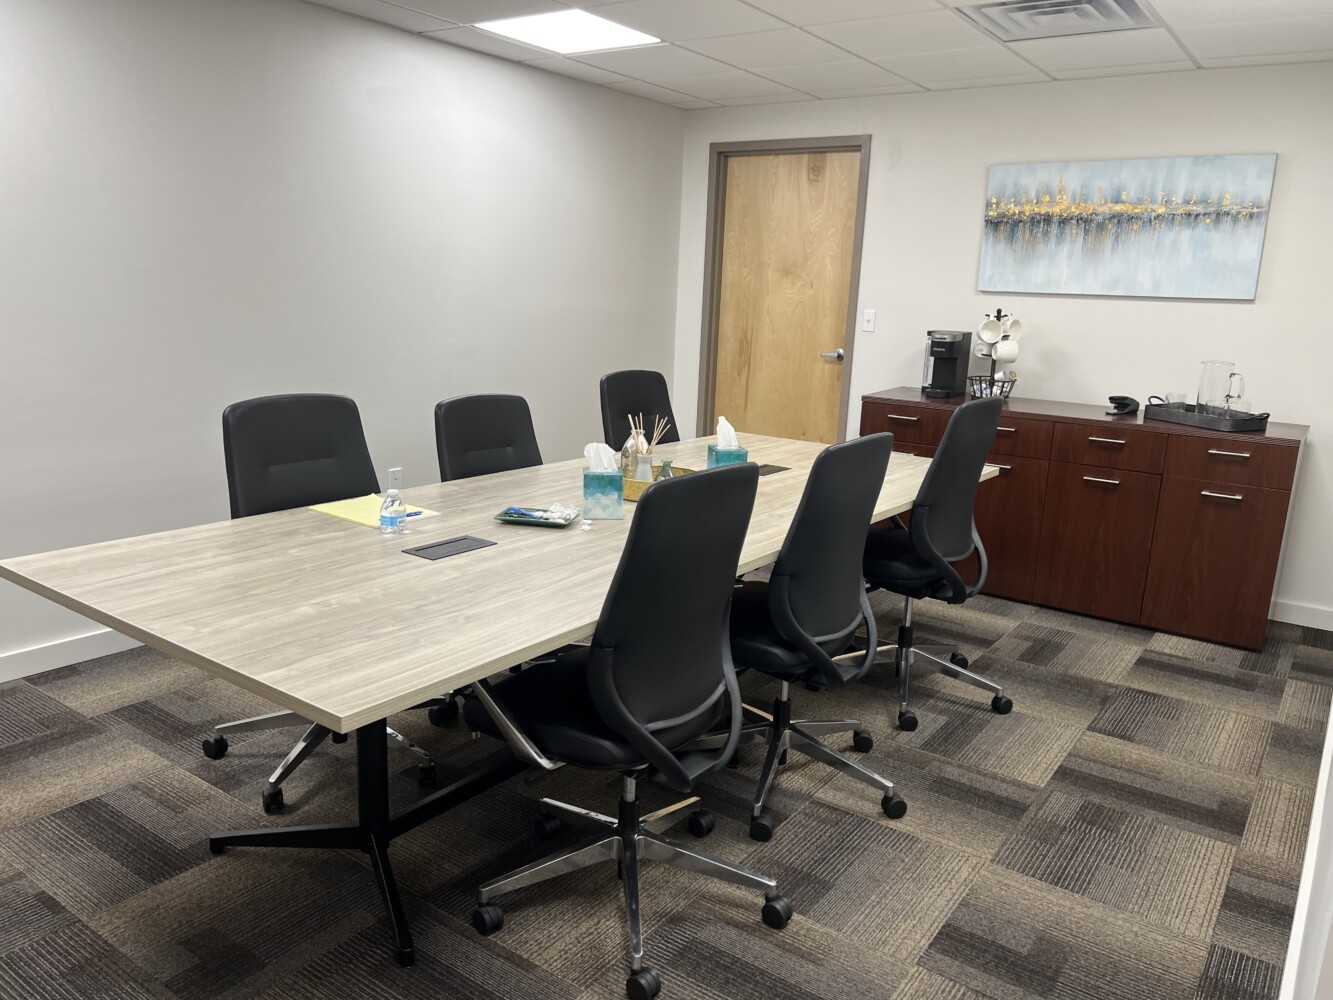
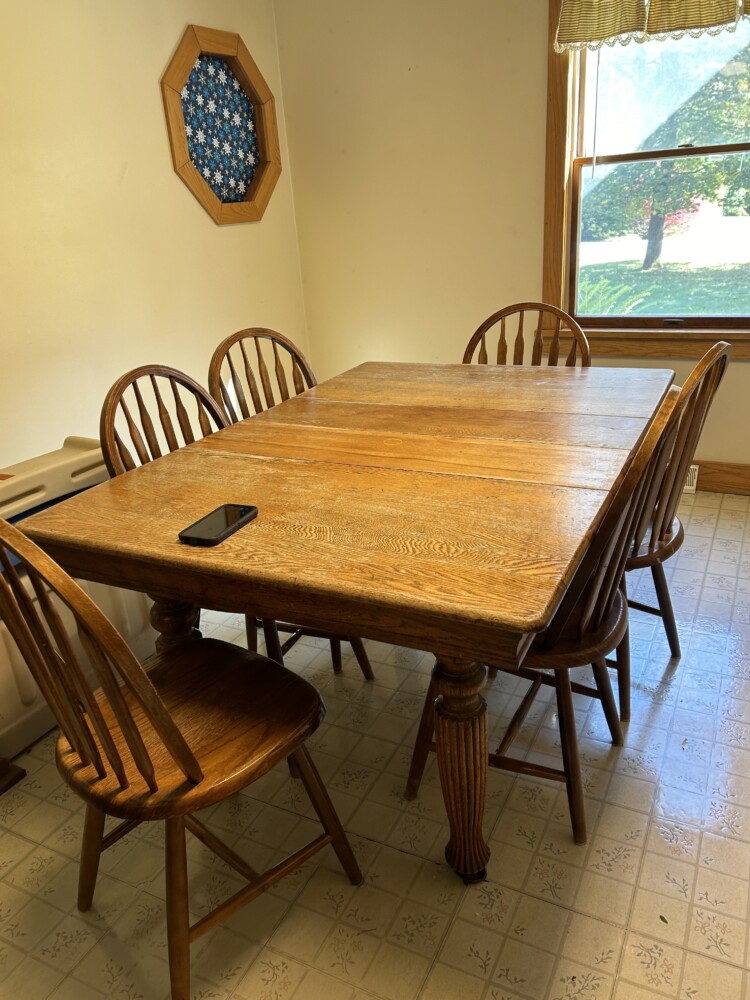
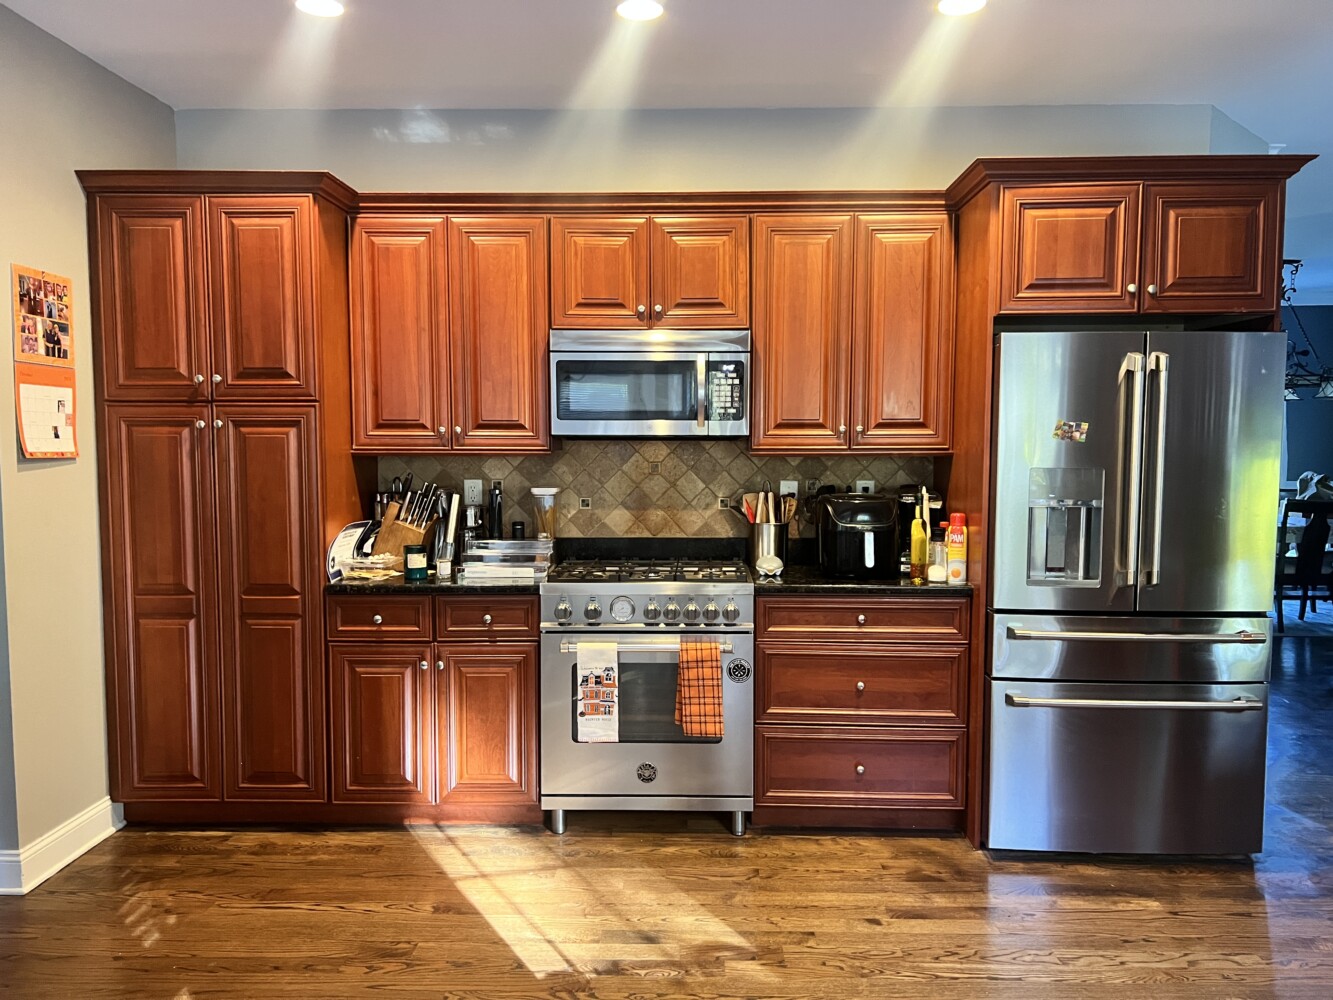
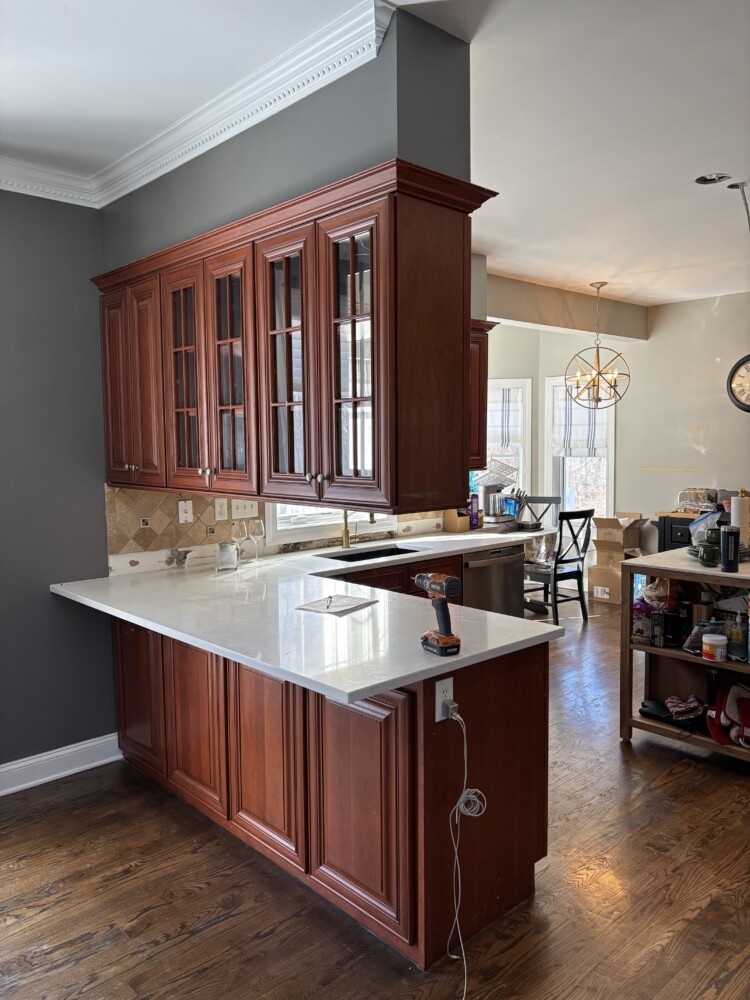
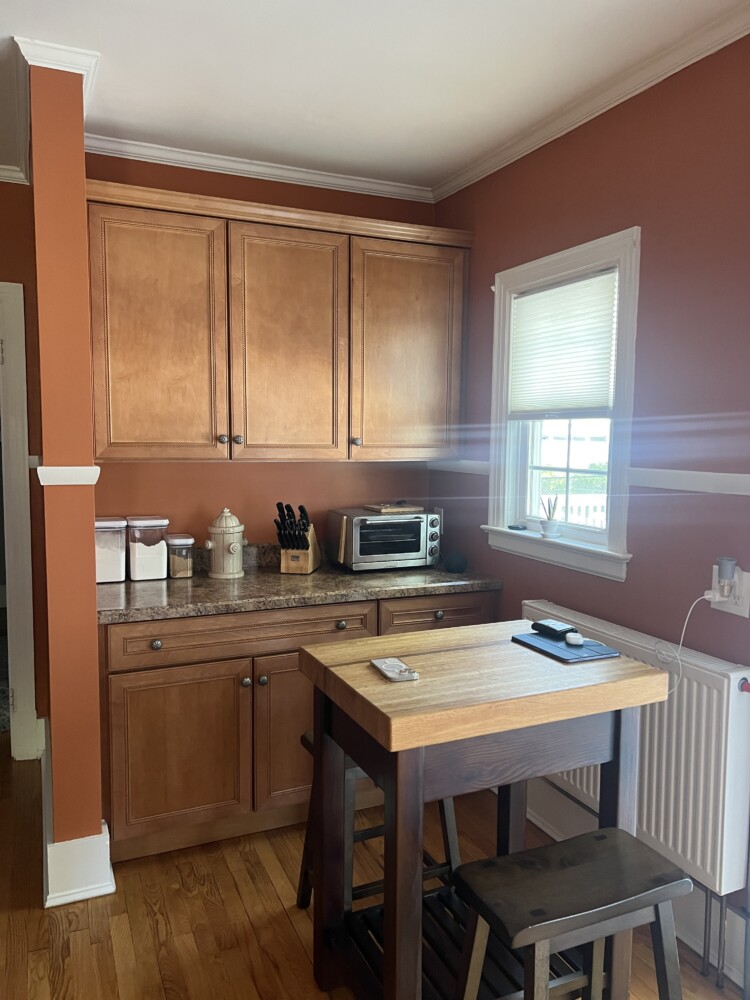
Here’s a picture of what this space looked like before we had the chance to execute the design vision.

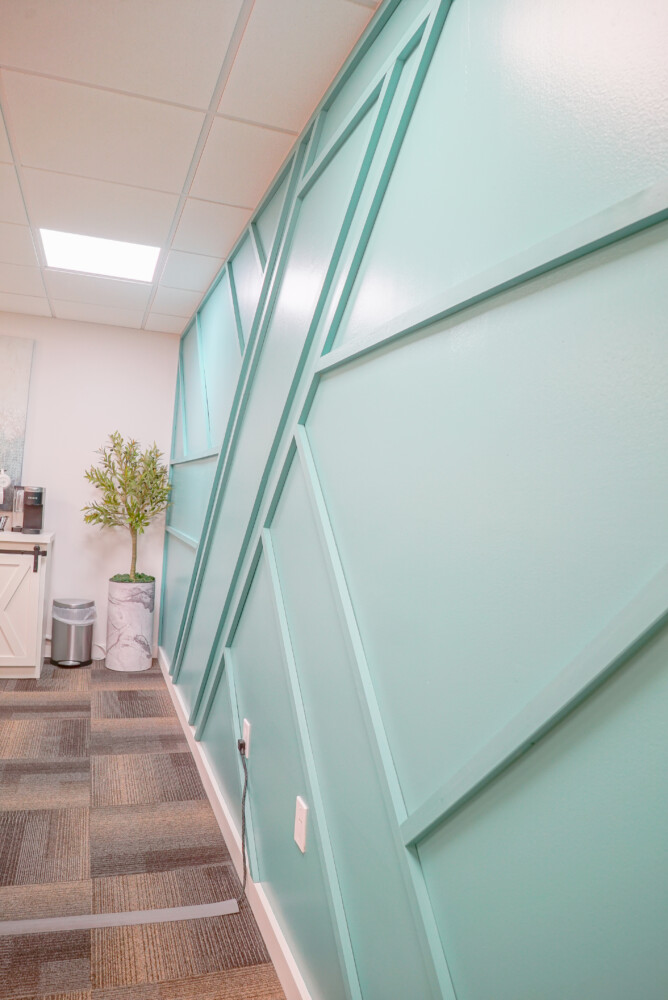
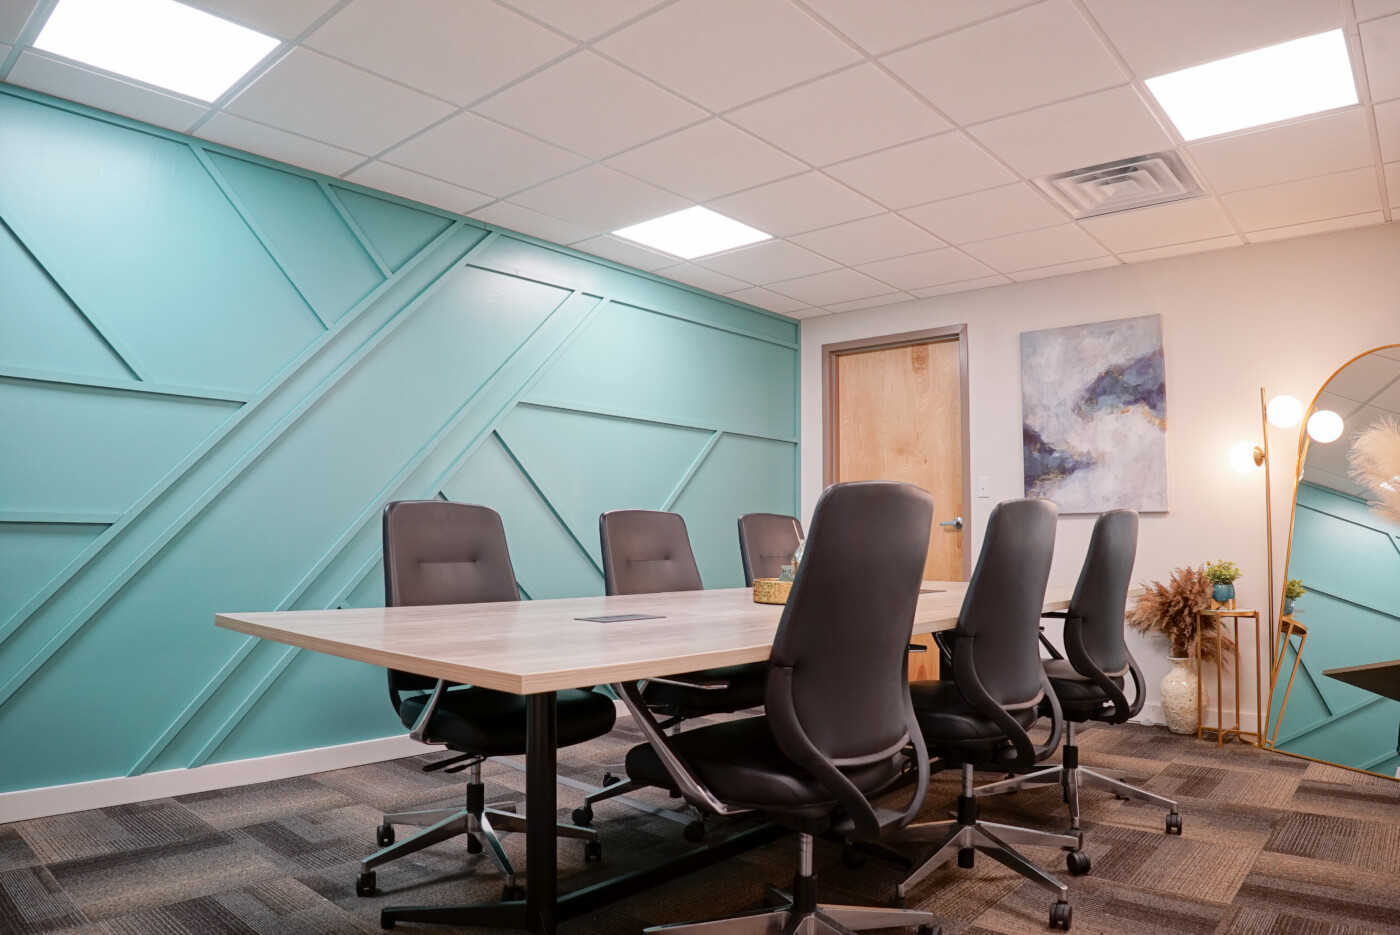
Bold Teal and Gold: A Confident Color Story

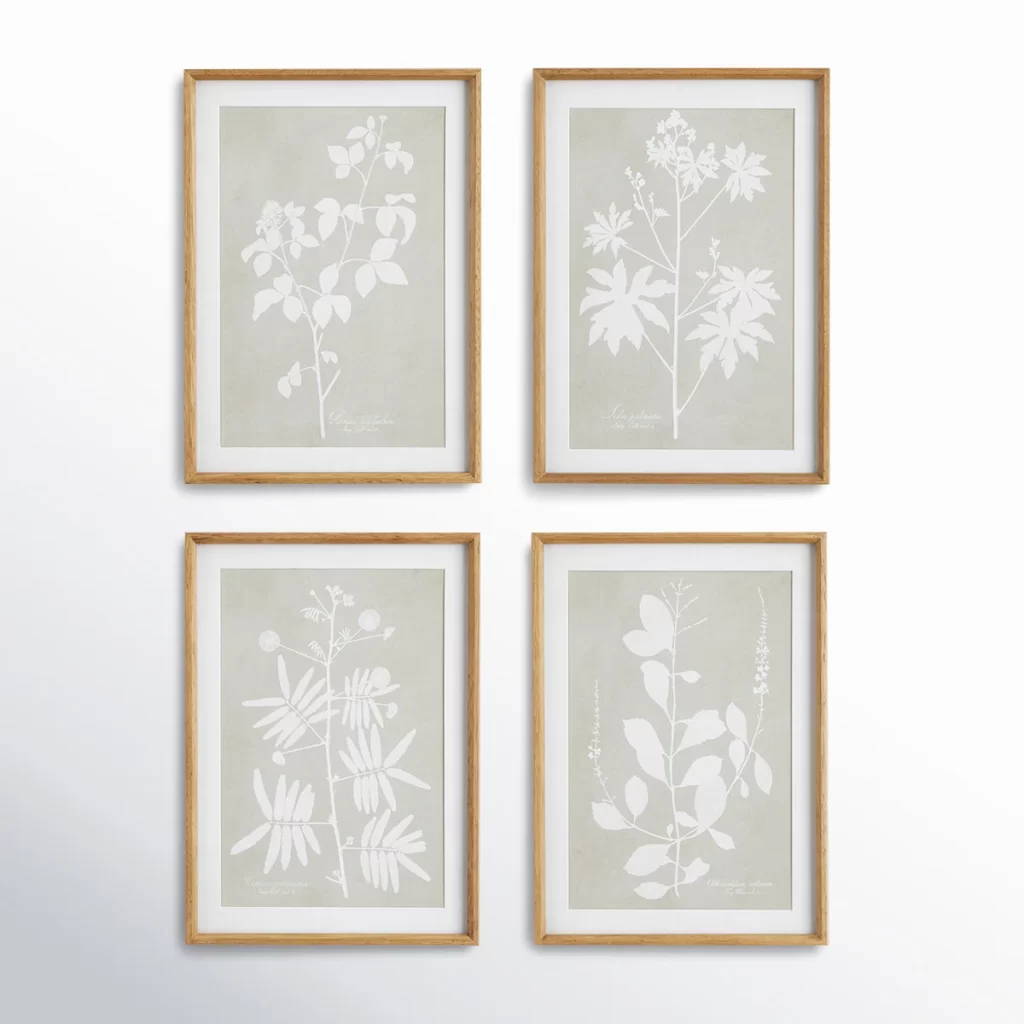
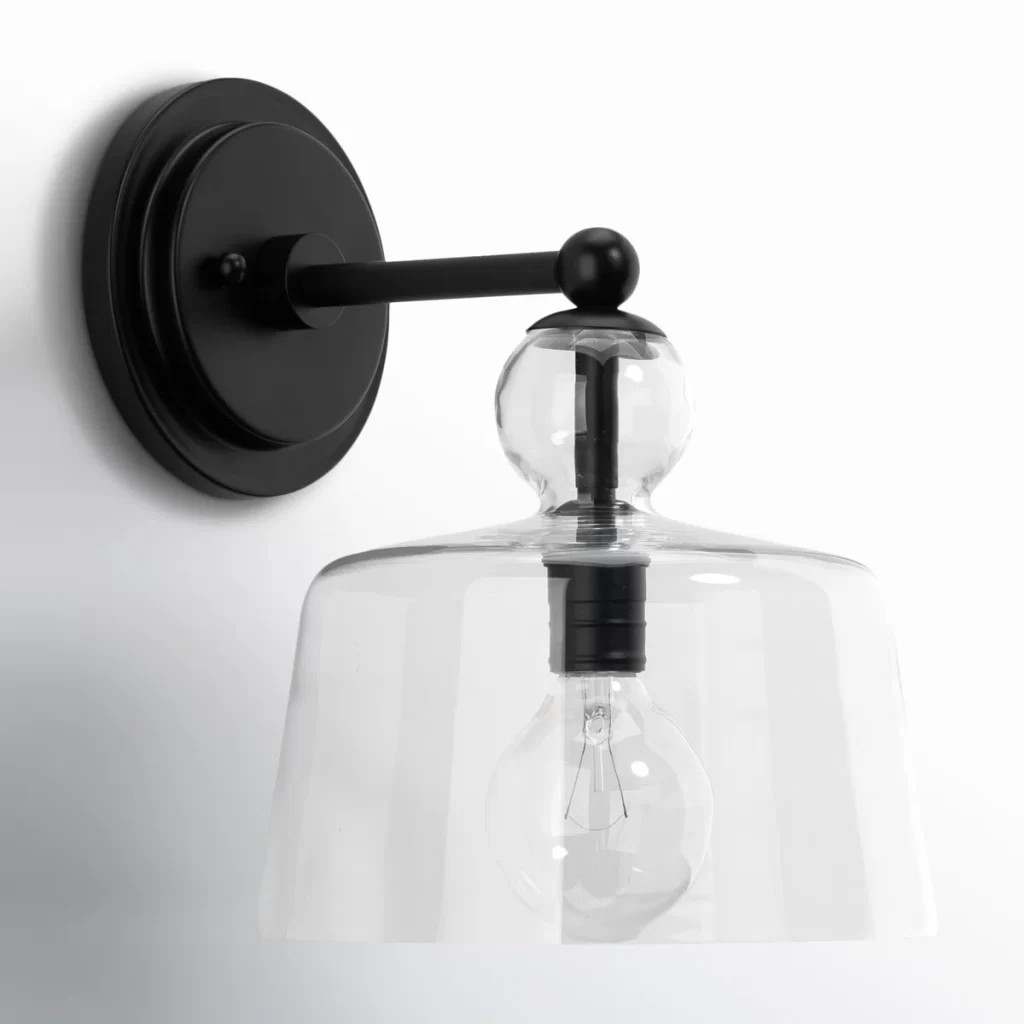
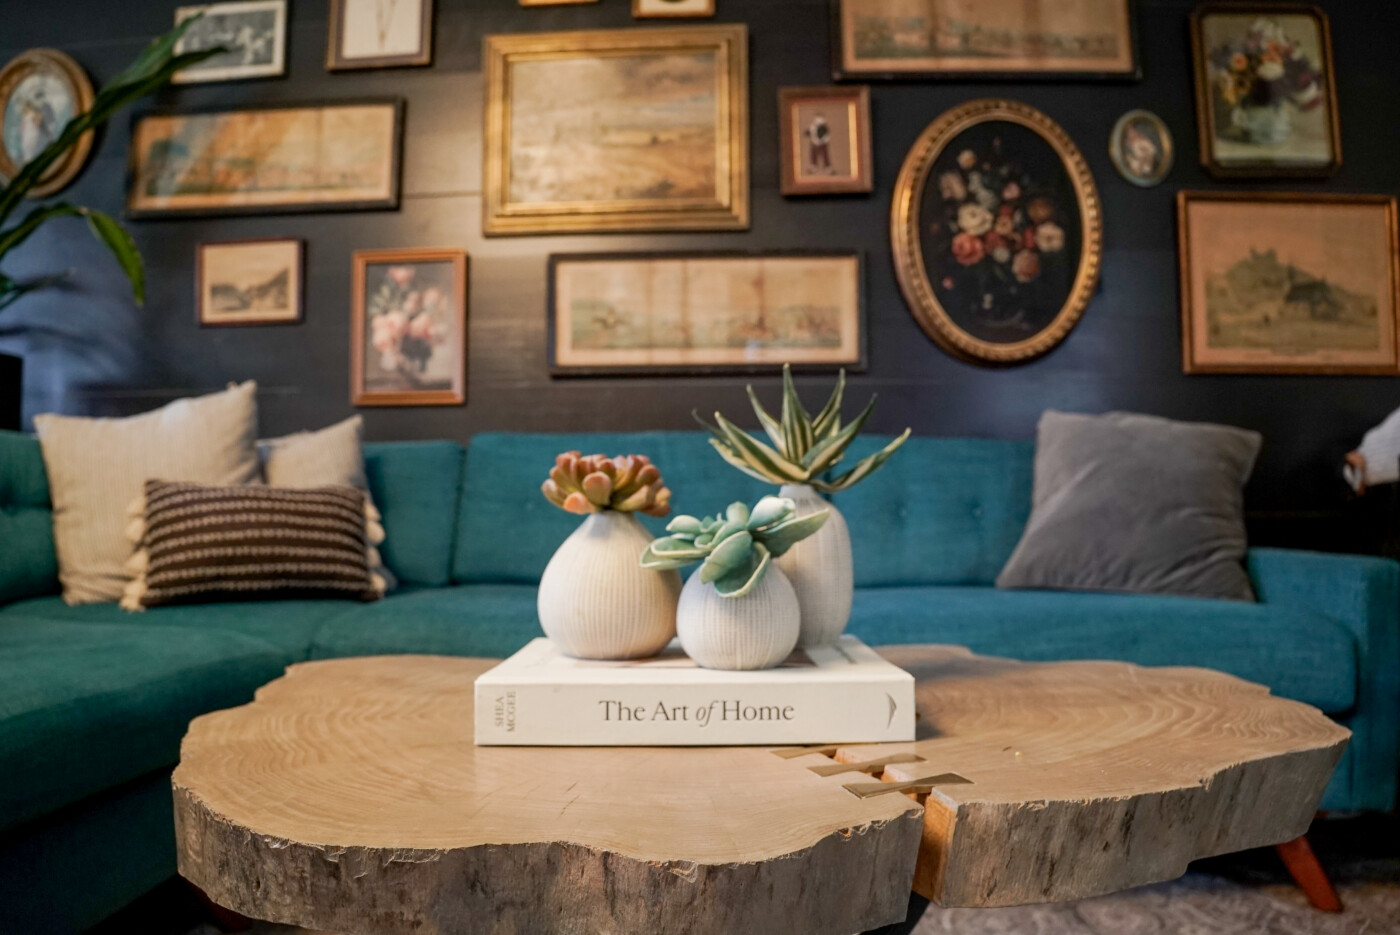
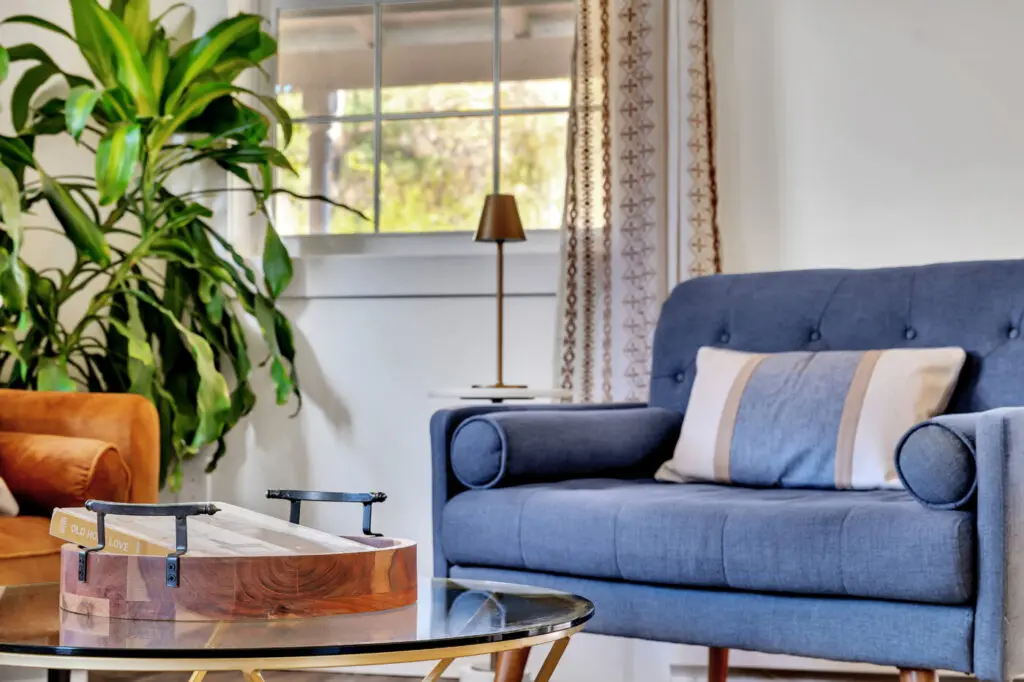
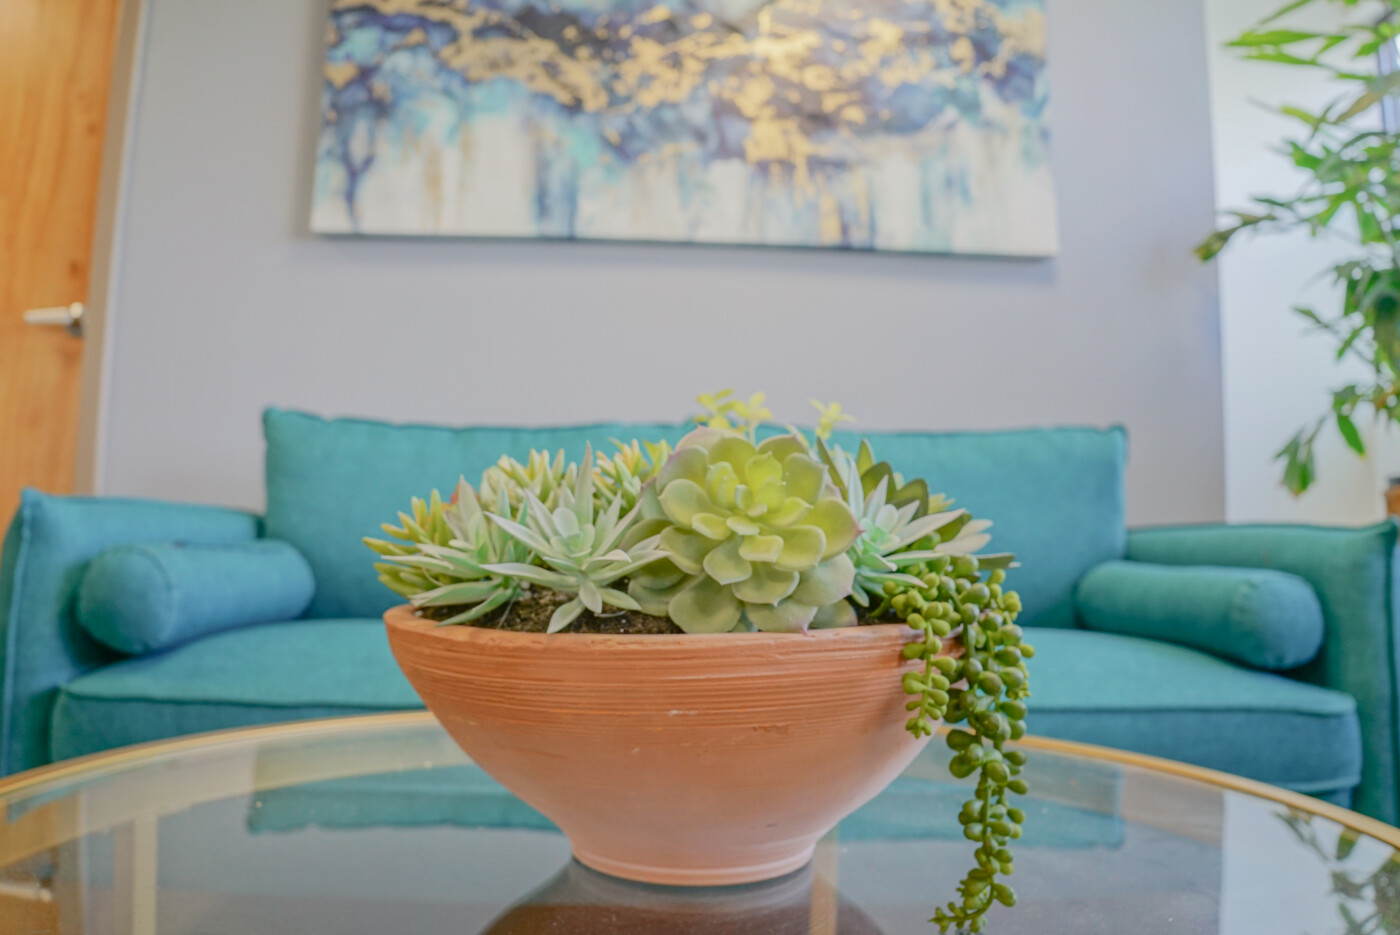
Choosing the right colors for the client lounge was key to striking the perfect balance between personality and professionalism. A bold teal sofa with clean lines added just the right amount of character without compromising the refined tone of the office. Gold and glass elements were used throughout the space to reflect light and elevate the design, offering a sense of polish without adding visual weight to what is a relatively compact area. Teal and gold together create a color palette that signifies trust, creativity, and stability which are three core values that shape strong client-attorney relationships. These colors weren’t limited to just this space either; they were thoughtfully carried throughout the entire office to create a cohesive and intentional design plan.

To create a cohesive office design, carry a consistent color palette across every space. Repeating key tones in furniture to finishes helps connect each room while allowing them to shine individually.

Pro Tip from the Funcycled design team

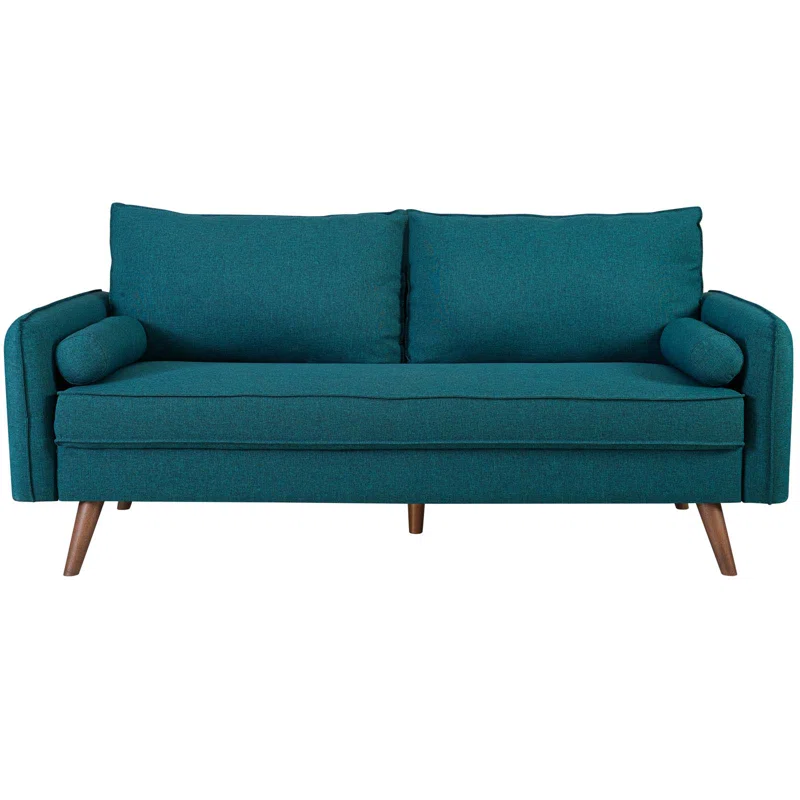
This sofa works really well for a compact space. Only 6 ft wide, it can comfortably accommodate a couple of people without adding bulk to the space. And the clean lines that mimic a mid-century style feel timeless, allowing this sofa to work well for years. To purchase a similar sofa, click the link below:

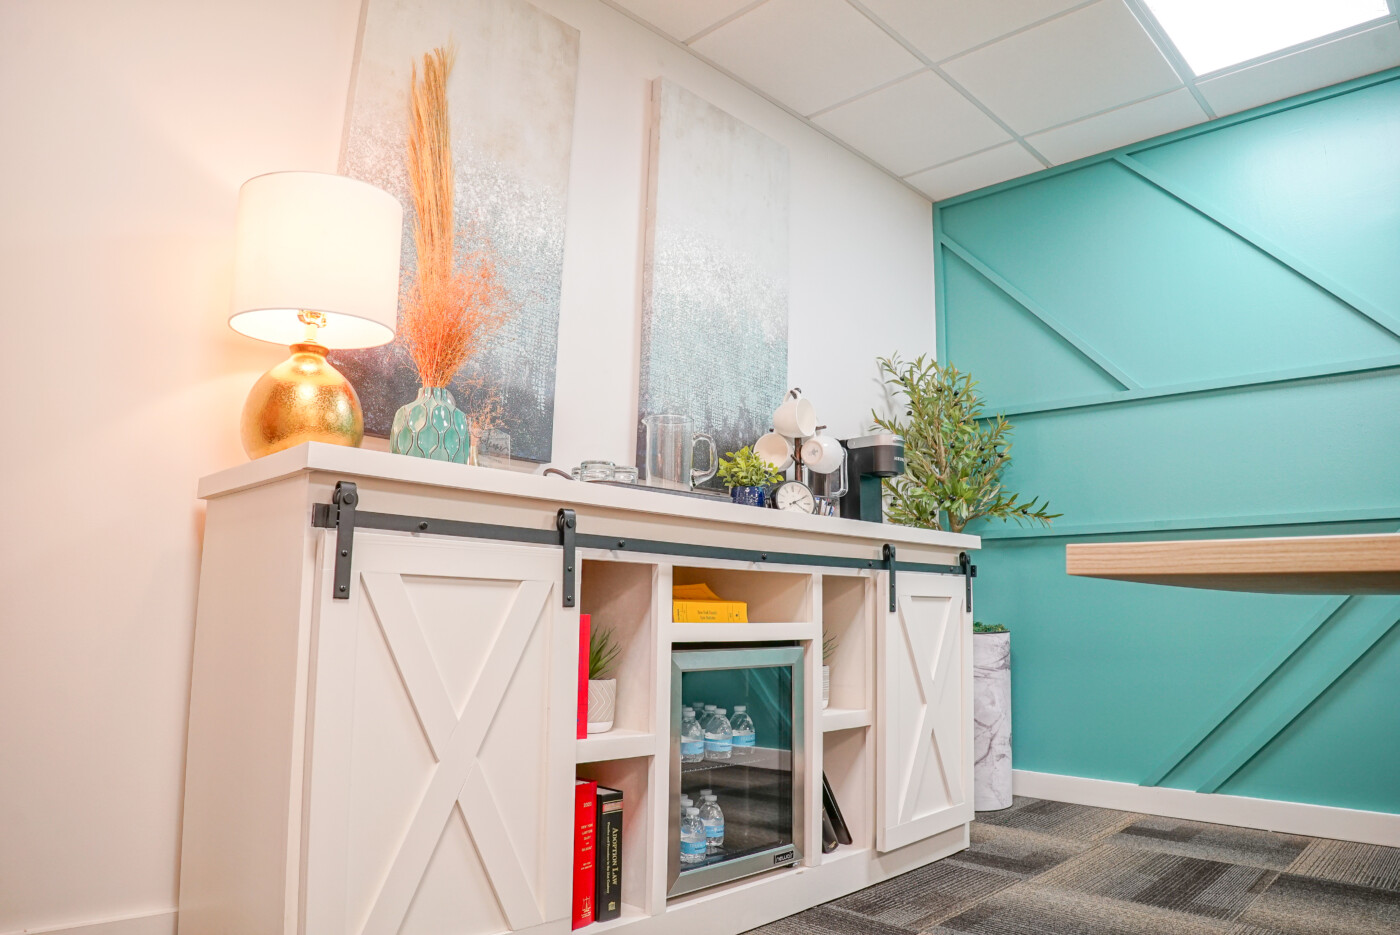
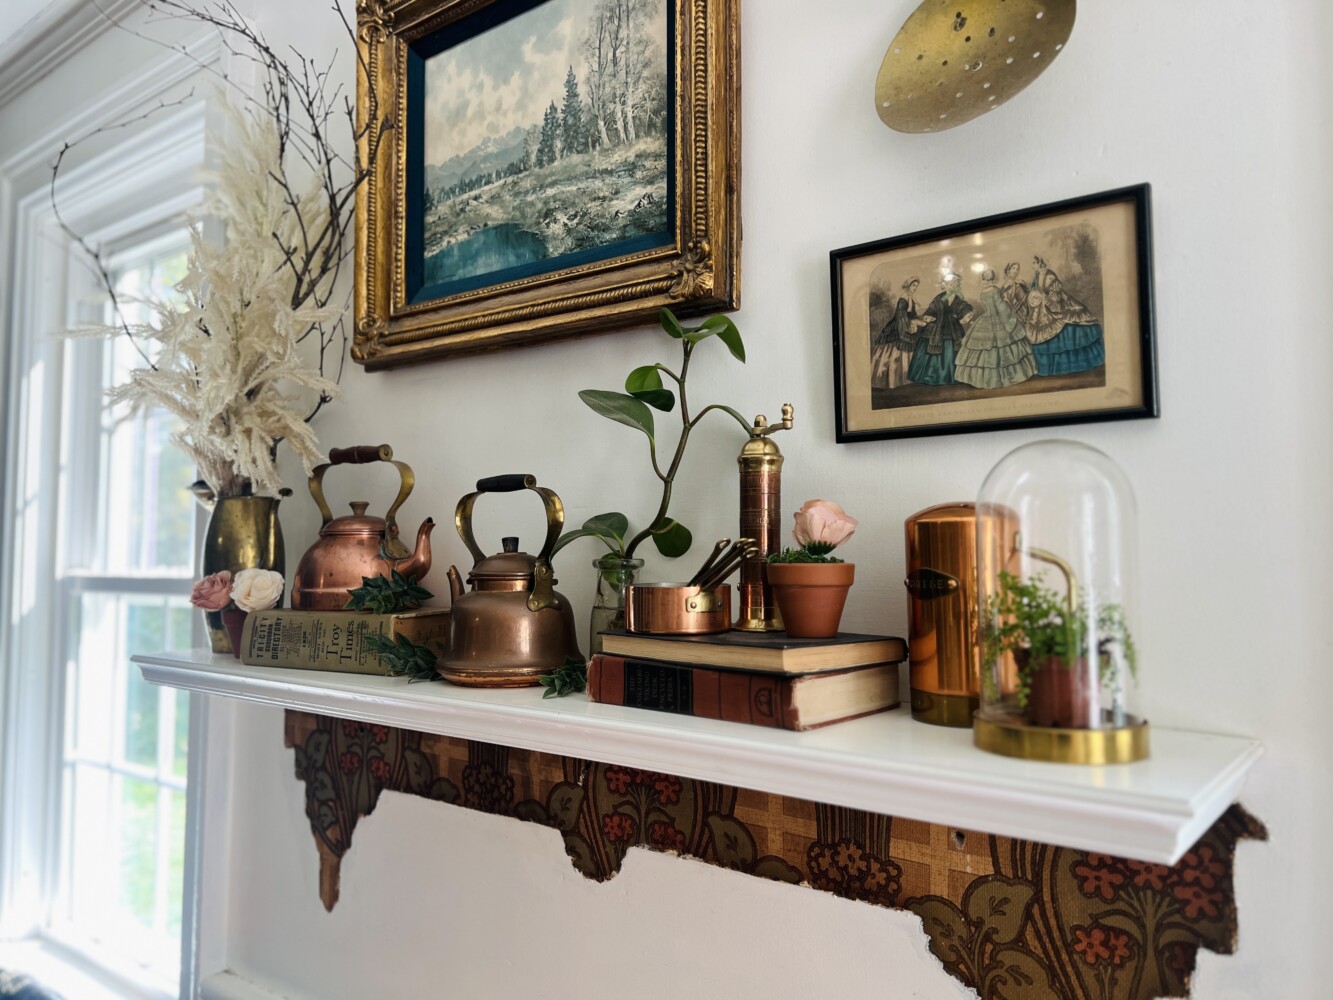
Open Shelving that Blends Storage and Style

Open shelving in a professional office space can be both functional and beautiful when styled with intention. In this client lounge, we used open shelving to add visual interest while providing practical storage that keeps the area feeling open and approachable:

  • Open concept shelves accommodate both storage and curated décor
  • Books, plants, and useful client materials live side by side
  • The clever design adds character while keeping things organized and accessible

I love this shelf! It has such style. With a combination of angled lines, this piece can accommodate a variety of heights, sizes, and needs. I think it can be used in an office, living room, bedroom, or even in a dining room for open storage and bar accessories. Click the link below to purchase:

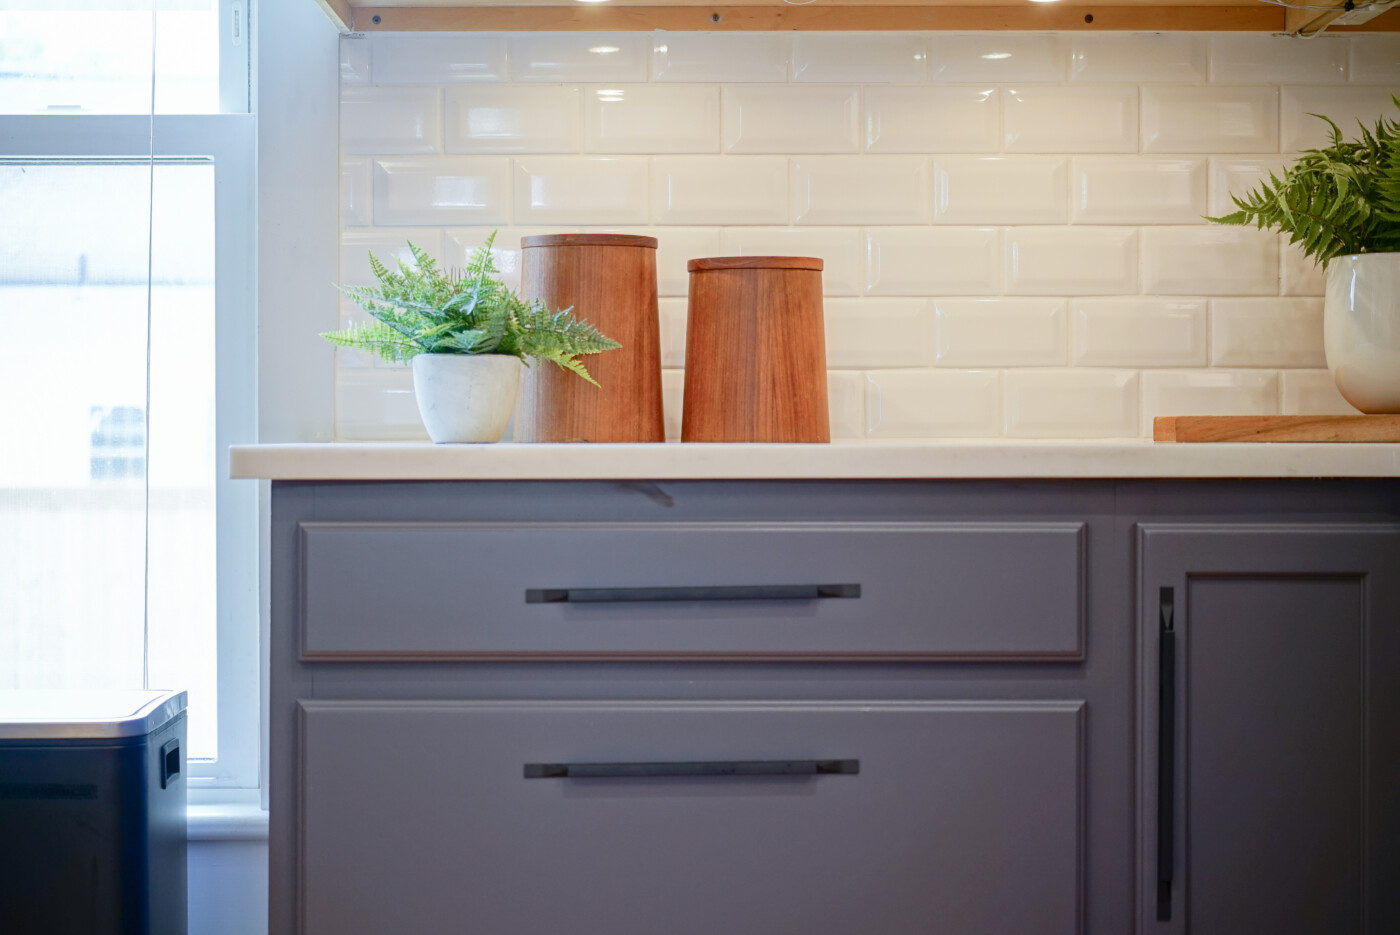
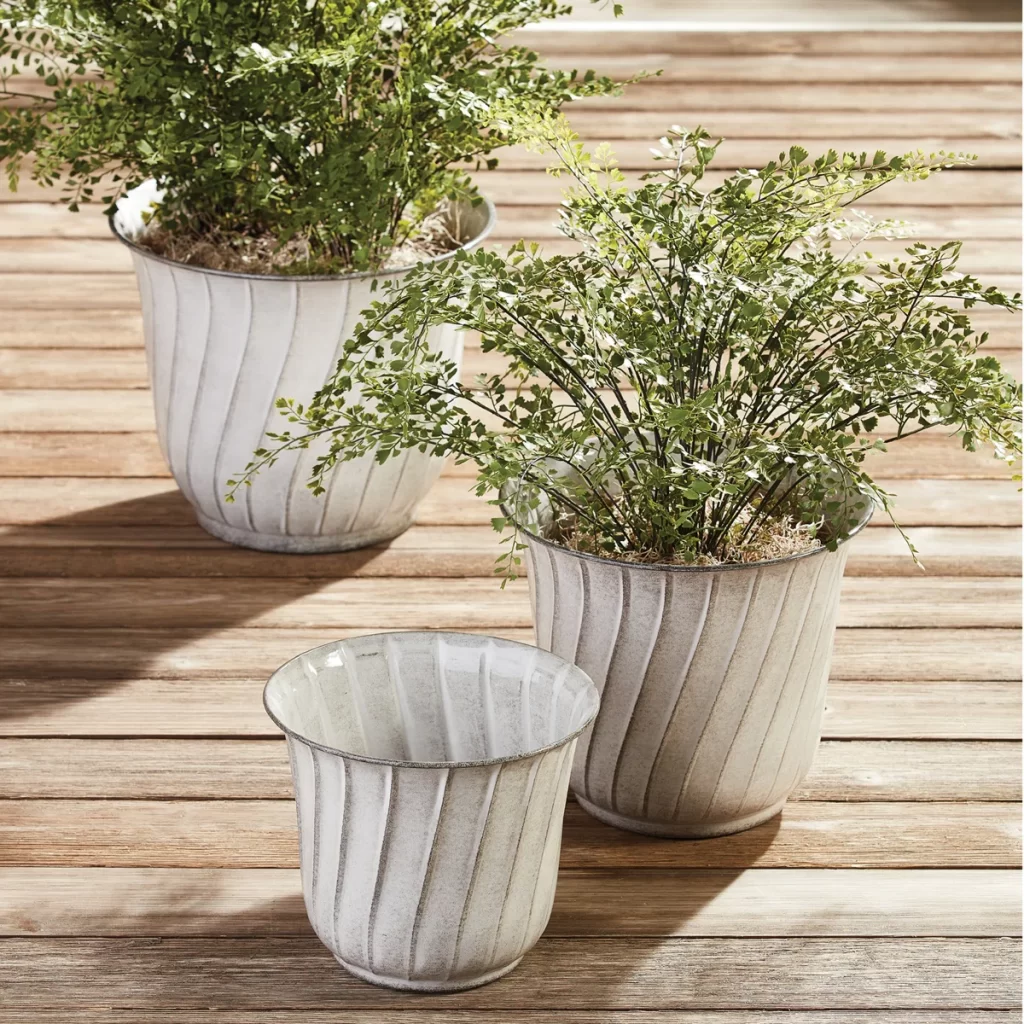
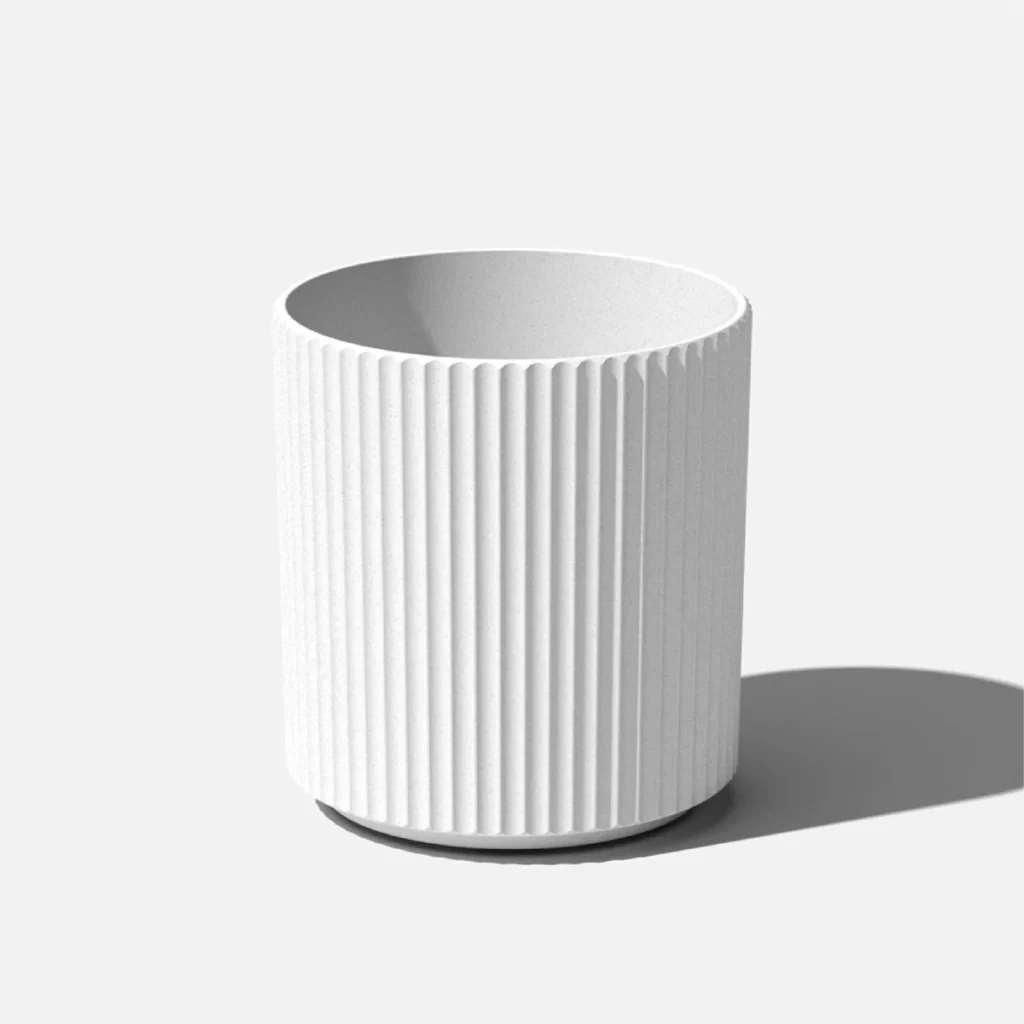
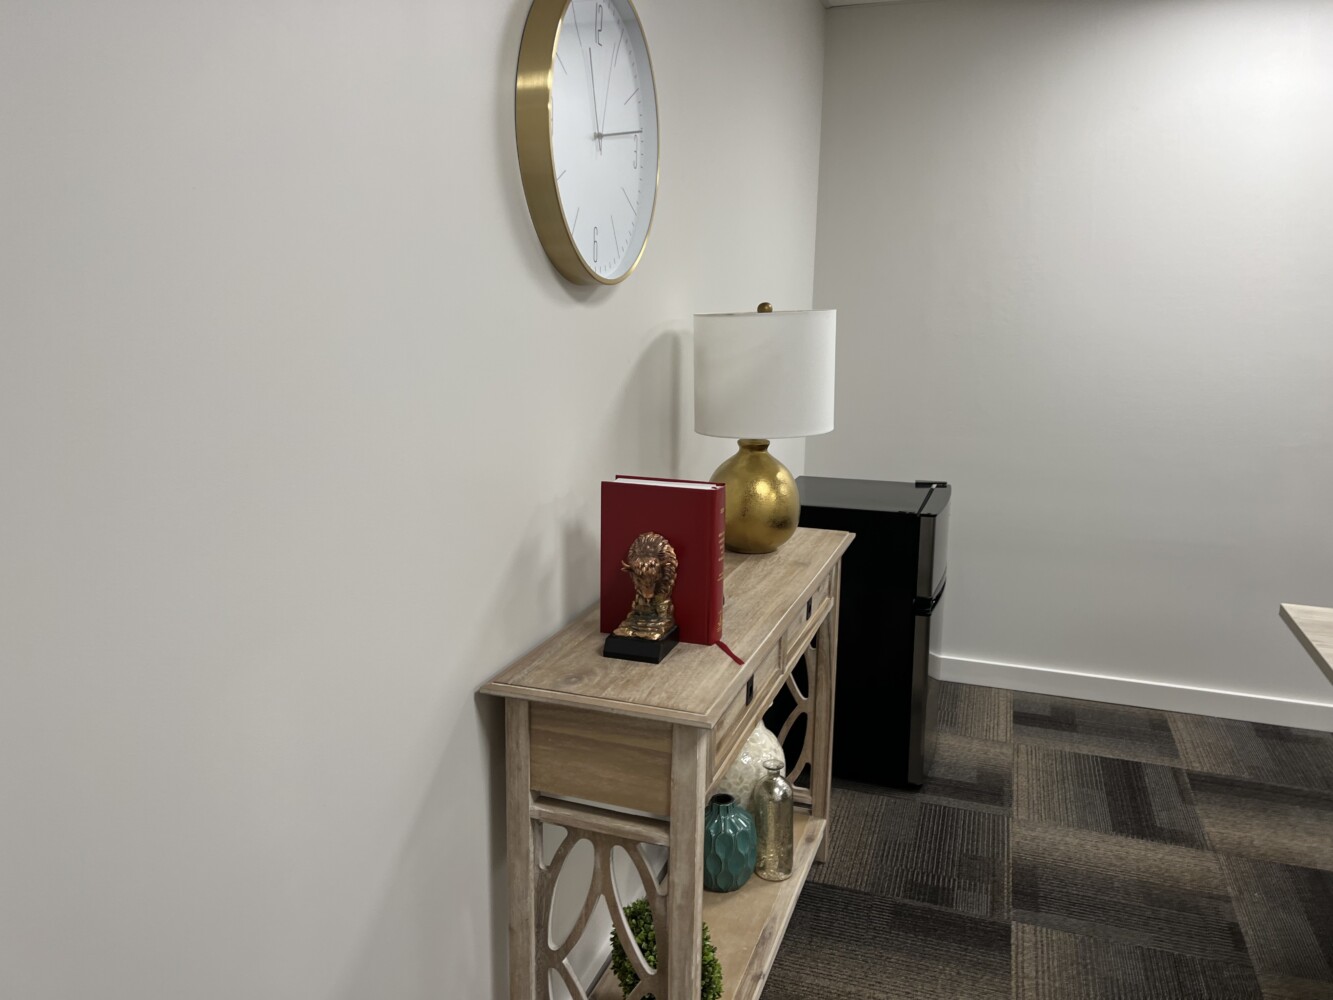
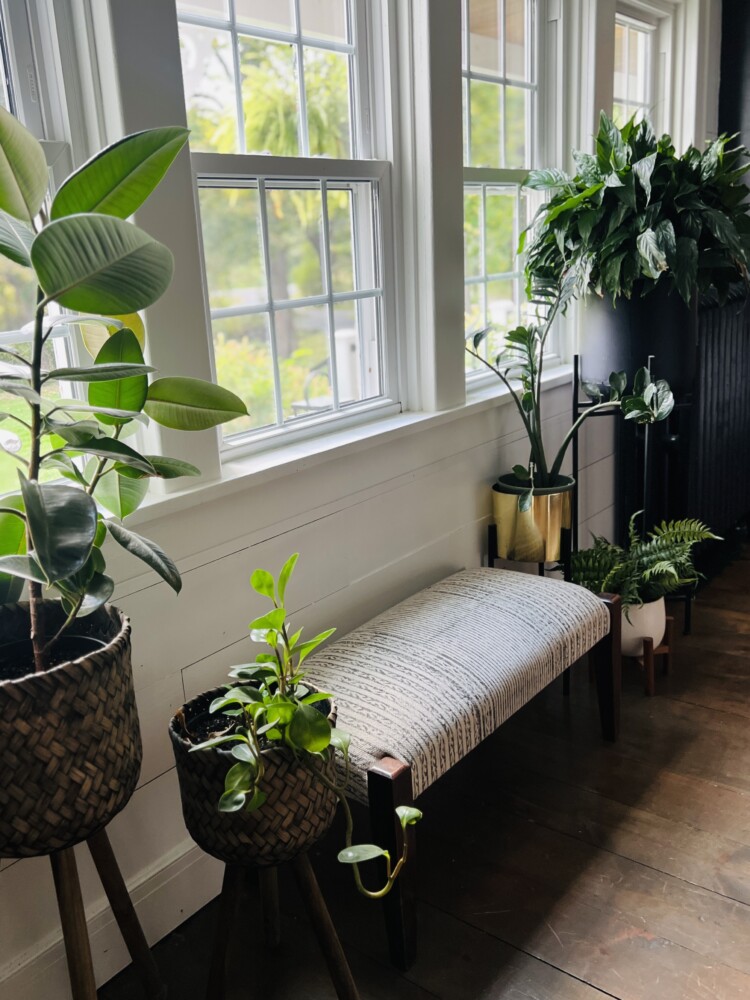
A Light-Filled, Plant-Rich Lounge Clients Will Love

Maximizing natural light and adding greens to any space create a warm atmosphere and set a welcoming tone to the room. We made sure to situate this lounge zone next to a large window which now serves as a backdrop to the plants and accompanying cabinet, which plays double duty, providing storage and surface area for plants.

Lauren and her team have a combination of real and faux plants throughout the office. The combination of both helps brings depth and vibrancy to a room, bridging the freshness of nature with lasting, effortless style.

We have sourced some of our favorite faux plants and stems for use in any design project. Click the link below to browse and shop:

Let these key points guide you as you consider brining light and green into your space:

  • Natural light plays a major role in softening the space
  • Layered greenery brings life and texture
  • Together, they achieve a thoughtful balance of comfort and productivity

Final Thoughts

Thank you all for following along! If you’d like to get this blog in your email once a week, please sign up for our weekly newsletter by adding your email in the little box below my picture at the top of this page. 

For additional inspiration, check out our other blog post for this AMAZING office makeover, linked below:

If you’ve enjoyed this post, please like FunCycled on  FacebookInstagram and Pinterest if you don’t already. Keep up to date on the newest finds, vote on colors and give your input on our creativity. We share fun tutorials, great before and after, and new design inspirations. 

We offer interior designkitchen cabinet painting, and custom built tablesbarn doors, and repurposed furniture. Thank you, again, for working with us and for taking the time to spread the word about what we do. 

Happy FunCycling Friends,
Sarah ;)

Note some of the the links provided are affiliate links which means I earn from any qualifying purchases.

Posted on

From Basic to Bold: A Tuxedo Kitchen Makeover with Timeless Charm

A fresh coat of paint can do wonders, but this tuxedo kitchen makeover took things a step further, transforming a bland, all-white space into a timeless and tailored showstopper. In this project, we turned a generic kitchen into a bold-yet-classic space by pairing crisp Chantilly Lace upper cabinets with smoky black lowers, creating that coveted tuxedo look. From oversized matte black hardware to a gleaming stainless steel apron sink and updated quartz counters, every detail was designed for both style and longevity. Here’s how we brought this stunning transformation to life.

Kitchen Makeover Design

When first meeting with our client, we realized how much she appreciated and valued the need for style that reflects her personality while creating a little drama and adding some creative choices to her home. To begin, we started with a design board to create a concept that we could work from.

Crisp Contrast: The Tuxedo Cabinet Look

This kitchen is totally timeless!

So what exactly is a Tuxedo Kitchen?

Tuxedo kitchen style refers to a two-tone cabinet design where upper cabinets are painted a lighter color and lower cabinets are finished in a darker, contrasting shade. Standard pairings might include whites and creams on top and black or navy for the bottom.

Here’s how we created that tuxedo style:

  • Top cabinets painted in Benjamin Moore Chantilly Lace white for a cool and crisp feel
  • Bottom cabinets painted in a moody, smoky hue found in Benjamin Moore Almost Black for grounding contrast.
  • Coordinated by painting the existing corner hutch to match the lower cabinets

**Note, the color of the lower cabinets that is displayed in the photos does not accurately display the Almost Black color.

I love this pairing. It is so classic and definitely give a nod to the elegance of a well tailored tuxedo

Designer’s Perspective

Hardware that Adds Style and Substance

To really create a modern-classic design, we decided to use oversized matte black hardware for both the doors and drawers.

To ensure scale, we found a selection that was available in a variety of sizes. This allowed us to create a cohesive design, streamline our product selection, and achieve a modern edge with timeless appeal. The sleek structure is perfect for a tuxedo kitchen. The hardware we used is linked in the picture to the right

Here’s the breakdown of what size was used where

  • 3.75″ for smaller upper cabinet doors
  • 5″ for small lower cabinet drawers
  • 7.5″ for larger drawers and all other cabinets

Backsplash and Counters: Classic Meets Fresh

We decided to use classic beveled white subway tile in keeping with a timeless design.

To assure fresh and clean lines for a modern appeal, we selected a white color for our grout choice. Stunning!

Here is a link to a beautiful beveled subway tile in crisp white.

We swapped outdated counters with a sleek new quartz surface with light veining.

Functional Beauty: Sink, Appliances, and Lighting

I often encourage clients to really evaluate their sink, light fixtures and appliances when they are considering options for a kitchen remodel, even if you are re-working much of what already exists. Taking the opportunity while you are in that mind frame and already planning a design just makes good sense.

Our client already had upgraded her appliances so they were in beautiful shape when we began this project, so we did not need to source this. In light of this, we were able to spend time and money on some other elements important to the overall design. As you can see, we swapped the sink for a sleek new design which added a touch of charm while maintaining a modern and polished look.

It was important to create as much light as possible. We changed out the dated, downcast light for a modern wood and metal fixture that would bring fresh illumination casted up and down. Note, we did paint part of this light in copper to match the new faucet and add richness to the design.

The fixture we used is featured here and linked below:

More Kitchen Transformation Inspiration

Here are some other great kitchen transformations from FunCycled.

Clean and Bright Kitchen Reveal

Classic & Farmhouse Feel Kitchen Makeover

Final Thoughts

I hope you have gleaned some inspiration and perhaps discovered some key takeaways for your kitchen! To see more kitchen inspiration, check out all of our KITCHEN MAKEOVERS.

Are you considering getting your kitchen cabinets painted (OR MORE!), follow these three easy steps to getting your FREE QUOTE today! If you are even remotely considering a kitchen refresh, I encourage you to CONTACT US today!

Thank you all for following along! If you’d like to get this blog in your email once a week, please sign up for our weekly newsletter by adding your email in the little box below my picture at the top of this page. 

If you’ve enjoyed this post, please like FunCycled on  FacebookInstagram and Pinterest if you don’t already. Keep up to date on the newest finds, vote on colors and give your input on our creativity. We share fun tutorials, great before and after, and new design inspirations. 

We offer interior designkitchen cabinet painting, and custom built tablesbarn doors, and repurposed furniture. Thank you, again, for working with us and for taking the time to spread the word about what we do. 

Happy FunCycling Friends,
Sarah ; )

Exquisite Spaces. Sustainable Designs. Brighter Futures.

Note some of the the links provided are affiliate links, and I may earn from any qualifying purchases.

Posted on

Should You Paint Your Kitchen Cabinets Yourself or Hire a Pro? What You Need to Know

Painting your kitchen cabinets can completely transform your space—but should you DIY it or call in the pros? While the appeal of saving money with a weekend project is worth evaluating, kitchen cabinet painting requires more than a brush and a can of paint. Let’s break down the pros and cons of painting cabinets yourself vs. hiring professionals.

The Appeal of DIY Kitchen Cabinet Painting

Cost Savings
DIY projects are often viewed as the cheaper option. Doing the project yourself means to you don’t have to pay for labor (other than your own time). And since you are completing the project on your own, you have the ability to spread the project out, which can help spread out your upfront costs. It is important to note that materials for a professional-grade result—like high-quality paint, primer, degreasers, sanders, and sprayers – add up quickly.

Creative Control
Doing it yourself allows you to have total control over every detail – the colors, the finishes, and timing. For the super organized and design-focused person, this is an appealing to many homeowners. Plus if you like a hands on approach, this might be the way to go.

Satisfaction of a Project Completed
There’s something satisfying about stepping back and saying, “I did that.” A DIY kitchen cabinet project can be a rewarding experience if you’re prepared for the work it takes. Seeing that “before and after” is a always exciting, especially when you made it happen.

The Challenges of DIY Cabinet Painting

Time-Consuming Process
Prepping and painting cabinets is a major time investment. Between removing hardware, sanding, cleaning, priming, drying, and multiple coats of paint, the job can stretch out over days or even weeks. Plus, if you run into any damage issues along the way, the scope of the project may go beyond what you planned or are equipped to tackle.

Easily Made Mistakes
Cabinet painting is detailed work, and errors are easy to spot—streaks, drips, brush marks, or poor coverage can make the whole kitchen feel unfinished.

Durability Concerns
Paint adhesion and finish quality are crucial in kitchens, where surfaces get wiped, bumped, and receive daily use. DIY jobs can chip, peel, or fade if the proper prep and products aren’t used.

What the Pros Bring to the Table

Professional-Grade Finish
Professionals use specialized tools like sprayers and industrial-grade finishes to create a smooth, factory-like surface.

Proper Prep and Technique
Prep work is everything. A professional painter knows how to thoroughly clean, sand, prime, and apply the right product for long-lasting results. Plus, they have a broader and deeper understanding of troubleshooting and addressing any complications or challenges that arise.

Time Efficiency
What might take you weeks to complete can be done in a few days by an experienced crew, minimizing the disruption to your daily life.

FUNCYCLED BONUS:
Our crew is usually able to overhaul kitchen cabinets within one week, with only a few days in your home.

That is true for this beautifully refreshed kitchen. We painted the whole kitchen in just one week.

Access to Better Materials

Professional painters often have access to higher-grade primers, paints, and equipment that aren’t readily available at big box stores. These products are more durable and deliver a more refined result.

CONSISTENCY IS KEY
Professionals will achieve a uniform finish across multiple doors and drawers is harder than it seems. Professionals are trained to deliver consistency in sheen, color depth, and coverage—something that can be tricky with DIY.

Increased Home Value

Cabinet painting done by a professional can significantly improve your kitchen’s appeal and help boost your home’s resale value. Real estate agents and potential home buyers might be able to detect poor-quality paint jobs which could hurt your listing.

So, Should You DIY or Hire a Pro?

If you have the tools, patience, and confidence to take on the job yourself—and you’re okay with a few imperfections—DIY might work for you. But if you want a smooth, durable, and professional finish that will stand the test of time (and elevate your home’s value), hiring a pro is well worth the investment.

Professional, Durable, & Timeless
That is our approach to kitchen cabinet painting, so you get the most value and ROI on your project.

Final Thoughts: It’s More Than Just Paint

Your kitchen is one of the most-used rooms in your home. Cabinet painting is a high-impact update—but it’s only worth doing if it’s done right. While the DIY route might save you some money up front, the long-term value, quality, and durability of a professional job often makes it the smarter investment.

Need more advice?

Check out these helpful blogs to further assist with your evaluation and consideration for choosing the right method for your project

Let us help you love your kitchen again—with expertly painted cabinets that look and feel brand new. To get started with your FREE quote, just follow these steps and reach out to us today!

Thank you all for following along! If you’d like to get this blog in your email once a week, please sign up for our weekly newsletter by adding your email in the little box below my picture at the top of this page. 

If you’ve enjoyed this post, please like FunCycled on  FacebookInstagram and Pinterest if you don’t already. Keep up to date on the newest finds, vote on colors and give your input on our creativity. We share fun tutorials, great before and after, and new design inspirations. 

We offer interior designkitchen cabinet painting, and custom built tablesbarn doors, and repurposed furniture. Thank you, again, for working with us and for taking the time to spread the word about what we do. 

Happy FunCycling Friends,
Sarah ;)

Exquisite Spaces. Sustainable Designs. Brighter Futures.
Posted on

A Neutral Fireplace Design: Tips for a Peaceful Home

How Neutrals Soothe the Senses and Clear the Mind

Creating and maintaining calm and mindfulness in your home is easily achieved by ensuring smooth transitions, adopting simple designs, and reflecting nature in your design choices. Using neutral colors works in conjunction with each of these principles. Here’s how:

  • Neutral colors are soft and muted and help maintain a consistent visual palette, thus reducing visual clutter and minimize overstimulation.
  • Calm hues invite peace and set a tone of serenity in the home. Making neutral choices will help us create a tranquil environment which sets the stage for mindfulness and clarity in our everyday lives.
  • Neutrals allow light to reflect more gently, softening the overall atmosphere of a room.

Let these quiet colors inspire your home!

Beiges & Greiges

Whites and Creams

Blues and Greens

You might be scratching your head wondering how blues and greens can fall into the neutral color category. Here’s how: Many neutrals (beiges, grays, and whites) actually do have a blue or green undertone. And when paired with muted hues with a more saturated green or blue base, you can add depth and dimension to lift and complement your neutral decor. Plus, soft blues and greens are known for promoting peace and harmony, a key ingredient for creating a neutral space! These two colors actually fall into the Gray category, but as you can see each takes on an identifiable blue or green hue.

Mantel Styling that Supports Stillness and Serenity

We wanted to create an example of a neutral

  • Keep mantel decor minimal and meaningful—fewer items allow each piece to breathe.
  • Choose natural textures (ceramic, wood, woven baskets) over bold or shiny finishes.
  • Layer in soft greenery or dried botanicals for a soothing organic touch.
  • Art or photography with gentle lines or calming themes reinforces stillness.
  • Stick with tonal variations of white, tan, or warm wood to maintain a quiet palette.

Design Elements that Quiet a Space—Without Making It Boring

There are some common misconceptions about using neutrals in your home. One of the biggest is the assumption that using neutral colors only will lead to a boring outcome, leaving the home feeling bland and devoid personality. Unfortunately this can be exactly the outcome if the design remains one dimensional. A quality design will encompass mixed textures, consider scale & balance, and focus on the whole room, not just one section. So as you plan the design for your mantle, be mindful of the whole room. Here are some tips to

  • Contrast texture instead of color: mixing wood with soft knits & smooth ceramics with woven baskets add dimension.
  • Add in subtle color variation: off-whites, taupes, and soft gray-greens keep the palette interesting.
  • Keep symmetry in mind: with centered decor, try offering gentle “end caps” in the form of similarly sized objects to keep a sense of balance.
  • Integrate soft ambient lighting: using candles and low lighting instead of overhead lights.
  • Bring in natural elements: stone, wicker, linen, and cotton echo the peace and presence of the outdoors.

Dimmable lighting provide a lot of versatility in – pro tip

Shop these products to help facilitate the simple tips above.

Peaceful Lighting

I really love these wall sconces! All of them are dimmable so they can create as much mood as you want. Regardless, they each provide ambient lighting and could be placed on either side of the mantle OR simply around the room to help create the right atmosphere. Keep your fixture selections to gold or black – these two options are simply timeless!

Don’t have the option for hardwiring your sconce?
Use rechargeable bulbs, designed to work
without the need to plug in or be hardwired!

Pro tip from the funcycled design team

Cozy, Calm, and Collected: Creating a Mood That Lasts

Two of the best benefits of using neutral design in our homes (as if tranquility and clarity are not enough!) are the longevity and timelessness that often accompany this type of design. Neutral spaces also embrace a practicality that can help keep us grounded. Having a space that needs minimal updating over time and remains a beautiful backdrop no matter the season generates a special kind of joy and appreciation for what we have. Try these practical tips as you plan your design:

  • Aim for intentional styling: each piece should contribute to the feeling of calm, not compete for attention.
  • Incorporate functional coziness—like a basket of rolled throws or books—so the space invites you in.
  • Use scent and sound to support the mood: soft instrumental playlists, diffused lavender, or a crackling fire.
  • Make this peaceful style a core part of your home, extending the same design language into adjoining rooms.

Final Thoughts

For additional Inspiration check out these other great blog posts to help inspire your journey for a peace-filled home!

Thank you all for following along! If you’d like to get this blog in your email once a week, please sign up for our weekly newsletter by adding your email in the little box below my picture at the top of this page. 

Want to get more helpful design tips? Then like FunCycled on  FacebookInstagram and Pinterest if you don’t already. Keep up to date on the newest finds, vote on colors and give your input on our creativity. We share fun tutorials, great before and after, and new design inspirations. 

FunCycled offers interior designkitchen cabinet painting, and custom built tablesbarn doors, and repurposed furniture. Thank you, again, for working with us and for taking the time to spread the word about what we do. 

Happy FunCycling Friends,
Sarah ;)

Note some of the the links provided are affiliate links, so I earn from any qualifying purchases associated with those links.

Posted on

Modern Conference Room Makeover for a Professional Law Office

A well-designed conference room sets the tone for every meeting, and this law office makeover proves that function and style can go hand in hand. When I met with my client, Lauren, it became clear that she wanted to have an office that would empower every person who stepped through the doors, including her staff, colleagues and clients.

Lauren owns and operates a law practice, Lauren Hunt, Esq., in Loudonville, NY, and serves families in the surrounding Capital Region area. When Lauren opened up her office, she reached out seeking advice on how to take the uninspired office space and transform it into a professional office that would reflect the personality of Lauren and her (all female) team and would be a place of positivity, peace and strength.

We got to work creating designs for every area of this office space. From reception area to conference room, the once utilitarian and generic office has been renovated into a professional office space equipped to meet the needs of Lauren, her team and clients. Let’s start with this conference room makeover, marked by rich color, custom furniture, and layered design elements.

A Bold Conference Room Makeover Begins with a Feature Wall

Making design decisions may begin with a several amazing ideas (which I love as a designer), but it is important to assess an overall plan and hone a design that keeps it focused. Tempting as it is to embrace every idea and try our hardest to make them work together, not everything can take center stage. Knowing when to remove something from a design plan is just as critical as knowing what to incorporate.

The conference room, like so many others, was devoid any character, and any visual focus was directed at the floor. Not exactly what you want everyone staring at! So to draw your eye up and create a new (and bold) focus, we decided to add a feature wall in our conference design. The wall would: Add Color, Add Texture, and Provide a Focal Point.

Adding Depth with a Geometric Pattern for Subtle Texture

This conference room is narrow which means we needed to be extra diligent with our use of space. And, since the purpose of this space is to conduct conferences and serve as a space for collaboration, it needed to include a large table and chairs. In light of these components, using the largest wall in the room was the smartest choice for our feature wall. Because the room is narrow, we knew we would not be adding a piece of furniture to this wall. And, rather than trying to source a large enough piece of art work or dressing the wall with a collage of pictures that may only clutter the room, adding visual interest with a geometric pattern and installing it to the whole wall would be a great solution.

We used a series of lines and a variety of spacing to create large scale movement and texture. By implementing both diagonal and straight lines, the design remained clean without feeling too stuffy or rigid. Everything was painted in the same medium turquoise – a color that represents both peace and wisdom, essential elements for this law office. Take a look at this side by side. By adding this geometric wall, the focus shifts from the floor to the bold wall. Plus, the overall look is totally elevated.

Custom Credenza: Stylish Storage with Personality

Having the right amount and the right kind of storage was also essential to this conference room. You can see in the before photo, the room was outfitted with a very small console table. Not only was this piece not very functional for this room, it was also completely the wrong size for this wall. This conference space would need a larger piece of furniture that would include:

  • some open storage,
  • a place for a small refrigerator,
  • the ability to store materials needed for meetings that could then be easily tucked away,
  • and a an area to accommodate a small coffee station for guests and clients.

This was a TALL order! Because we needed to find a way to account for each of these needs in one piece, the best choice was to custom build a credenza to perform the various functions. By customizing one piece of furniture, we could meet the functional needs and also address the greater design need for a larger scale piece of furniture to anchor the room. One bonus of working with us, we can design and build custom pieces for your business or home!

What Makes this Custom Credenza Work?

It is one thing to make a plan and it is another to make the plan work. Which is exactly how this custom piece turned out. The perfect blend of form and function not just as itself, but it works well for the whole rest of the room. But how?

  • First, painting it in a soft white color supports the adjacent turquoise wall rather than working against it.
  • Second, it was right sized for the room. We could build this to the precise measurements and anchor the space without overwhelming it.
  • Third, a blend of functional and decor items in a cohesive color palette adds balance, functionality, and harmony to the design.

Bringing in Light and Personality to a Professional Space

When designing a professional office, conference room or otherwise, the finishing details really go a long way. Similar to our home interiors, our professional spaces should be well balanced with light and decor items that reflect who we are and the message we are trying to live out.

To achieve this, we added some additional lighting around the room to soften the overhead fixtures. Adding a variety of styling elements around the room enhance the design with personality, keeping it full of energy and …. A mix of blues & turquoise with gold accents ensure a harmonious look and feel. I especially love the simple arched mirror flanked with soft plumes. The mirror helps reflect light in this windowless room while the gentle sprays of grass soften the glow of light and help ground this corner.

Get the Look: Shop Our Conference Room Makeover

Many of the products we used in this design were sourced locally at Homegoods or one-of-a-kind places, and some were purchased a long time ago and are no longer available. I have pulled together some very similar items for you to shop from to get the look.

Custom Builds by FunCycled

Shop our selection of custom built tables, buffets, headboards, and more.

Custom Built Furniture by FunCycled

Arched Mirror

Artwork

Floor Lamp

Pampas Grass Plumes

Gold Tray

Final Thoughts

Thank you all for following along! If you’d like to get this blog in your email once a week, please sign up for our weekly newsletter by adding your email in the little box below my picture at the top of this page. 

Don’t forget to pin this inspirational office makeover and share with friends and family! Who doesn’t need a little inspo for work!

If you’ve enjoyed this post, please like FunCycled on  FacebookInstagram and Pinterest if you don’t already. Keep up to date on the newest finds, vote on colors and give your input on our creativity. We share fun tutorials, great before and after, and new design inspirations. 

We offer interior designkitchen cabinet painting, and custom built tablesbarn doors, and repurposed furniture. Thank you, again, for working with us and for taking the time to spread the word about what we do. 

Happy FunCycling Friends,
Sarah ;)

Note some of the the links provided are affiliate links which means I earn from any qualifying purchases.

Posted on

10 Budget-Friendly Ways to Instantly Refresh Your Space


Refreshing your home doesn’t have to mean a full renovation or a big-budget shopping spree. Sometimes, all it takes is a few small tweaks to breathe new life into your space. Whether you’re renting, redecorating on a budget, or just itching for a quick change, these 10 budget-friendly tips will instantly elevate your home—without draining your wallet!


Easy Ways to Update Your Home on a Budget

1. Swap Out Throw Pillows & Blankets

Switching up soft textures like pillows and throws can completely change the vibe of a room. Go for bold patterns, cozy knits, or fresh seasonal colors to add style and comfort in minutes.

Shop Similar Items


2. Add Peel-and-Stick Wallpaper or Decals

Want an accent wall without the commitment? Peel-and-stick wallpaper is affordable, renter-friendly, and available in countless designs. You can also try decals for smaller areas like a backsplash or behind shelves.

We have used a variety of patterns and colors in our designs.

Shop the Look


3. Paint a Statement Wall or Door

A fresh coat of paint on a single wall, an interior door, or even a piece of furniture can completely transform the look of a room. One quart of paint can go a long way!

I love the contrast of a deep black agains lighter and bolder colors!

Here are some great options to create a little moody drama while still giving you a neutral backdrop!


Budget-Friendly Home Decor Tips That Make a Big Impact

4. Switch Out Cabinet or Drawer Hardware

Updating knobs and pulls instantly modernizes furniture and cabinetry. With so many affordable options online or in stores, this is a simple upgrade that makes a big difference.

Changing hardware can be done in any room – kitchens, bathrooms, bedrooms, and even the living & dining room. Now you can find almost any style imaginable. I have pulled (get it!) some unique and vintage inspired knobs that could be used in a variety of spaces in the home!


5. Rearrange Your Furniture

One of the easiest—and free—ways to refresh a room. Try a new layout that opens up space, creates new conversation areas, or changes your perspective on a familiar place.


6. Style Your Coffee Table or Open Shelves

Vignettes make your home feel curated and lived-in. Use books, candles, plants, and personal items to layer and create interest on surfaces.


7. Update Light Fixtures or Lamp Shades

Lighting sets the mood. Even changing out a dated lampshade or switching to daylight LED bulbs can shift the feel of a space—without touching a wire.


8. Add Greenery (Real or Faux)

Plants bring life, texture, and color to any space. Don’t worry if you’re not a plant pro—there are great faux options that look incredibly real. Although if you can, find an open window area in your home and have at it with real plants. It is really healthy for your home AND it can be a support to your local nursery or greenhouse! I also like to mix real and fake plants for a fuller, layered look. Can you tell which plant in the photo below is fake?


9. Swap out Artwork for a Mirror – or vise/versa

Simply changing out the wall hanging above a credenza or buffet table (or any piece of furniture) can easily change the look of a room without costing too much! And it’s even better if you are able to find similar sized pieces around your home and just change the room they are hanging in!


10. Declutter & Restyle

Sometimes the best refresh is subtraction. Clear cluttered surfaces, edit down decor, and create breathing room. You’ll be amazed at how much calmer and more put-together your home feels.

Final Thoughts

If you would like to incorporate any of these ideas but are struggling with where to begin, I would love to help! The best way to get started with a 1 Hour Design Appointment and let me know you would like to add customization to your closet. I would love to help! You will find the link to get started posted below.

Refresh Your Home with a Design Consultation with FunCycled

Thank you all for following along! If you’d like to get this blog in your email once a week, please sign up for our weekly newsletter by adding your email in the little box below my picture at the top of this page. 

If you’ve enjoyed this post, please like FunCycled on  FacebookInstagram and Pinterest if you don’t already. Keep up to date on the newest finds, vote on colors and give your input on our creativity. We share fun tutorials, great before and after, and new design inspirations. 

We offer interior designkitchen cabinet painting, and custom built tablesbarn doors, and repurposed furniture. Thank you for working with us and for taking the time to spread the word about what we do. 

Happy FunCycling Friends,
Sarah ;)

Note some of the the links provided are affiliate links, and I may receive a commission for any qualifying links.

Posted on

Coastal Glam Kitchen Design Ideas: Soft Blue, Gold & Wicker Accents

Looking to give your kitchen a fresh, elegant update that blends beachy calm with upscale touches? This Coastal Glam Kitchen moodboard is the perfect inspiration to get started. With a soothing palette of soft blues, brushed gold accents, and natural wicker textures, this look balances luxury and relaxation in one chic space.

From lighting to seating and decorative elements, read on to explore product picks and design tips to bring this style to life in your own home.


Coastal Glam Color Palette: Soft Blue, White & Gold

The foundation of any Coastal Glam Kitchen begins with the color scheme. This moodboard features:

  • Soft sky blues – evoking sea and sky
  • Crisp white cabinetry – clean and timeless
  • Warm brushed gold fixtures – elegant contrast
  • Natural wicker and rattan – to ground the look in organic texture

Choosing no more than three dominant colors will create a cohesive design for your kitchen.

pro Tip from the funcycled design team

Statement Lighting: Brushed Gold Pendants

Gold pendant lighting adds instant glam to any space. Choose bold, dome-shaped or cone pendant lights in a brushed gold finish to elevate your kitchen island.

Shop the Look:

Tip: Install a row of pendants (depending on island size) over your island to create visual rhythm and focus.


Seating in Style: Blue Bar Stools

Bar stools in powder or denim blue upholstery add a soft coastal touch while maintaining elegance. Look for pieces with bamboo or cane frames to nod to the beachside vibe or gold to mimic the touches of glam and sparkle in the room.

Shop These Items:

If you prefer to keep your blue touches around the room as smaller accents, you can still create a coastal vibe with these woven seats.

Shop These Items:


Natural Accents: Rattan, Rope & Art

Blending natural elements with art and decor inspired by the water help create the right atmosphere for a serene cooking and eating experience for you and your guests. Layer in texture and personality with accessories:

  • Wicker trays on counters or open shelves
  • Nautical rope wall decor for a subtle maritime theme
  • Ocean-inspired artwork in soft gradients of blue and white

Shop These Trays:

Shop the Artwork

Pro Tip: Mix natural textures (wicker, rope, jute) with glossy and metallic finishes for visual interest. You can even do this with every day use items!

Shop These Kitchen Touches:


Coastal Glam Kitchen Styling Tips

  1. Keep it Light – White or cream walls keep the space bright and airy.
  2. Mix Textures – Pair smooth marble or quartz countertops with rattan and wood.
  3. Balance Formal & Relaxed – Think “Hamptons meets Malibu.” Elegant lighting, casual textures.
  4. Stick to a Theme – Use repetition in colors and materials to create cohesion.

Final Thoughts

The Coastal Glam Kitchen is a beautiful blend of relaxed coastal charm and modern glamor. Whether you’re doing a full renovation or just refreshing your decor, this style offers a timeless yet trendy aesthetic perfect for any home.

Don’t forget to pin this post & moodboard and start shopping the look today to create a kitchen that is equal parts breezy and beautiful!

II would love to help you refresh your kitchen by creating the right design for your home!

For additional inspiration, check out these two blogs:

Thank you all for following along! If you’d like to get this blog in your email once a week, please sign up for our weekly newsletter by adding your email in the little box below my picture at the top of this page. 

If you’ve enjoyed this post, please like FunCycled on  FacebookInstagram and Pinterest if you don’t already. Keep up to date on the newest finds, vote on colors and give your input on our creativity. We share fun tutorials, great before and after, and new design inspirations. 

We offer interior designkitchen cabinet painting, and custom built tablesbarn doors, and repurposed furniture. Thank you, again, for working with us and for taking the time to spread the word about what we do. 

Happy FunCycling Friends,
Sarah ;)

Note some of the the links provided are affiliate links which means I earn from any qualifying purchases.

Posted on

Vintage Dining Table Flip – A Heartfelt Furniture Makeover

A Vintage Dining Table Flip with a Personal Story

Some furniture flips are just about aesthetics and style, but this antique oak dining table flip carried a deeper meaning for me. This wasn’t just any table—it once belonged to a close family friend, someone I used to visit often as I was growing up, and even in my adult years. I can still carry fond memories of sitting at that table, sharing stories and snacks, and feeling a sense of home and comfort. So when the opportunity came to bring this table back to life, I knew it would be something special.

More Than a Makeover – A Tribute

This dining table flip wasn’t just about furniture. It was a chance to honor the people and memories that shaped my childhood. Mr. Jackson was a big part of my upbringing, and our families share special life moments together. I even came across this photo from my wedding day – you can see my hand on his shoulder. Mr. Jackson was a special man, and I am honored that we got to create a new fresh start for this set – in honor of him! He was strong, but so gentle. He had a servants hard and that made him a great leader. I would often stay at the Jackson’s house if my parents were out of town so there were countless game nights, dinners around this table, and in the morning I would walk down and see Mr. or Mrs. Jackson reading their Bible’s at this table.

After he passed away, Mrs. Jackson wanted to see if I would bring this set back to life. Mr. Jackson would have wanted me to. In his quiet way, he’d look at me and smile and say “it looks great honey, I’m so proud of you”. I just know he would if he were here right now. We miss you Mr. Jackson, but your love and spirit will always live on in me and countless others.


Prepping a Piece Full of Memories

This table had been well-loved over the years, but it was structurally sound, so giving it a refresh would be pretty smooth. Our only challenges were dealing with worn edges and an outdated finish. Underneath, I could see a fresh and sturdy beauty awaiting revival. Here are some pictures of the table and chairs before.


A Bold Black Table with a Warm Wood Top

For the table base, I chose a rich, black paint with a light distressing to give it a mix of modern tones & the timeless appeal of a table that has shared experiences with you. For the tabletop, we sanded it down and applied a medium stain that highlighted the natural grain. The result? A stunning contrast of sleek black and warm, rustic wood—a perfect blend of old and new.


Rustic White Chairs to Complete the Look

The six chairs were each painted in a soft white with a lightly distressed, rustic finish. The worn edges and brushed texture give them a farmhouse charm that pairs beautifully with the stained tabletop. Not only do they brighten up the set, but they also add that cozy, welcoming vibe I remember so vividly from my visits as a kid. And I love how they perfectly contrast with the table while completing the design with shared rustic elements.

Dining tables and chairs DO NOT have to match to create good design. Sometimes using a little contrast is exactly the right way to elevate the look.

Pro tip from the Design Team


Final Thoughts: Creating Beauty with Meaning

Flipping furniture is always rewarding, but when the piece has a personal history, the reward is even greater. This project reminded me how powerful design can be—not just visually, but emotionally. If you’re considering your own vintage dining table flip, don’t be afraid to embrace the memories as part of the transformation. You might just end up with a masterpiece that tells your story. I love how this turned out! Check out the after photos of this beautiful set.

Style your home

Vintage Farmhouse Dining Set by FunCycled

Bring this gem home today. Get all the dimensions and purchasing details below.

Customized Dining at Home

For more tips and inspiration on furniture flips, check out our Pinterest Board, linked below.

Thank you all for following along! If you’d like to get this blog in your email once a week, please sign up for our weekly newsletter by adding your email in the little box below my picture at the top of this page. 

If you’ve enjoyed this post, please like FunCycled on  FacebookInstagram and Pinterest if you don’t already. Keep up to date on the newest finds, vote on colors and give your input on our creativity. We share fun tutorials, great before and after, and new design inspirations. 

We offer interior designkitchen cabinet painting, and custom built tablesbarn doors, and repurposed furniture. Thank you, again, for working with us and for taking the time to spread the word about what we do. 

Happy FunCycling Friends,
Sarah ; )

Exquisite Spaces. Sustainable Designs. Brighter Futures.

Note: some of the the links provided are affiliate links, and as an Amazon Associate, I earn from any qualifying purchases.

Posted on

Kitchen Transformation: Painted Cabinets, Open Shelving & Backsplash Reveal!

Who doesn’t like a kitchen transformation??? Painted cabinets, open shelving, backsplash – the reveal of fresh renewal sparks joys and energy like nothing else. Today’s kitchen reveal is my favorite that FunCycled has completed this year. Let’s explore together!

The “Before”: Closed Off Kitchen Ready for a Refresh

Before you start any renovation project (large, minor, or somewhere in between), I encourage clients to take some time to evaluate what is working and what isn’t working. In our efforts to update our homes, it is important to bear in mind the features and functions of a space that we value and are actually working for us and our families. Don’t be too hasty to remove everything and start over – that will cost you greatly, and you may actually eliminate aspects that really work well for you.

After meeting with Joanne, it became clear that her kitchen worked in some regards. It had a good amount of storage and also had room for eating in without overcrowding the space. However, we identified that the ample storage (while valuable) was creating a barrier in their living space and was not really needed. Additionally, though she had a good amount of counter space, she still needed more for prepping. Plus, there was quite a bit of space between any prep space and cooking area. We would need to bridge that gap with a new island. Take a look at some of the before photos for this kitchen.

Our Vision: Brightening and Streamlining the Space – Showcasing Color and Character

After reviewing the needs and wishes for my client, it was time to plan and design. The design board I created for Joanne’s kitchen is below.

And for the plan, we identified these key components:

  • open things up so there was no break between the family room and kitchen,
  • modify the storage solutions by adding an island, hutch, and pull out drawers in the pantry cabinets
  • create additional seating
  • add personality and color and create some focal points
  • update counters and finishes for an elevated and cohesive design

Cabinet Painting: Breathing New Life into Existing Structures

Blue kitchen cabinets

Selecting the right color for your cabinets is key to the design and look of your kitchen. For this kitchen we wanted to brighten, add color, and make a statement that was reflective of our client’s personality. The biggest impact was made with the paint color. We selected this gorgeous color by Benjamin Moore. It is called Newburyport Blue.

This is a rich medium to deep blue, with an understated versatility. It can be paired with a variety of finishes, depending upon the desired outcome. For our design, it was paired with bright whites and classic gold and brass accents.

Look at how rich this color looks on the cabinets!

Opening Up: The Impact of Open Shelving

It may seem counter-intuitive to take down storage and replace it with open shelves, but so often, opening things up (Discuss the removal of some upper cabinets and the installation/styling of open shelves)

Here’s a look at the progression of the transition from overhead cabinets to opening up and styling!

A Fresh Look: New Backsplash & Counters

Next to the rich blue of the cabinets, this stunning backsplash makes such a huge statement in this kitchen design. It brings together so many elements that elevate the look! I am so glad our client was open to a unique design that will most definitely stand the test of time! We selected these textured gold handles for the cabinets – doors and drawers. You can shop these for your home as well.

To create an elevated look in your kitchen, use the same hardware on the cabinet doors and drawers, using a variety of sizes in scale with the size of the doors and drawers.

pro tip from the funcycled design team

New counters were installed, which meant we could reconfigure some of the layout for this space. Here’s a closer look at the new counters we selected.

The “After”: A Stunning and Functional Kitchen Transformation

Details all pulled together, and this kitchen is simply AMAZING! It has function, flow, and personality. Joanne and her family are ready to host guests in style!

Two eating areas will provide this family with choices for meal times and allows for additional seating for larger gatherings.

More Kitchen Transformation Inspiration

Here are some other great kitchen transformations from FunCycled.

Final Thoughts

I hope you have gleaned some inspiration and perhaps discovered some key takeaways for your kitchen! To see more kitchen inspiration, check out all of our KITCHEN MAKEOVERS.

Are you considering getting your kitchen cabinets painted (OR MORE!), follow these three easy steps to getting your FREE QUOTE today! If you are even remotely considering a kitchen refresh, I encourage you to CONTACT US today!

Thank you all for following along! If you’d like to get this blog in your email once a week, please sign up for our weekly newsletter by adding your email in the little box below my picture at the top of this page. 

If you’ve enjoyed this post, please like FunCycled on  FacebookInstagram and Pinterest if you don’t already. Keep up to date on the newest finds, vote on colors and give your input on our creativity. We share fun tutorials, great before and after, and new design inspirations. 

We offer interior designkitchen cabinet painting, and custom built tablesbarn doors, and repurposed furniture. Thank you, again, for working with us and for taking the time to spread the word about what we do. 

Happy FunCycling Friends,
Sarah ; )

Exquisite Spaces. Sustainable Designs. Brighter Futures.

Note some of the the links provided are affiliate links, and as an Amazon Associate, I earn from any qualifying purchases.

Posted on 2 Comments

Add Dimension & Character: Your Guide to Board and Batten Walls

Creating character, increasing the value to your home, and creating a personalized space are often goals for homeowners. Adding a wall treatment, such as board and batten, is a great way of achieving all three of these goals at once. Before we dive into board and batten, I want to clear up a little confusion about various wall treatments – shiplap, board and batten, and wainscoting. I think you will find this helpful!

What is the difference between shiplap, board and batten, and wainscoting?

Shiplap, board and batten, and wainscoting are terms often used interchangeably, but in reality they are 3 distinct wall treatments. Shiplap uses boards of wood that are applied to the wall horizontally, one on top of the next, so they create a small to minimal gap between them. Board and batten is the patterned use of wide boards separated by narrow strips – this can cover 1/2 the wall to the whole wall, where battens are applied vertically and sometimes horizontally as well. Wainscoting is the application of wall paneling (sometimes grooved) and covers the lower portion of the wall.

Why Choose Board and Batten?

Board and batten, along with other wall enhancements, can elevate the look and feel of any room in your home. Because board and batten can be applied to walls in a variety of ways, it adds loads of personality and style. Other benefits include:

  • Adds character & charm
  • Provides texture & dimension
  • Creates visual interest & balance

Board and Batten Styles and Design Ideas for Every Room

Balance in the Kitchen

What I love about this example is that is displays the use of board and batten to help balance the room. As you you can see in the before photo, chair rail is mounted part way up the wall. While this can be an interesting element in some spaces within the home, in this kitchen, it served as more of a visual interruption. So we were able to remedy this by adding board and batten between the trim and baseboard and found coordinating square tile backsplash to keep the

Harmonious Bathroom Design

I love this bathroom design from our Trolley House Flip. The nature inspired wallpaper brings some elements of outside into the space. By adding the wooden board and batten to the adjacent wall, it only serves to support the biophilic touches within this bathroom design.

Board and batten in bathroom

Welcoming Atmosphere

Entering into your home should immediately set you and your guests at ease. This entryway I created (through AI tools to help depict design concepts for my clients ) is a great example of creating a strong welcome. The contrasting wall acts as a focal point for the practical components of the space.

Tips for a Perfectly Finished Walls

Should you DIY or Call the Professionals?

Here’s the thing with board and batten, DIY is a great option for many people, but before biting off more than you can chew, I recommend doing a lot of research and assessing whether you really have the right skills to get the job done correctly. Adding board and batten will require the use of power tools and accurate measurements. I emphasize the the latter because this will require strong planning and meticulous execution. Plus, you will need to understand how to work with or reinstall your existing baseboard trim to achieve the right outcome. This may not be for the novice DIY’er.

You should plan to call a professional if you 1) don’t have any (or have very limited) experience with this type of work; 2) want to add a pattern that covers the whole wall and uses both horizontal and vertical battens; and 3) have other unique features or factors that need accommodation during the installation.

What’s great is that there are more than enough DIY videos to help guide you – even as you assess whether this job is for you or the professionals!

Basics to Know

If you are considering whether adding board and batten to your walls is right for you and your home, here are some helpful insights :

Will adding board and batten increase the home value?

When installed correctly and incorporated well into an overall design, yes, adding board and batten will increase the value of the home.

Is board and batten considered trendy?

Adding board and batten comes and goes from the interior design trend scene. Designers and homeowners have used this enhancement as a staple wall application and feature for decades, so it shouldn’t be considered a trend.

Is it difficult to install board and batten?

The level of difficulty can depend on a variety of things. For a basic pattern, the installation is pretty straight forward. For more complicated patterns or to accommodate unique features on a wall, the level of difficulty increases.

Is it expensive to add board and batten?

The wood will be the most costly part of this project. Depending upon the type of wood you select, you can find ways to minimize the cost.

Final Thoughts

Thank you all for following along! If you’d like to get this blog in your email once a week, please sign up for our weekly newsletter by adding your email in the little box below my picture at the top of this page. 

If you’ve enjoyed this post, please like FunCycled on  FacebookInstagram and Pinterest if you don’t already. Keep up to date on the newest finds, vote on colors and give your input on our creativity. We share fun tutorials, great before and after, and new design inspirations. 

We offer interior designkitchen cabinet painting, and custom built tablesbarn doors, and repurposed furniture. Thank you for working with us and for taking the time to spread the word about what we do. 

Happy FunCycling Friends,
Sarah ;)

Note some of the the links provided are affiliate links, and as an Amazon Associate, I earn from any qualifying purchases.