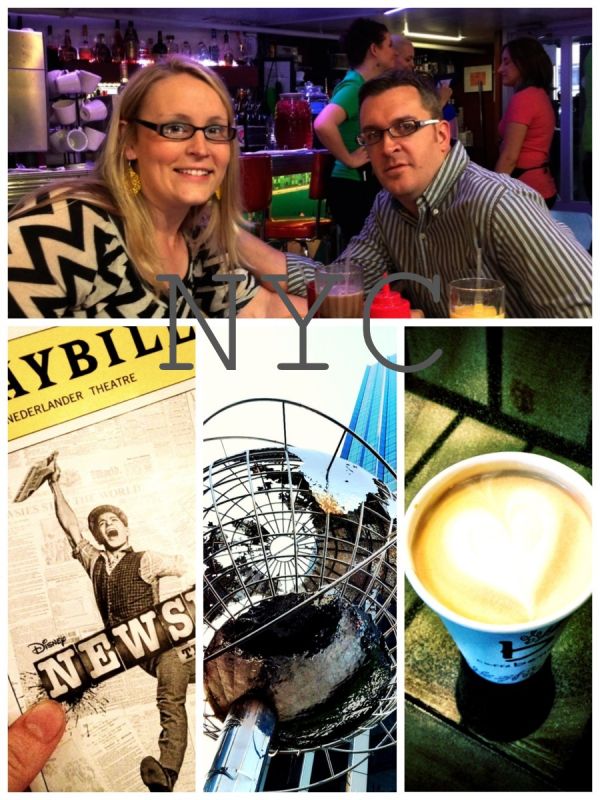
This is a quick overview about our anniversary trip to NYC. With some time saving, $$ saving tips to help you have a great time in the city, too!
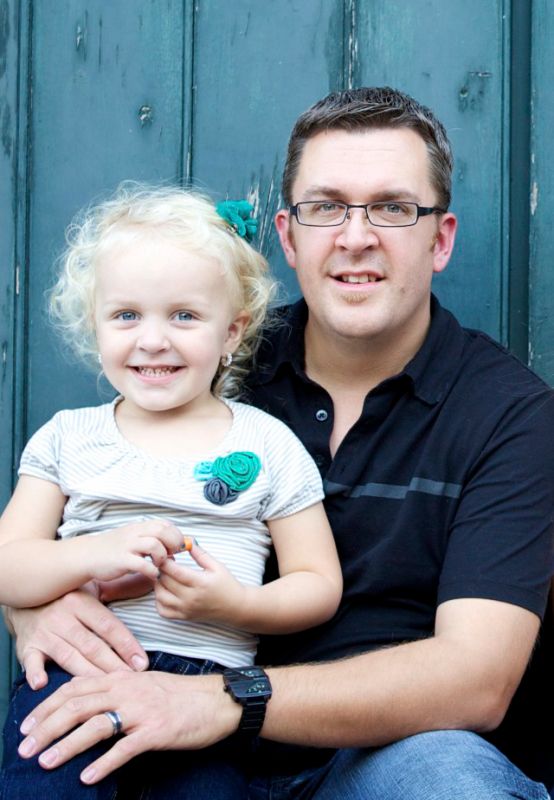
On a rainy Saturday afternoon ten years ago, I said “I do!” to this handsome guy. Aside from asking Christ to forgive me for my sinfulness and give me a home in heaven because of what He did by dying on the cross for my sins, John is my biggest blessing. Don’t get me wrong, marriage is work for sure but anything worthwhile is work, right? We have so much fun together!! I love that he’s hard working, loves God and teaches the kids about Him, isn’t afraid to stand up for what’s right, laughs at my silliness, and just as importantly knows what color Kelly green is. :) Do you want to know why the Kelly green thing is so important to me? Because it shows he cares about what I care about. It’s the little things that mean so much to me.
For our 10th anniversary, we decided to go away for a long weekend to NYC. If you know us, you would know this is right up our alley!! Lots of people, plenty of culture, art, and limitless food options. How could you go wrong?? Since we live in upstate NY, it’s an easy weekend trip when mom is willing to watch the kiddos. Thanks MOM and JO for taking good care of our little monkeys. They didn’t even want to talk to us when we called. They were having WAY too much fun. Heart breakers. ;)
So here we are on our first ever mega bus double decker bus ride. If your close to NYC this is a super affordable way to travel to the city, drama free. We had round trip tickets for $47 and that was the most expensive option because we had to go at prime time. If you can leave earlier the price went down from there. For info on pricing go here: http://us.megabus.com/
It dropped us off right near Times Square and of course I had to take a picture of the Superman poster to show our little man when we got home.
Off we went to grab a coffee and quick lunch. We went to Fresh & Co. for lunch. If you want a quick lunch with fresh, farm to table food, this is the place. Our sandwich was delicious. I always try to buy a little to eat when we stop for food because it’s hard to find a clean bathroom in NYC. So, if I need a bathroom break, I go into a restaurant or coffee shop where you really should buy something to use the bathroom. Eat small little things throughout the day to keep the clean bathrooms available. lol We split a sandwich and tea. Yummy!
Then we walked about 10 blocks in the pouring rain. Rain must be a sign of something in our marriage. ; ) It was actually the first hurricane of the season and we walked the city through blinding rain and wind. We stopped by Cafe Bene and the barista made me this latte’ with a heart on top. Seemed very “instaworthy” as the lady behind me said. lol
I can’t tell you how much I LOVED this spot. I loved the design, the service, the lighting, everything was perfect, including the latte! Off to the hotel we went. We stayed at the Hudson Hotel right next to Central Park. It’s not the cheapest option but for $50 more than the typical hotels, I really, really loved it. It was modern and minimalist but in a very artsy fartsy way.
That night we went to see Newsies on Broadway. This was a special play for me!! I watched this movie 100 times at least when I was a kid. My brothers, sister and I would sing every word. I was so excited to see my favorite childhood movie come to life. It was full of memories and amazing music. A definite must go in my book.
See how close we were?? I could see them spit! lol
The bad part? It was still raining buckets so when we left the theater, we grabbed a ride from a “pedicab”, one of those guys who ride a bike and pull people behind them. Doesn’t that sound like an adventure we would remember? Well, note to self: NEVER DO THAT AGAIN! The bill for about 10 blocks was $160. That’s more than our tickets to Newsies. I had no clue it would be that high! I think we may have been robbed!! I have since learned that Mayor Bloomberg signed a law effective summer 2013 to ensure that pedicabs have clearly identified by the minute rates so that “no pedicab rider will be surprised with unknown, illegal, or unexpected charges at the end of their ride.” Scamming tourists seems to be pretty routine. Enough said!
On to Saturday (trying not to be bitter about what happened the night before and the major loss of our anniversary money), we ate breakfast at the Star Dust Diner. I think the first time I went here was with my brother Jesse when I was 16. I’m not a diner fan, but I love this one. All the waitstaff have amazing voices and sing Broadway music as they serve you. Now that’s talent! It’s really loud and full of life; I like that! Here we are at breakfast, I had french toast stuffed with fluff and topped with strawberries. Oh my word! Heavenly bliss! If any of my long time friends are reading this, you’ll know why I love that so much!!
Next up was a walking food tour of Greenwich Village and Soho. It was from 12-3 and our tour guide took us to all different places that I would have never tried otherwise. I definitely recommend this to anyone!! It’s so much fun!! For ticket info go here: http://www.foodsofny.com/greenwichvillage.php
Here are some of the highlights from that trip. We are coffee lovers so stopping in at the Porto Rico Importing Company was so much fun!! Amazing!!
Oh and I loved, loved this door that we saw on our walk through town. It’s the little things that made this trip so fun for John and me!
The hanging tree in Washington park where there would be public hangings in the late 1800’s. Eeeek!
One of my favorite parts of the food walking tour was our stop at Cuba! A huge thank you to our tour guide, Diana!! We highly recommend this!
adventure to anyone. :)
After the food tour was over, I had a glorious day planned of window shopping (and maybe a little buying ) in Soho. Instead, I hurt my foot. That’s not a good thing to have happen in NYC. I wobbled around for a bit, bought a brace, elevated it, but nothing worked. Change of plans. I moved up our dinner reservation so I could sit down and be off my foot. We went to Bobby Flay’s Mesa Grill. Definitely my favorite meal of the trip. John had a pork tenderloins (below) and I had prime rib with a double baked potato. The steak melted in mouth!! It was ridiculous!!! SO good!!
I definitely couldn’t walk after dinner so our options were go back to the hotel for the night or go to the movies. Off we went to the movies. We’re goers! :)
On Sunday we visited Calvary Baptist Church which was just a couple blocks from our hotel. My parents always went to church on vacation and it made a big impression on me. We didn’t just go to church when we were home. The Lord’s day was the Lord’s day no matter where we were and my family always liked to hear the Bible preached and spend time with Christians wherever we were. I feel the same way still so it was fun to meet new people and enjoy a Sunday morning service here.
Since I was still having a hard time walking on Sunday, we decided to go on a bus tour of NYC. This is the 2nd time I’ve been on one and it was just as much fun. Here are some photos from the ride.
Amazing architecture, right? The best part about this trip was being reminded about how John is my best friend. Hands down! When I spend time with him I have fun, laugh, feel one of a kind, and am reminded of God’s grace in my life. I was married at 19 and know that it’s only by God’s grace (and my parents prayers) that I ended up with someone so special.
Thanks everyone for your patience due to my lack of online and email presence over the weekend. Your kind notes meant so much to us!!
Have any of you been to the places we enjoyed?? Or if you have any more recommendations to share, please do so in the comments!!
Blessings,
Sarah
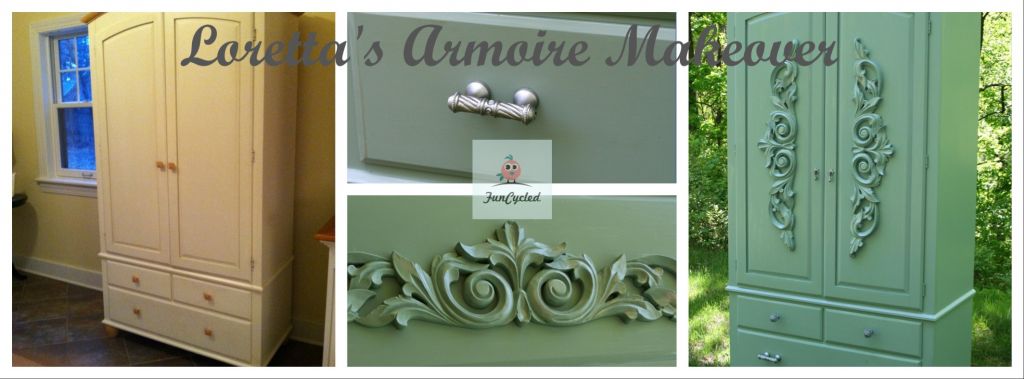
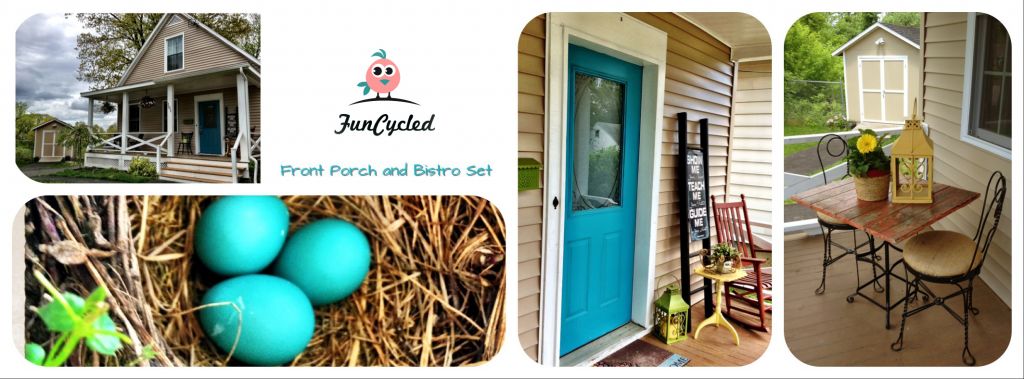
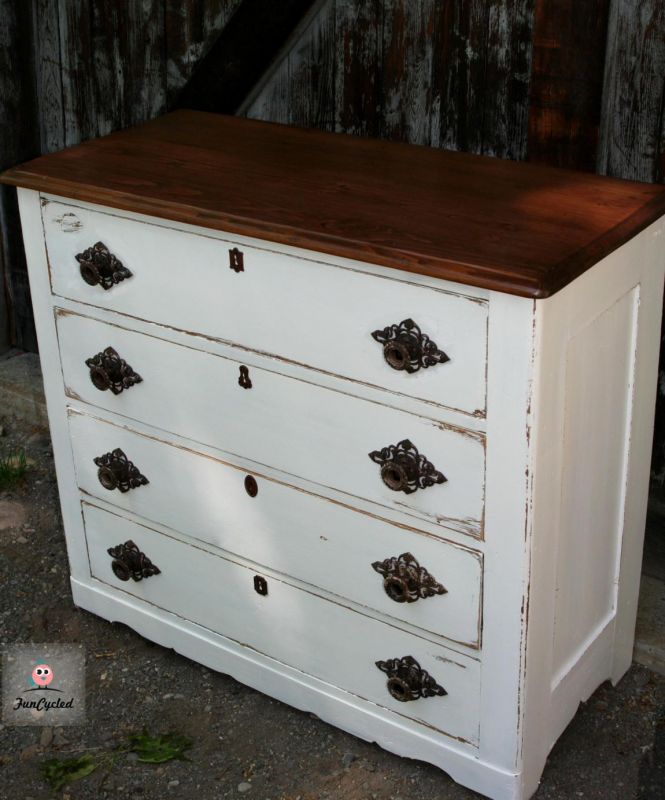
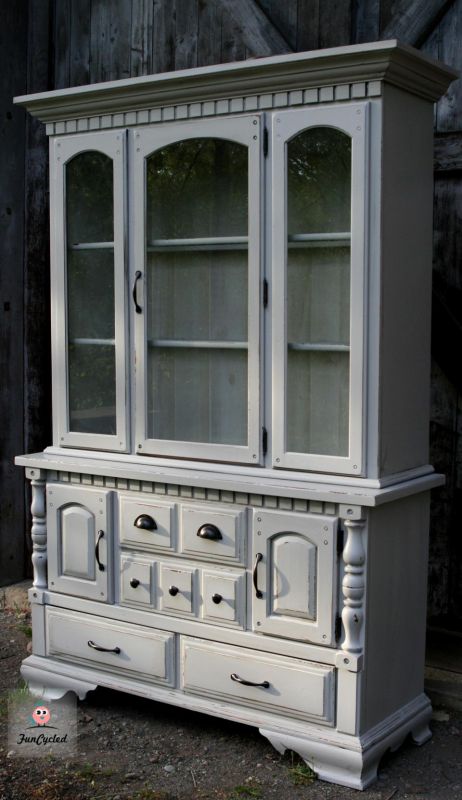
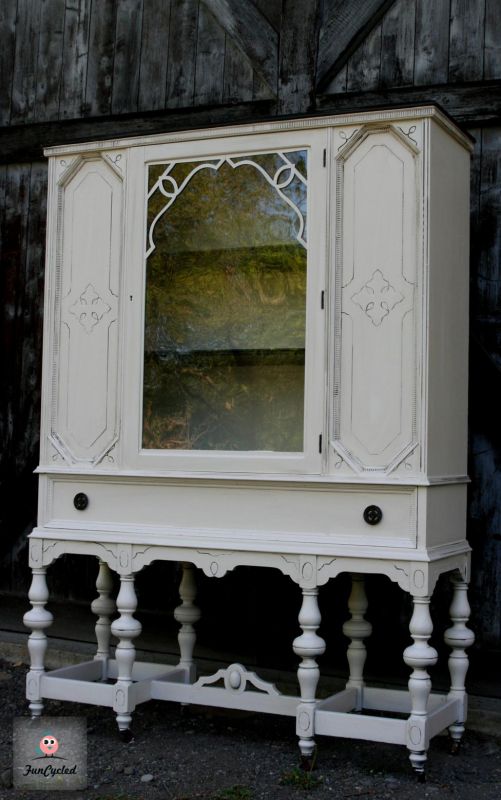
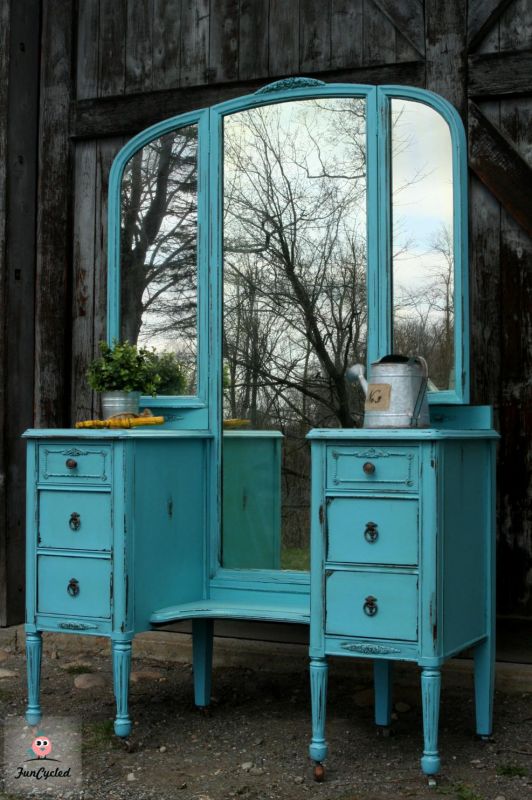
If you like what you see, please like our face book page to keep up to date on the newest finds, vote on colors and give your input on our creativity.
There is a box at the top right of this page to enter your email address in to receive notifications by email when I post something new on this blog. Please sign up today!
Last but not least, let us customize a furniture piece for you. We create custom furniture and will deliver for customers in upstate NY and will also ship throughout the US. Send us a note with what you would like using our contact page. Or buy something that we’ve already designed from our furniture for sale page.


")